VOLUME XXIV — THE MAKER'S CODEX
Complete Sacred Performance, Visual Art, Leathercraft, and Fiber Arts
The ME Tablet · dup šimati · the decrees that build worlds
Carrying the decrees: ME 18 · kur-ĝar-ra · The Kurgarra — ME 19 · ĝír-ba-da-ra · The Girbadara — ME 20 · sa-gur₅-ra · The Sagursag — ME 28 · nam-kù-zu · Art — ME 45 · nam-ašgab · Craft of the Leatherworker — ME 47 · nam-ad-KID · Craft of the Basket Weaver
Unaltered and unabridged: 70,778 words, 42 chapters, 54 plates (39 inline + 15 gallery).
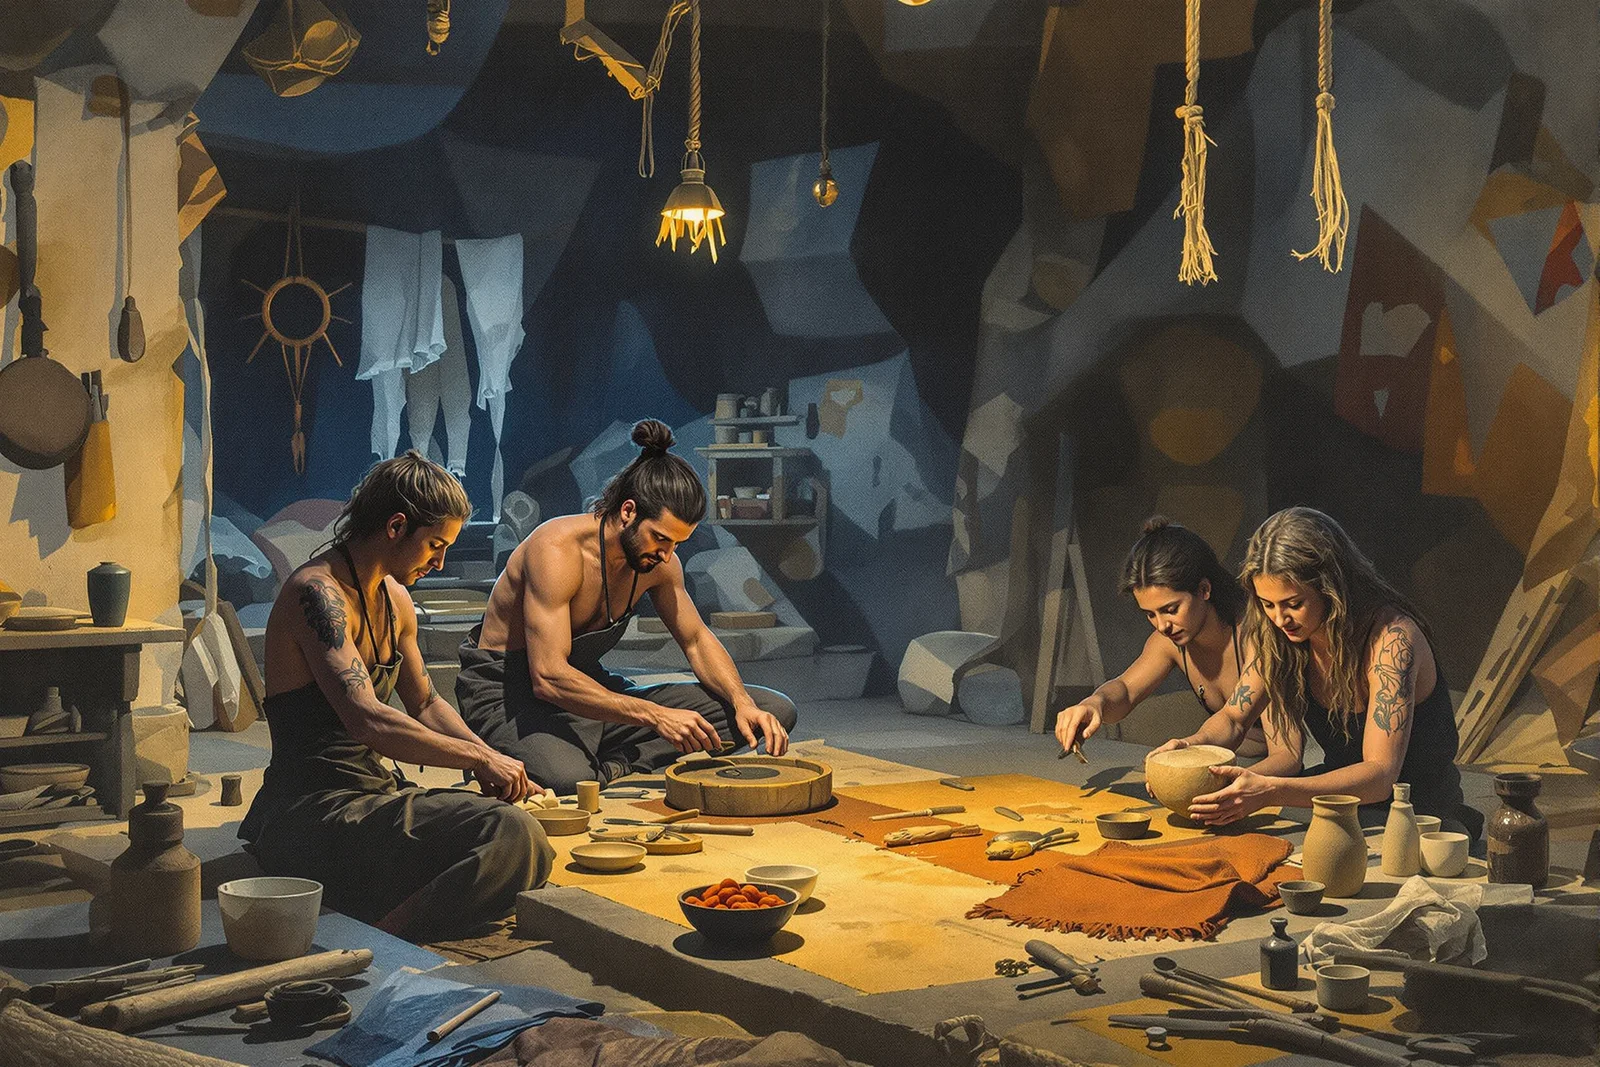
Of the sixty-four decrees, four belong to creation and two complete the crafts — and these six are the ones the modern world dismisses first. Art is called decoration. Performance is called entertainment. Leather and basketry are called hobbies. The scribes of Uruk knew better. The Kurgarra, the Girbadara, and the Sagursag were temple offices, carried in the same lists as kingship and law, because a civilization that cannot stage its own meanings — that cannot draw its gods, mask its dancers, bind its harvest, and shoe its walkers — is a civilization renting its imagination from somewhere else.
This volume restores the maker's decrees as working knowledge: the draughtsman's full discipline and the pigments ground from the Practitioner's own earth; clay, kiln, and carved form; the complete leather arts from raw hide to finished work; the fiber arts that carried every harvest before the plastic age; and the sacred performance itself — mask, costume, procession, story, and festival — the engineering of collective meaning.
Every technique in this volume is real. Every build can be made with field tools. The Practitioner who completes it holds the means of cultural production — able to make the image, the vessel, the garment, the mask, and the rite, and so to carry a people's imagination across a dark age intact.
The transmission is complete. Every word carried over, unaltered and unabridged.
TABLET INDEX
SUB-VOLUME I — THE DECREE OF ART: THE DRAUGHTSMAN'S DISCIPLINE (Chapters 1–6) SUB-VOLUME II — THE SCULPTOR'S ART: CLAY, KILN, AND CARVED FORM (Chapters 7–12) SUB-VOLUME III — THE LEATHERWORKER'S ART (Chapters 13–18) SUB-VOLUME IV — THE BASKET WEAVER'S ART (Chapters 19–24) SUB-VOLUME V — SACRED PERFORMANCE I: MASK, COSTUME, AND PROCESSION (Chapters 25–30) SUB-VOLUME VI — SACRED PERFORMANCE II: STORY, DANCE, AND FESTIVAL (Chapters 31–36) SUB-VOLUME VII — THE APPLIED DECREE (Chapters 37–41) APPENDIX A — Glossary of the Maker's Decrees APPENDIX B — Materials Sourcing Tables APPENDIX C — Tool Care and the Maker's Bench APPENDIX D — The Quick Builds: Seven Works in Seven Days APPENDIX E — Reference Tables COUNCIL APPROVAL — The Twelve Voices Speak PLATES — Supplemental Gallery
SUB-VOLUME I — THE DECREE OF ART: TRAINED SEEING
ME 28 · nam-kù-zu · ART (THE RECORDING EYE)
The decree of the recording eye. Carried out of Eridu among the holy measures, nam-kù-zu grants the Practitioner the right and the burden of seeing truly and setting down what is seen — the conversion of the world's surfaces, proportions, and lights into marks that another human, in another century, can read as the thing itself. Where this decree is held, the eye is no longer a passive window but a trained instrument, and the one who draws stands as the civilization's witness, keeping the shapes of vanished things against the next Reset.
Of all the practical arts, drawing is the one most often mistaken for a gift. The Practitioner must discard that error on the first day. Drawing is not a talent dispensed unevenly at birth; it is a discipline of seeing, learnable by any sighted hand willing to measure, compare, and correct. What separates the person who "cannot draw a straight line" from the recorder of civilizations is not manual dexterity — it is that one has been taught to look and the other has not. The pencil is merely the place where trained vision touches the page.
This sub-volume teaches that vision. It does not teach style, which is the residue a Practitioner cannot help leaving and need not pursue. It teaches the substrate on which every later art in this Codex stands: the painter's surface in Sub-Volume II, the leatherworker's pattern, the weaver's cartoon, the performer's blocking — all of them begin in the ability to see a proportion and set it down true. Vol XVI, the Historian's timeline, records that after every collapse of the high cultures, the draughtsman preceded the architect and the engineer into the work of recovery, because nothing can be rebuilt that cannot first be drawn. You are training, in these six chapters, to be that person.
Work in order. Each drill is the jig for the next, and the eye built in Chapter 1 is the eye that composes in Chapter 5 and records the world in Chapter 6.
CHAPTER 1 — DRAWING AS MEASUREMENT: THE SIGHTING DISCIPLINE
The beginner draws what they know; the recorder draws what they see. This is the whole of the matter, and it is harder than it sounds, because the mind is a relentless editor. Asked to draw a coffee cup seen from slightly above, the untrained hand draws the rim as a full circle — because the mind knows the rim is a circle — when the eye, had it been consulted, reports a flattened ellipse. The first labor of the artist is to silence the knowing mind and let the seeing eye dictate. Every technique in this chapter is a method for catching the eye's true report before the mind can correct it into a lie.
Comparative proportion: the only measurement that matters
The eye cannot judge absolute size — no human can look at a jug and report "190 millimetres" — but the eye is exquisitely good at judging ratio. Is this width greater or less than that height? Twice it? Half again? This comparative faculty is the artist's entire metrology. You will never measure your subject in units; you will measure every part of it against one chosen part of itself.
Protocol 1-A — Establishing the unit of comparison:
- Survey the subject and choose one clear, middling dimension as your base unit — for a standing figure, the head height; for a still life, the width of the central object; for a building, the height of one door.
- Draw that unit first, at the size it will occupy on your final sheet. This single decision fixes the scale of everything to follow.
- Express every other dimension as a multiple or fraction of the base unit, judged by eye against the subject: "the table is three head-heights wide," "the jug is two-thirds the bottle's height."
- Lay these proportions onto the page before committing a single contour. The drawing is correct in its skeleton before it is beautiful in its skin.
The Critical Insight: A drawing fails at the level of relationship, not of line. A gorgeously rendered nose drawn one-fifth too large ruins a portrait that a crude nose, correctly placed and sized, would have carried. Spend your vision on proportion first; the rendering is cheap by comparison.
The pencil-and-thumb method, properly explained
This is the most demonstrated and least understood technique in all of drawing, and most who perform it do so as empty ritual. Understand precisely what it does and does not measure.
Hold the pencil at full arm's length, elbow locked straight, the pencil held vertical or horizontal in the plane perpendicular to your line of sight — that is, parallel to your own face, never tilted toward or away from the subject. Close one eye. Align the pencil's tip with one edge of the dimension you wish to gauge, and slide your thumbnail along the shaft to mark where the other edge falls. The length pencil-tip-to-thumbnail is now a record of that dimension's apparent (angular) size — the size it projects onto your view, not its size in the world.
The locked elbow is not a stylistic flourish; it is the entire validity of the method. Your arm is a fixed-radius compass. Only if the pencil returns to exactly the same distance from your eye every time does the comparison between two measurements hold. Bend the elbow on the second measurement and you have changed the radius of the compass and corrupted the ratio.
What you do with the reading is the point most often missed:
- You do not transfer the pencil length to the page. That arm's-length measure has no fixed relationship to your drawing's scale. It is purely a comparator.
- You compare it against another pencil reading. Gauge the head's height; without moving your thumb, rotate the pencil and lay that same length against the body to ask "how many heads tall?" The answer — seven and a half, say — is a pure ratio, true at any drawing scale.
- You check verticals and horizontals against the pencil's edge. Held truly plumb (let it hang as a plumb line to confirm), the pencil reveals which features sit directly above which, and the true slope of any edge measured as its departure from vertical or horizontal.
Negative space: drawing the holes
The mind has powerful, interfering ideas about objects — a chair should look thus — but almost no opinions about the gaps between and around objects. This is a weapon. The triangular void between a chair's leg, its stretcher, and the floor is a shape your knowing mind has never edited, so your eye can report it honestly. Draw that void true, and the chair leg bounding it is forced into correctness without your ever having "drawn a chair leg" at all.
Protocol 1-B — Seeing in negatives:
- Identify the enclosed and half-enclosed voids in and around your subject — between limbs, under arches, within the silhouette's notches.
- Draw the voids as positive shapes, attending to their proportion and angle exactly as you would an object.
- Let the subject emerge as the residue left between the voids.
- When a passage of a drawing "looks wrong" and resists correction, switch to its negative space. The error is almost always in a void you have not truly looked at.
Art direction
CHAPTER 2 — LINE, VALUE, FORM: THE MARKS THAT MODEL LIGHT
A contour drawing states where an object ends. A value drawing states how light falls across it, and only value can turn a flat outline into the convincing illusion of a solid form occupying space. The Practitioner must command both: line to bound and describe, value to model and weigh. This chapter establishes the value language and the manual protocols for laying it down by hand.
The five-value system
The eye can distinguish a great many shades, but the artist who tries to track them all is lost. Reduce the entire range from paper-white to darkest dark to five controlled steps. This is enough to model any form convincingly and few enough to manage. Train until you can place each value on demand and judge any passage of a subject as one of the five.
Specification Table 2-1 — The Five-Value Scale
| Step | Name | Approx. reflectance | Where it falls on a lit sphere | Pencil method (graphite) |
|---|---|---|---|---|
| 1 | Highlight / paper white | 90–100% | The point facing the light source most directly | Bare paper, untouched |
| 2 | Light | 65–75% | The lit hemisphere away from the highlight | Single light layer, H–HB, wide spacing |
| 3 | Halftone (mid) | 40–50% | The terminator zone, where the form turns from light | Even HB layer, moderate pressure |
| 4 | Core shadow | 18–25% | The dark band just past the terminator, the form's turning point | Built B layers, close hatching |
| 5 | Cast & occlusion shadow | 3–10% | Where the form blocks light onto another surface; deepest in crevices | Dense 2B–4B, burnished, layered |
The Critical Insight: The single most important value on any rounded form is not the darkest shadow but the core shadow (Step 4) — the band of dark that sits between the lit side and the reflected light bouncing up from below into the shadow side. Beginners render the shadow side as a flat dark and the form reads as cardboard. Place the core shadow correctly, let the shadow side lighten slightly beneath it with reflected light, and a flat disc becomes a sphere. The turning of the form lives in that one band.
Hatching and cross-hatching protocols
Graphite, ink, and the point of any drawing tool build value not as smooth tone but as density of marks. Mastered, hatching gives the artist control over value and the description of a surface's direction in a single stroke, because hatching lines laid along the run of a form describe its curvature even as they darken it.
Protocol 2-A — Hatching:
- Lay parallel strokes of even pressure, lifting at each end so the line is darkest in its middle and feathers out — this prevents the hard "fence-post" terminations that read as marks rather than tone.
- Control value by spacing, not by pressing harder. To darken, lay the lines closer; keep the pressure constant. Pressure-darkening glazes the paper and kills further layering.
- Follow the form. Hatch across the direction of a cylinder, around a sphere along its latitude lines. The strokes then double as a description of the surface's curvature.
Protocol 2-B — Cross-hatching:
- Lay a second layer of strokes across the first to deepen value past what single hatching allows.
- Cross at a moderate angle (roughly 60–70°), never a perfect 90° grid — square cross-hatching reads as mechanical mesh and flattens the form.
- Add third and fourth layers, each at a fresh angle, for the deepest darks. Four crossed layers will reach Step 5 with ordinary graphite.
- Keep the open lozenges of paper between strokes consistent in size within a passage; their evenness is what the eye reads as smooth tone.
The daily regimen
Seeing is a muscle and it atrophies. The Practitioner commits to a short, daily, deliberate practice — twenty minutes is enough if it is focused — rotating the foundational drills. A long weekly session does not replace daily contact; the eye recalibrates overnight and must be re-set each morning.
Specification Table 2-2 — The Daily Twenty-Minute Regimen
| Day | Drill | Duration | Objective | Pass criterion |
|---|---|---|---|---|
| Mon | Straight lines & ellipses | 5 + 15 min | Ghosted strokes from the shoulder; ellipses at varied degrees | Lines land on target; ellipses symmetric, no "points" at the ends |
| Tue | Value scales | 20 min | Render the five-step scale, then a nine-step, with clean transitions | Each step distinct; no banding or smudging between |
| Wed | Negative-space studies | 20 min | Draw three cluttered subjects by their voids only | Object correct though never directly drawn |
| Thu | Sphere, cylinder, cube, cone | 20 min | The four primitives under one light, full five-value modelling | Core shadow placed; reflected light present; cast shadows anchored |
| Fri | Comparative-proportion blind contour | 20 min | One subject, eyes mostly on the subject, measuring by ratio | Proportions within ~10%; no peeking-correction |
| Sat | Master copy (line only) | 20 min | Copy a fine line drawing for construction, not finish | Underlying proportion matches the source |
| Sun | Free observational study | 20 min | Apply the week's gains to any chosen subject | Honest self-critique logged beside it |
Your Commitment: You will draw every day, even badly, even for ten minutes when twenty cannot be found. The artist who draws daily for a year overtakes the "talented" one who draws monthly, without exception. Talent is the name given, in hindsight, to a practice no one witnessed.
Art direction
CHAPTER 3 — PERSPECTIVE: THE CONSTRUCTION OF DEPTH
Perspective is the geometry by which a three-dimensional world is projected, truthfully, onto a flat surface. It is not an artistic convention but an optical fact: parallel edges receding from the viewer appear to converge, and they converge toward predictable points. The Practitioner who learns to construct perspective gains the power to draw any architectural or mechanical subject convincingly from imagination, and to catch and correct the errors that the untrained eye makes by instinct. Two terms govern everything.
The horizon line is the horizontal line at the exact height of the viewer's eye, where the ground plane appears to meet the sky at infinite distance. The eye level is synonymous with it: wherever your eye is, there the horizon lies. Raise your viewpoint and the horizon rises with you; crouch, and it descends. Every vanishing point of every horizontal edge in the scene lands on this line. Fix the horizon first; it is the spine of the construction.
A vanishing point (VP) is the point on (or beyond) the horizon toward which a set of mutually parallel lines appears to converge. A scene has one VP per set of parallel horizontal lines.
One-point perspective
Used when the subject's principal face is parallel to the picture plane — a corridor seen straight on, a row of columns, a road running directly away.
Protocol 3-A — One-point construction:
- Draw the horizon line and mark a single VP on it.
- Draw the near face of the subject in true, undistorted shape (its verticals truly vertical, its horizontals truly horizontal) — these edges are parallel to the picture plane and do not converge.
- From each significant corner of that near face, draw a construction line back to the VP. These are the receding edges.
- Cut off the depth with a vertical-and-horizontal back face; place it by judged proportion or by the measuring methods below.
- All depth edges ride the lines to the VP; all width and height edges stay true.
Two-point perspective
Used when the subject is seen at an angle, so that two of its faces recede — the corner-on view of a building, a box on a table turned askew. This is the workhorse of architectural drawing.
Protocol 3-B — Two-point construction:
- Draw the horizon. Place two VPs on it, as far apart as the sheet allows — crowded VPs produce the violent, fish-eye distortion that marks amateur work.
- Draw the nearest vertical edge of the subject (the corner closest to the viewer) as a true vertical. Verticals remain vertical in two-point perspective.
- From the top and bottom of that near vertical, draw lines to both VPs — four lines, defining the two receding faces.
- Set the far vertical edges of each face with true verticals, cutting the converging lines at the judged depth.
- From those far verticals, run lines back to the opposite VP to close the top and bottom planes.
Three-point perspective
Add a third VP, above or below the scene, when the viewer looks markedly up or down and the vertical edges, too, begin to converge — looking up a tower from its base (VP high above), or down into a canyon (VP far below). The third VP governs the verticals; the two horizon VPs govern the two horizontal sets as before. Place the third VP far off the subject, or the distortion becomes grotesque.
Foreshortening and the measuring problem
Foreshortening is the dramatic compression of any form that recedes sharply toward the viewer — an outstretched arm pointed at you, a tabletop. The compressed dimension shortens faster than instinct expects, and the mind fights this violently, insisting the arm be drawn at its "real" length. Trust the sighting measure (Chapter 1) over instinct every time; gauge the foreshortened length with the locked-elbow pencil and set it down even when it looks impossibly short. It is not too short. Your knowledge is lying; your eye is not.
To place receding intervals evenly (fence posts, floor tiles, windows), do not guess. Draw the first two by eye, then use the diagonal method: a line through the diagonal of the first cell, continued, crosses the upper rail at the precise spacing of the next, and so on to the VP. Equal real intervals compress correctly and automatically.
Specification Table 3-1 — Common Perspective Errors and Corrections
| Error | Appearance | Cause | Correction |
|---|---|---|---|
| VPs too close together | Violent fish-eye warping | Vanishing points crowded onto the sheet | Move VPs far apart, often well off the paper's edge |
| Verticals converging in 2-point | Building seems to topple | Treating a two-point scene as three-point | Keep all verticals truly plumb unless deliberately in three-point |
| Even spacing by guess | Receding posts/tiles drift unevenly | Eyeballing equal intervals in depth | Use the diagonal method to step intervals to the VP |
| Foreshortening "corrected" longer | Limbs and planes too long, distance flattened | Mind overriding the seen length | Trust the sighting measure; set the short length as seen |
| Mixed horizons | Objects sit at impossible heights | More than one eye level in a single scene | One horizon line governs the entire scene |
| Tilted horizontals to VP | Edges miss the vanishing point | Construction lines drawn by feel | Rule every receding edge precisely to its VP |
The Critical Insight: Every horizontal edge in a scene belongs to some set of parallels, and every such set has its own vanishing point on the single shared horizon. A staircase, a half-open door, a tilted lid — each introduces its own VP, but all of them land on the one eye-level line (the inclined ones on auxiliary points directly above or below it). Master that single rule and no architectural subject can defeat you.
Art direction
CHAPTER 4 — THE HUMAN FIGURE: THE CANON OF PROPORTION
No subject is more demanding or more rewarding than the human body, and none exposes faulty seeing faster, because every viewer is an expert on human proportion whether they know it or not — the eye catches a wrongly drawn figure instantly, even when it cannot say why. The Practitioner approaches the figure through a measuring canon, a gesture discipline, and a working knowledge of the landmarks the skin reveals.
The canon of proportion: the head as unit
By long convention and good observation, the adult human figure is measured in head-heights — the vertical distance from crown to chin — used as the base unit (Chapter 1) for the whole body. The idealized standing adult is seven and a half heads tall. (The eight-head figure is a heroic, slightly elongated convention used for idealized and fashion work; the true average is nearer seven and a half. Children are proportionally larger-headed: an infant is roughly four heads tall, a six-year-old about six.)
Specification Table 4-1 — The 7.5-Head Standing Adult
| Head-unit mark (from crown) | Landmark falls here |
|---|---|
| 0 | Crown of the head |
| 1 | Chin (base of head) |
| ~1.3 | Nipple line / armpit |
| 2 | Lower edge of the pectorals; bottom of the rib cage near here |
| 3 | Navel (just above) / natural waist |
| ~3.5 | Crotch — the midpoint of the whole figure |
| 4 | Mid-thigh; fingertips of the relaxed hanging arm fall ~mid-thigh |
| 5 | Below the knee / top of the shin |
| 6 | Mid-calf |
| 7 | Just above the ankle |
| 7.5 | Sole of the foot |
Supporting proportions to commit to memory: The span of the outstretched arms (fingertip to fingertip) roughly equals the standing height — the figure fits a square. The hand is about the length of the face (chin to hairline) and covers the face when laid over it. The foot is roughly one head-height long. The elbow falls at the navel/waist; the wrist at the crotch/hip line. Shoulder width is about two head-widths for an average build (broader for heroic male figures).
Gesture drawing: capturing the action before the anatomy
Before a single contour or muscle, the figure must be caught as a gesture — the line of action, the rhythm and thrust of the pose, the living asymmetry of weight. A figure drawn limb-by-limb without gesture is a stiff assemblage of correct parts that has never drawn breath. The gesture is drawn fast, on purpose, to outrun the editing mind.
Protocol 4-A — The gesture drawing (30–120 seconds):
- Find the line of action — the single sweeping curve, often a C or an S, that runs from the head through the spine to the weight-bearing foot. Draw it first, in one confident stroke.
- Note the weight: which foot (or seat) bears the body. Find the line of the shoulders and the line of the hips — in a weighted standing pose they tilt in opposition (the classical contrapposto), and capturing that opposition is half the life of the drawing.
- Lay in the masses — head, rib cage, pelvis — as simple shapes strung on the line of action, attending to their tilt and the spaces between, not their detail.
- Indicate the limbs as lines of motion, the hands and feet as wedges. Stop. A gesture is a statement of energy, not a finished figure; resist all detail.
- Draw many, fast. Twenty thirty-second gestures teach the figure faster than one hour-long rendering.
Anatomy landmarks for the artist
The artist need not learn every muscle, but must know the bony landmarks — the places where the skeleton presses near the skin and shows regardless of build or fat — because these are fixed, reliable, and the true scaffold of the surface. Soft tissue varies between bodies; bone does not.
Specification Table 4-2 — Surface Landmarks the Skeleton Provides
| Landmark | Where it shows | Why it matters to the artist |
|---|---|---|
| Pit of the neck (jugular notch) | Hollow at the top of the breastbone | Centerline anchor for the upper torso; gauges shoulder tilt |
| Acromion (shoulder tip) | Bony point capping the shoulder | Marks true shoulder width and the shoulder line's tilt |
| Sternum / xiphoid | Front centerline of the chest | Establishes the rib cage's facing direction |
| Iliac crests (hip points) | The two front "hip bones" above the pelvis | Read the pelvic tilt — essential to weight and contrapposto |
| Greater trochanter | Bony knob at the side of the hip | Widest point of the hips; hinge of the leg |
| Patella (kneecap) | Front of the knee | Locates the knee joint and the leg's direction |
| Medial & lateral malleoli (ankles) | The two ankle knobs | Inner ankle sits higher than the outer — a constant tell of a true drawing |
| Spine of the scapula / inferior angle | Across and at the base of the shoulder blade | Maps the moving plates of the back |
| Olecranon (point of elbow) | Bony tip of the elbow | The one hard landmark of the arm; falls at the waist when arm hangs |
The Critical Insight: The inner ankle bone sits higher than the outer; the inner wrist bone lower than the outer; the elbow's point drops below the two knobs of the upper arm when the arm straightens. These small, fixed asymmetries are precisely what the eye uses to tell a living figure from a mannequin. Get the bony landmarks right and the figure convinces even where the muscle is wrong — get them wrong and no amount of beautiful rendering will save it.
Art direction
CHAPTER 5 — COMPOSITION: THE ORDERING OF THE PICTURE
A picture is not a collection of well-drawn objects; it is an arrangement — a deliberate ordering of shapes, values, and lines across a bounded field so that the viewer's eye is led, held, and rewarded. Composition is the art of that ordering. A masterfully rendered subject thrown carelessly onto the page is a wasted labor; a simply rendered subject perfectly placed can be unforgettable. This chapter gives the Practitioner the structural tools.
Focal hierarchy: the picture must have a king
Every composition needs one primary focal point — the place the eye is meant to go first and return to — supported by a hierarchy of lesser points. A picture with two equal focal points tears the viewer in half; a picture with none lets the eye wander out of the frame, bored. The artist creates focus through contrast: the focal point is where the picture's strongest contrast of value, sharpest edge, highest saturation, greatest detail, or convergence of lines is concentrated. Everywhere else, contrasts are softened so as not to compete.
Protocol 5-A — Establishing focal hierarchy:
- Decide the single primary focus before composing anything else.
- Concentrate at that point the sharpest value contrast in the whole picture — the lightest light meeting the darkest dark. The eye is drawn to maximal contrast involuntarily; this is the most powerful focusing tool there is.
- Sharpen the edges at the focus and soften (lose) edges as you move away from it.
- Reserve the highest detail and saturation for the focus; subordinate the rest.
- Use line and the implied direction of gazes, gestures, and receding edges to point toward the focus.
Rule of thirds versus the golden section — with the actual mathematics
The eye dislikes the dead center. A subject placed exactly in the middle of the frame is static and inert; the same subject placed off center generates tension and life. Two systems formalize this.
The rule of thirds is the simple, practical guide: divide the frame into thirds horizontally and vertically with two lines each way, and place key elements on those lines and especially at their four intersections ("the power points"). The thirds lines fall at fractions 1/3 ≈ 0.333 and 2/3 ≈ 0.667 of each dimension. It is an approximation, easy to lay out by eye, and entirely serviceable.
The golden section is the older, subtler ratio, denoted φ (phi). It is the division of a line such that the whole is to the larger part as the larger part is to the smaller. Solving that relationship:
φ = (1 + √5) / 2 ≈ 1.6180339887, and its reciprocal 1/φ = φ − 1 ≈ 0.6180339887.
To place a golden-section line, divide the frame's dimension at the fraction 0.382 (that is, 1 − 0.618) from one edge, or equivalently 0.618 from the other. Compare: the rule of thirds places its line at 0.333/0.667; the golden section places its at 0.382/0.618 — slightly nearer the center. The golden division is marginally more dynamic and is the one embedded in the proportions of much classical architecture and painting; the thirds are a fast, robust stand-in that no viewer will fault. Use the thirds to rough a layout in seconds; reach for the true golden section when a composition's proportion is doing heavy work.
A golden rectangle is one whose sides stand in the ratio φ:1 (≈ 1.618:1). Remove a square from it and the remainder is another golden rectangle — repeat, and the nested squares' corners trace the logarithmic golden spiral, a powerful armature for leading the eye in a curving sweep into a focal point.
Value massing: the composition beneath the subject
Before any subject is rendered, a strong composition resolves into a few large, clearly designed masses of value — a handful of simple shapes of light, mid, and dark that read as a satisfying abstract pattern even squinted at or seen from across a room. If the value massing is muddy or evenly speckled, no amount of detail will rescue the picture. Design the picture as three or four big value shapes first; let the detail live inside those shapes without breaking their large read.
Protocol 5-B — The thumbnail value study:
- Before the full drawing, make small thumbnails (50–80 mm) of the whole composition.
- Restrict yourself to three values only — light, mid, dark — and block the entire design in those flat masses.
- Squint at the thumbnail; the masses should hold together as a clear, balanced, asymmetrical pattern.
- Test two or three arrangements this way in minutes. The thumbnail that reads strongest, squinted, is your composition. Only then begin the full work.
Leading the eye
The composed picture is a path designed for the eye to travel. Leading lines — roads, rivers, fences, gazes, the edges of cast shadow, the direction of a gesture — usher the eye from an entry point (often lower left, where Western eyes begin) along a route to the focal point. Arrange these so the path loops within the frame and returns, rather than running off an edge and abandoning the viewer outside the picture. A diagonal lead is more dynamic than a horizontal; a curving lead (the golden spiral, an S-curve through a landscape) is the most graceful of all.
The Critical Insight: Composition is decided in the value massing, not the detail. Squint hard at any picture you admire and it collapses to four or five simple shapes of light and dark in a deliberate, asymmetrical balance. Squint at a failed picture and it collapses to grey mush. Design the squinted version first, and you have composed; everything after is only rendering inside shapes already known to work.
Art direction
CHAPTER 6 — THE DOCUMENTARY EYE: THE ARTIST AS CIVILIZATION'S RECORDER
Here the decree returns to its root. nam-kù-zu is the recording eye, and the highest office of the artist is not decoration but witness — the setting-down of the world's forms with such fidelity that another mind, in another age, can know the thing though the thing itself is gone. Before the camera and after every collapse that takes the camera away, this office falls to the trained hand. The documentary draughtsman is the Practitioner whom Vol XVI's timeline records walking ahead of every reconstruction, because the seed, the joint, the column, and the mechanism must all be drawn before they can be re-grown, re-cut, re-raised, or re-built. This chapter is the discipline of drawing for the record.
Documentary drawing differs from expressive drawing in its loyalties. The expressive artist serves the picture; the documentary artist serves the information. Where the two conflict, the recorder sacrifices beauty to clarity without hesitation — though the finest records, by the discipline of their honesty, achieve a beauty of their own.
Botanical drawing conventions
The botanical record exists to let a botanist, centuries hence, identify a species from the drawing alone — and so it follows hard conventions, refined across the long documentary tradition Vol XVI traces to the herbalists of the recovery eras.
Protocol 6-A — The botanical plate:
- Draw from the living or fresh specimen, at a stated scale, with a scale bar on the plate (never "life size" alone — reproductions change size; a scale bar does not lie).
- Show the diagnostic features that distinguish the species: habit, the leaf and its attachment and margin, the flower whole and dissected, the fruit, the seed, the root or rhizome where it identifies.
- Render dissections and magnified details alongside the whole plant, each with its own magnification stated (e.g. "×4").
- Show the parts in botanically standard views — a leaf flattened to show its true shape and venation, the flower in face and in section.
- Render form with controlled value (Chapter 2) but never let shading obscure a diagnostic edge or vein. Clarity outranks atmosphere.
- Label nothing on the art itself that a clean leader line and a margin key can carry instead.
Architectural drawing conventions
Architecture is recorded in orthographic projection — views taken as if from infinitely far away, so that no perspective convergence distorts the measurements, and a ruler laid on the drawing yields true proportions at the stated scale.
The standard orthographic set: the plan (a horizontal section looking down, as though the building were cut through and the top lifted off), the elevation (a face seen straight on, front/side/rear), and the section (a vertical cut through the building revealing its internal heights and structure). Each is drawn to a stated scale with a scale bar and a north arrow on the plan. Line weight carries meaning: edges actually cut by the section plane are drawn heavy; edges seen beyond the cut are light; hidden edges are dashed. A reader fluent in this convention reconstructs the whole building in the mind from the flat sheets — which is the entire purpose.
Mechanical drawing, exploded views, and cutaways
The mechanical record must let a maker re-fabricate and re-assemble a device from the drawing. It adds two powerful conventions to the orthographic set.
The exploded view draws every component of an assembly separated along its axis of assembly, each part floating in its correct position and orientation relative to the others, often strung on dashed assembly axis lines that show exactly how the parts come together. It reveals at a glance the full part-count, the order of assembly, and how each piece seats — information no assembled view can show.
The cutaway (and its sibling the section view) removes part of an object's outer skin or slices it open to reveal the working interior — the bore of a barrel, the teeth of a hidden gear train, the chambers within a casting. Cut surfaces are conventionally marked with section hatching (evenly spaced parallel lines, angled, denser for smaller parts) to distinguish solid material that the cut passed through from the open voids beyond it.
Protocol 6-B — The exploded assembly drawing:
- Choose a clear axis of assembly (often the main shaft or the dominant direction the parts stack).
- Draw each component in correct orthographic or measured form, separated along that axis in assembly order, the first-fitted parts toward the center.
- String the parts on dashed center/assembly lines so the eye reads which seats into which.
- Maintain one consistent scale across all parts, and keep each part's orientation matching its installed orientation.
- Number every part with a leader to a margin key (the "bill of materials"): name, quantity, material.
- Add section hatching to any part shown cut, and a separate cutaway inset for any internal feature the exploded view cannot reveal.
CANON SIDEBAR — THE RECORDER BEFORE THE BUILDER
Vol XVI's reconstructed chronology is emphatic on this point, and the Practitioner should hold it as the moral center of nam-kù-zu. In the recovery that followed the Bronze Age collapse of 1177 BCE, and again in each subsequent dimming of the world's knowledge, the first art to be re-established was not architecture, not metallurgy, not agriculture — it was drawing, because each of those greater arts had first to be recovered from whatever drawn records survived, and then re-recorded so the recovery would hold against the next loss. The Mystery School transmission preserved its deepest teachings not as text alone but as diagrams — measured, proportioned, and copyable — precisely because a drawing crosses the barrier of a dead language that a sentence cannot. The exploded view of a mechanism, the orthographic set of a vanished building, the botanical plate of a lost cultivar (cross Vol VII, the Agrarian, on seed and species recovery): these are the true treasure the recording eye lays up. When you draw for the record, Practitioner, you are not making a picture. You are placing a message in the one bottle that has reliably survived every flood: the honest, measured, labeled image. The decree calls you witness for exactly this reason. See truly, and set it down so plainly that the truth survives you.
Art direction
The six chapters of this sub-volume have built, from the first sighting measure to the last labeled exploded view, a single instrument: the trained, recording eye that the twenty-eighth decree commits into the Practitioner's keeping. The hand that can measure a proportion, model a form, construct a depth, proportion a figure, order a picture, and set down the world for the record is the hand on which every remaining art of this Codex — the pigment and surface of Sub-Volume II, and the crafts of leather and fiber that follow — is raised. Learn to see, and you have learned the half of every making that matters. The other half is materials, and to those we now turn.
SUB-VOLUME II — PIGMENT AND SURFACE
ME 28 · nam-kù-zu · ART (THE LASTING COLOUR)
Where Sub-Volume I gave the trained eye, this sub-volume gives the eye its hands. The same decree that grants the Practitioner the right to see truly grants also the obligation to make the seen thing endure — to bind colour to surface so firmly that it outlives the maker, the maker's city, and the maker's tongue. A drawing is a witness; a painting properly grounded is a witness sworn to the next millennium. The Historian's volume (Vol XVI) records that the murals of the megalithic and dynastic eras survived their Resets precisely where the makers had mastered the chemistry of permanence, and perished — taking their testimony with them — wherever they had not.
Sub-Volume I worked, deliberately, in the most forgiving medium: graphite and charcoal on paper, marks that ask nothing of chemistry and forgive every error with an eraser. That forgiveness ends here. The moment the Practitioner reaches for colour, you cross into materials science — the hard physics of which earths hold their hue under sunlight, which binders cure into films that flex without cracking, which grounds grip the paint and which let it fall. A magnificent design laid in a fugitive pigment over an unsound ground is not art; it is a slow act of forgetting.
This is therefore the most chemical sub-volume in the Codex, and at every step the question is the same the recoverer of civilizations always asks: will it last, and is it safe to make? The high cultures, Vol XVI reminds us, had the genius and the recklessness to make their most brilliant colours from poisons, and the cost is written across the biographies of their artisans. The Practitioner inherits the brilliance and refuses the recklessness. You will make nothing here that can kill the maker. That is the first law of the Maker's bench, and it is not negotiable.
Work in order. The pigment chapters (7–8) give the colour; the binder chapter (9) gives what holds it; the ground chapters (10–11) give what it holds to; the scribe's chapter (12) closes the loop back to the line, where Sub-Volume I began.
CHAPTER 7 — EARTH PIGMENTS: THE COLOURS UNDER YOUR FEET
The oldest colours of the human record are earths, and they remain the most permanent the Practitioner can wield. The ochres, siennas, and umbers that stained the hands of the cave painters are the iron oxides and oxide-hydroxides, coloured by the same chemistry that rusts iron and reddens deserts. They are abundant, free for the digging, entirely non-toxic, and — most importantly — lightfast to the absolute limit of the scale: an iron-oxide red does not fade, for the pigment is a stable mineral with no further oxidation for sunlight to drive. The recoverer who masters earths alone, Vol XVI notes, outlasts the chemist who reaches for synthetics.
The mineralogy: what gives an earth its colour
Every earth pigment in this family owes its hue to one of a few iron compounds, modified by clay and by the presence or absence of water in the crystal — the chemistry you manipulate in the fire (below).
Specification Table 7-1 — The Iron-Earth Pigments
| Pigment | Colouring compound | Formula | Hue | Origin |
|---|---|---|---|---|
| Yellow ochre | Goethite (hydrated iron oxide-hydroxide) | α-FeO(OH) | Warm yellow to gold | Weathered iron-bearing clays |
| Red ochre / red oxide | Hematite (anhydrous iron oxide) | α-Fe₂O₃ | Earth red to brick | Natural beds, or calcined yellow ochre |
| Raw sienna | Goethite + higher clay, some Mn | FeO(OH) + clay | Tan, transparent | Iron clays, classically Tuscan |
| Burnt sienna | Hematite (from calcined raw sienna) | Fe₂O₃ + clay | Rich red-brown | Calcined raw sienna |
| Raw umber | Goethite + manganese dioxide | FeO(OH) + MnO₂ | Cool greenish-brown | Manganese-rich iron earths |
| Burnt umber | Hematite + Mn oxides | Fe₂O₃ + Mn oxides | Deep warm brown | Calcined raw umber |
| Green earth (terre verte) | Glauconite / celadonite | K,Fe,Al,Mg silicates | Muted sage green | Marine sediments |
The Critical Insight: The single most useful fact in earth-pigment craft is that yellow becomes red in the fire. Yellow ochre is hydrated (goethite, FeO(OH)); heat drives off the bound water and converts it to anhydrous hematite (Fe₂O₃), which is red. Raw sienna and raw umber become burnt sienna and burnt umber by the same dehydration. The Practitioner who controls a small fire thus commands half the warm palette from a single dug earth — this is calcination, the only "manufacture" the earth pigments require.
Locating and digging
Iron-stained earths announce themselves by colour. Survey road cuttings, eroded stream banks, excavation spoil, weathered cliffs, and the rust-staining around iron-bearing springs and bogs. The richest yellow ochres are buttery and stain the fingers instantly; reds occur as deep brick-coloured bands; umbers are dark and characteristically cool in undertone owing to their manganese.
Protocol 7-A — Field test for an iron earth:
- Rub a pinch of the damp earth across a white unglazed surface (a fragment of biscuit-fired pot is ideal); a true pigment earth leaves a strong, even, coloured streak.
- Note the streak colour, not the lump colour — the streak is the true pigment hue.
- Place a smear in a small flame or on a hot ember for a minute. If a yellow or tan earth reddens, you have confirmed a hydrated iron pigment and proven its calcined colour in one step.
- Reject any earth gritty beyond what washing can remove, or that smells strongly organic (peaty matter rots a paint film).
Washing and levigation: separating pigment from grit
Dug earth is pigment adulterated with sand, root, and stone. Levigation — separating fine particles from coarse by differential settling in water — is the universal purification, unchanged since antiquity and dependent on nothing but water, patience, and the physics of sedimentation: fine particles fall slowly, coarse ones fast.
Protocol 7-B — Washing and levigating an earth pigment:
- Dry and crush. Dry the raw earth, crush the lumps to coarse powder, and pick out roots and stones by hand.
- Slake. Stir the powder into a large excess of clean water and let it stand, stirring occasionally over a day, until every lump dissolves to a smooth slurry.
- First settle (drop the grit). Stir vigorously, then wait only 20–40 seconds — the sand and coarse grit fall while the fine pigment stays suspended, colouring the water. Promptly pour off the coloured water into a second vessel and discard the grit.
- Second settle (drop the pigment). Let the coloured water stand undisturbed for hours or overnight; the fine pigment settles into a dense cake and the water above clears.
- Decant and repeat. Pour off the clear water. For a finer grade, re-slurry and repeat steps 3–4; each cycle narrows the particle range.
- Dry the cake. Spread the wet cake on a clean non-absorbent slab to dry to a hard biscuit, then grind to fine powder. The pigment is ready to bind.
Calcination: making red from yellow, burnt from raw
Calcination is the controlled heating of a dried, washed earth to drive off bound water, shifting the colour from the hydrated to the anhydrous oxide.
Protocol 7-C — Calcining yellow ochre to red:
- Use only fully washed and dried pigment. Calcining un-levigated earth bakes the grit in permanently.
- Place the dry yellow ochre in a heat-proof, lidded vessel (a steel can or covered crucible). A lid limits but need not wholly exclude air; the reaction is dehydration, not combustion.
- Heat steadily. Useful colour change begins around a dull red heat (roughly 250–350 °C and upward); the pigment passes through deepening orange to a settled red as goethite converts to hematite.
- Watch the colour, not the clock. Pull samples and let them cool to judge — hot pigment reads darker than it will cool. Lower temperatures yield warmer, brighter reds; higher and longer heating drives toward cooler, purple-toned "caput mortuum" reds. This is your dial.
- Cool fully, then re-grind, the calcined cake having hardened and aggregated.
- Apply the identical method to raw sienna (→ burnt sienna) and raw umber (→ burnt umber); the manganese in umber deepens the burnt result toward a darker brown than sienna gives.
Your Commitment: Keep a labelled board of your own dug, washed, and calcined earths — the raw streak, the levigated grade, a ladder of calcination temperatures from each. It is worth more than any purchased tube: it is a map of your own ground, from which a recoverer repaints a culture out of the dirt beneath the ruin.
Specification Table 7-2 — Lightfastness of the Earth & Common Pigments
(Scale: I = excellent/permanent, the standard the Practitioner should demand for any work meant to last; III–IV = fugitive, for ephemeral work only.)
| Pigment | Lightfastness | Notes for the Practitioner |
|---|---|---|
| Yellow ochre / red ochre | I | The benchmark. Effectively permanent; the pigment is a stable mineral. |
| Raw & burnt sienna | I | Permanent. Transparent; superb for glazing and warming. |
| Raw & burnt umber | I | Permanent. Manganese content speeds the drying of oils (a working asset). |
| Green earth (terre verte) | I | Permanent but weak in tint; classic flesh-underpainting green. |
| Carbon / lamp black | I | Permanent. Pure carbon; nothing for light to attack. |
| Bone / ivory black | I | Permanent. Warmer than carbon black. |
| Chalk / lime white | I | Permanent in water-media and fresco; vanishes (turns transparent) in oil — see Ch. 8. |
| Madder lake (genuine) | II–III | Good-to-moderate; the most lightfast of the plant lakes. Glaze thinly. |
| Weld / indigo (plant) | III–IV | Fugitive in light. Beautiful but ephemeral; reserve for work not meant to endure. |
CHAPTER 8 — PLANT AND MINERAL COLOURS: THE SAFE PALETTE AND THE FORBIDDEN ONE
The earths give an unkillable warm palette and a true black-and-white, but they are silent in two registers the eye craves: the clear cool blues and greens and the transparent, jewel-bright reds and yellows of the plant kingdom. This chapter supplies what is safe to make of these — and, with equal force, names what is forbidden. The high cultures reached their most dazzling colours through arsenic, mercury, and lead, and paid in poisoned artisans; the Maker's Codex draws a hard line: brilliance is never bought with the maker's blood.
Plant lakes: colour from the garden, fixed to a mineral
A lake pigment is a soluble dye precipitated onto a colourless inert base — almost always alum (potassium aluminium sulphate) struck with an alkali to throw down hydrated alumina — so that a dye (which would merely stain) becomes an insoluble pigment (which can be ground and bound like any other). The dye colours; the alumina carries and bodies it. This is among the oldest pieces of true chemistry in the artist's craft.
Protocol 8-A — Making a madder lake (the model lake; madder is the most lightfast):
- Extract. Simmer (do not hard-boil) chopped or powdered madder root (Rubia tinctorum) in soft water, drawing the red alizarin colour into solution. Strain off the spent root; keep the deep red liquor.
- Combine with alum. Dissolve alum in warm water and stir it into the warm dye liquor.
- Strike (precipitate). Slowly stir in a mild alkali — washing soda (sodium carbonate) in solution. As the liquor turns alkaline, hydrated alumina precipitates and drags the dye down with it as a coloured lake; the liquid above clears.
- Wash. Let the lake settle, decant, then wash repeatedly with clean water (settle and decant each time) to remove soluble salts, which would otherwise bloom and weaken the pigment.
- Dry and grind. Dry the washed lake gently to a crumbly cake and grind to powder. Bind thin — lakes are transparent and give their best as glazing veils over a lighter colour.
The same procedure makes a yellow lake from weld (Reseda luteola, the most lightfast historical yellow) and other dye plants. Accept their honest limitation: even the best plant lakes are only moderately lightfast (Table 7-2), and most yellows and the plant blues are frankly fugitive. Use them where their beauty is wanted and their impermanence acceptable; never trust a culture's lasting record to them.
Indigo: the vat blue, in brief
Indigo (from Indigofera and woad, Isatis tinctoria) is the great historical plant blue, but not made by the lake route. Indigo is vat-dyed: the insoluble blue is chemically reduced to a soluble, yellow-green "leuco" form in an alkaline reducing bath, the fibre or ground is wetted in it, and on exposure to air the leuco form re-oxidises back to insoluble blue in place. Its full protocol belongs to the dyer's craft (cross Sub-Volume IV). As a paint pigment it is usable but fugitive (III–IV); for a permanent blue the safe recourse is a synthetic blue (Table 8-2), the natural permanent blues having been either ruinously costly (ultramarine from lapis) or outright forbidden (below).
The blacks: carbon and bone
Black is the Practitioner's friend — abundant, permanent (pure carbon offers nothing for light to degrade), and entirely safe.
Protocol 8-B — Carbon blacks and bone black:
- Lamp / carbon black. Hold a cool, clean ceramic or metal surface in the smoky upper flame of a burning oil or fat. Soot (nearly pure carbon) deposits; scrape it off — an intense, slightly cool, very fine black. Ventilate, and gather only cooled soot.
- Charcoal black. Grind fully carbonised hardwood (the charcoal of Sub-Volume I's drawing sticks) and levigate as for an earth (Protocol 7-B) to a fine, slightly warm, somewhat weaker black.
- Bone / ivory black. Calcine clean bone in a closed, air-starved vessel until fully charred; the residue is carbon in a calcium-phosphate matrix. Grind and levigate. Bone black is a deep, dense black — the warmest of the three.
The whites: chalk and lime
For all water-based media and fresco, the Practitioner's whites are the cheap, safe carbonates: chalk / whiting (calcium carbonate, CaCO₃) and lime white (slaked lime, calcium hydroxide, Ca(OH)₂, which cures to CaCO₃). Both are permanent and non-toxic. Their one hard limitation governs all later work: in oil, chalk and lime go transparent — their refractive index is too near that of oil to scatter light — so they serve only as glaze-extenders. For an opaque white in oil the Practitioner must turn to a safe modern white (Table 8-2), every traditional opaque white having been a poison.
The forbidden pigments: what the Practitioner must NEVER manufacture
Here the Codex is absolute. A family of historical pigments give superb colour and were in constant use by the high cultures, and every one is a cumulative poison whose home manufacture endangers the maker, the household, and the water. The Practitioner does not make them; there is no protocol for them in this book and there never will be.
Specification Table 8-1 — PROHIBITED PIGMENTS (DO NOT MANUFACTURE)
| Forbidden pigment | Toxic element | Hazard | Verdict |
|---|---|---|---|
| Lead white (flake white), red lead, lead-tin yellow, Naples yellow (lead antimonate) | Lead (Pb) | Cumulative neurotoxin; no safe dose; poisons children and the unborn at trace levels | PROHIBITED |
| Vermilion / cinnabar (mercuric sulphide) | Mercury (Hg) | Cumulative neurotoxin; vapour and dust both dangerous; manufacture involves mercury | PROHIBITED |
| Emerald green, Scheele's green (copper arsenites) | Arsenic (As) | Acute and chronic poison and carcinogen; releases toxic gases when damp or heated | PROHIBITED |
| Orpiment, realgar (arsenic sulphides) | Arsenic (As) | Carcinogen; the brilliant historical yellow/orange and a lethal one | PROHIBITED |
| Chrome yellow, chrome orange (lead chromate) | Lead + chromium | Lead poison compounded with a chromium-VI carcinogen | PROHIBITED |
| Cadmium pigments (raw, from soluble salts) | Cadmium (Cd) | The raw soluble cadmium salts are toxic and carcinogenic; manufacture is hazardous | Do not manufacture — purchase finished, encapsulated, artist-grade tubes only |
The Critical Insight: The lethality of these pigments rises catastrophically at the moment of manufacture, where the maker handles concentrated soluble compounds, respirable dusts, and — for mercury and arsenic — toxic fumes. A sealed, professionally encapsulated cadmium tube is one matter; grinding cadmium pigment from soluble salts in a home is another. The rule is therefore not "handle with care" but "do not be the manufacturer." Brilliance that requires you to brew a poison is brilliance the Maker's Codex forbids you. There is always a safe substitute, and the table below names it.
Specification Table 8-2 — Safe Modern Substitutes for the Forbidden Colours
| If you want the colour of… | Safe permanent substitute (lightfastness I) | Nature |
|---|---|---|
| Lead white (opaque white) | Titanium dioxide white (titanium white) | Inert, non-toxic, the most opaque white known |
| Lead white (a softer, leaner white) | Zinc white (zinc oxide) | Inert, cooler, more transparent; sound in water-media |
| Vermilion (brilliant red) | Cadmium red (bought, encapsulated) or synthetic red iron oxide | Bright opaque red / permanent earth-toned red |
| Naples / lead-tin yellow | Bismuth-vanadate yellow or cadmium yellow (bought) | Bright, opaque, lightfast yellows |
| Emerald / Scheele's green | Viridian (chromium oxide hydrate) or phthalocyanine green | Brilliant, permanent, non-toxic greens |
| Orpiment (golden yellow) | Bismuth-vanadate or quinacridone gold | Permanent and safe |
| A permanent deep blue | Ultramarine (synthetic) or phthalocyanine blue | Brilliant, permanent, inexpensive, non-toxic |
Art direction
CHAPTER 9 — BINDERS: WHAT HOLDS THE COLOUR TO THE WORLD
A pigment is a coloured dust until a binder glues each particle to its neighbour and to the ground. The binder, more than the pigment, decides what kind of painting you are making — its sheen, flexibility, drying speed, permanence, and medium-name: egg makes tempera, glue distemper, oil oil paint, molten wax encaustic, lime true fresco (Ch. 11). Command each as a separate discipline, with its own protocol and hazards.
Egg tempera: the jewel of the panel painters
Egg-yolk tempera is the binder of the medieval and early-Renaissance panel, capable of luminous, enamel-hard, near-permanent paintings. The yolk is a natural emulsion of oil, water, and protein (lecithin the emulsifier); thinned with water it brushes freely, and as the water leaves and the proteins cure it locks into a tough, insoluble film. It cannot be laid thickly — it is built in many thin, hatched layers, suiting the hatching hand of Sub-Volume I.
Protocol 9-A — Egg-yolk tempera medium and paint:
- Separate the yolk from the white and roll it gently on a clean cloth to dry its surface.
- Tap the sac and drain only the yolk. Pinch the yolk sac over a clean jar, puncture it, and let the pure liquid yolk run out, discarding the empty sac and any white. The white (albumen) is a separate, brittle, inferior binder; keep it out.
- Thin. Stir the pure yolk with roughly an equal volume of water to a light, brushable medium. (A trace of vinegar or a clove preserves a day's working pot.)
- Make paint. Mull each pigment into a stiff paste with a little water, then stir small amounts of yolk medium in until the paint brushes well and dries to a matte, even, non-powdery film. Test the ratio: too little yolk and the dried paint dusts off; too much and it dries glossy and may crack. Aim for the leanest binding that does not chalk.
- Paint in thin hatched layers over a rigid, absorbent ground (true gesso — Ch. 10). Tempera cannot be blended wet like oil; model values by hatching one thin tone over another, exactly the discipline of Sub-Volume I, Chapter 2.
- Cure. Tempera is touch-dry in moments but hardens and grows insoluble over months. Handle gently for the first weeks; a cured tempera panel is among the most durable paintings the Practitioner can make.
Hide-glue distemper (and the size that underlies all)
Hide glue — collagen extracted by simmering animal skin and connective tissue — is the Practitioner's universal water-soluble binder and adhesive. Thin, it is size (the sealing liquid used under gesso, in paper sizing, and as the glue in gesso itself); stronger and carrying pigment, it is distemper (soft, matte, opaque wall- and scene-paint). It is reversible — re-wettable with water — which is both its convenience and its limitation.
Protocol 9-B — Making and using hide glue / size / distemper:
- Soak. Soak granular hide glue (or rabbit-skin glue) in cold water until it swells to a soft jelly — several hours. Use roughly one part dry glue to ten or more of water for a size; stronger for distemper.
- Warm gently in a water bath. Heat the swollen glue in a double boiler until it melts clear. Never boil glue — boiling breaks the collagen and destroys its strength. Keep it below a simmer, just hot enough to stay liquid.
- Test the strength. Correct size gels on cooling to a soft jelly. Too strong (a hard rubbery gel) cracks and pulls; too weak (barely thickening) will not bind. Adjust with water or more glue.
- For distemper: stir warm glue into pigment paste and apply warm, as it sets on cooling. Distemper dries much lighter than it goes on — always test a dried sample.
- Keep it fresh. Glue is food for mould; it spoils in a day or two and stinks when it does. Make only what the day needs, keep it cool, and discard any sour batch.
Casein: the lime-fast milk binder
Casein, the protein of milk, makes a binder far tougher and less reversible than hide glue once cured — valued for wall painting and grounds. Know it as the alkali-set milk glue: curd (or commercial casein powder) freed by a measured alkali (classically slaked lime, or ammonium carbonate) yields a strong, fast-setting, eventually water-resistant binder, excellent with lime ("lime-fast," unharmed by the alkalinity of plaster). Mix only what the session needs — like all protein binders it spoils quickly and, once set hard, cannot be re-dissolved.
Drying oils: the binder of the great easel tradition — and its one deadly hazard
Drying oils — pre-eminently linseed oil, pressed from flax seed — cure not by drying out but by absorbing oxygen from the air and polymerising into a tough, flexible, transparent film. This oxidative curing gives oil paint its unmatched blending time, depth, and permanence — and carries the single most dangerous hazard in this sub-volume (sidebar below).
Protocol 9-C — Processing and using linseed oil:
- Source and refine. Begin with cold-pressed linseed oil. Raw oil may be refined by washing — shaking it with water and a little salt, letting it separate, and drawing off the cleaned oil — to remove mucilage that yellows and slows drying.
- Sun-thicken (optional, traditional). Standing linseed oil in a shallow, gauze-topped glass vessel in sunlight for weeks both bleaches and bodies it, yielding a richer, faster-drying medium. This is not combustion — it is slow controlled oxidation in the bulk liquid.
- Make paint. Mull pigment into the oil until each particle is wetted and the paint is smooth and stiff. Mull to the stiffest smooth paste that still spreads, as excess oil yellows and wrinkles.
- Paint fat over lean. Build from leaner (less oil) underlayers to fatter (more oil) upper layers, so the more flexible, slower-drying films sit on top. Reverse this and the upper layers crack as the substrate moves — the governing rule of oil-film soundness.
- Earth pigments help. Umbers and siennas (manganese- and iron-rich) are natural dryers, speeding the oxidative cure — one more reason the earths of Chapter 7 are the Practitioner's foundation.
### ⚠ CANON SIDEBAR — THE OILY RAG: SPONTANEOUS COMBUSTION
This is the warning that has burned down studios. A rag or pile of waste soaked in linseed (or any drying) oil can catch fire entirely on its own, with no flame, spark, or external heat applied. The mechanism is exact: the oil cures by oxidising, and oxidation releases heat. In a crumpled rag the heat cannot escape — the cloth insulates it — so the reaction warms, accelerates, warms faster, and this runaway can drive the heap to ignition in hours. The studio is found ablaze with no one having struck a match.
The Practitioner's absolute protocol for oily rags and waste:
1. Never wad, pile, or bin oily rags. A heap is the hazard.
2. Spread each oily rag out flat and singly to dry — hung over a metal edge or laid out separated on a non-combustible surface, in open air. Spread flat, the heat escapes and no runaway begins.
3. Or submerge them in a sealed metal can filled with water until disposal. Water both cools and excludes the oxygen the reaction needs.
4. Keep oily waste away from all other combustibles, and never leave a fresh oily rag in a closed studio overnight.Your Commitment: Treat every linseed-soaked rag as a slow fuse already lit. This single discipline has saved more makers' work — and lives — than any other rule in the Codex.
Wax encaustic: paint that is melted, not dried
Encaustic binds pigment in molten beeswax (often hardened with a little tree resin); the paint is kept liquid by heat, applied hot, then fused so each stroke melds to the last. It cures instantly on cooling — it does not "dry" at all — into a tough, water-resistant, astonishingly permanent film; the Fayum mummy portraits survive nearly two thousand years in encaustic. The basics: melt clean beeswax gently (water bath or low heat — wax is flammable; never heat it over open flame to smoking), stir in pigment, apply hot to a rigid, absorbent support (wood panel — Ch. 10), and pass gentle heat over the surface to fuse and level it. Its hazards are physical: hot wax burns, and overheated wax can ignite or fume — work at the lowest fluid temperature, and ventilate.
Art direction
CHAPTER 10 — GROUNDS AND SURFACES: WHAT THE COLOUR HOLDS TO
No paint is sounder than the ground beneath it. A ground is the prepared layer between the raw support (panel, wall, paper, cloth) and the paint — it seals the support, gives a uniform absorbency and colour to work over, and above all provides a keyed, stable surface the paint can grip without cracking or sinking. The Practitioner who skimps the ground builds a palace on sand. This chapter gives true gesso, panel preparation, lime plaster for fresco, and paper sizing.
True gesso: chalk and glue, the panel painter's ground
True gesso (distinct from the modern acrylic "gesso," a different material) is simply chalk (or gypsum) bound in hide glue, built over a sized rigid panel and scraped or sanded to a flawless, brilliant-white, mildly absorbent surface — the ideal ground for egg tempera and gilding. Being brittle, it goes only on a rigid support (a wood panel), never flexible canvas.
Protocol 10-A — Making and applying true gesso:
- Size the panel first. Brush one or two coats of warm thin hide glue (size, Protocol 9-B) onto the bare panel and let dry, sealing the wood and keying the gesso.
- Make the gesso. Warm hide-glue size in the water bath and sift fine chalk (whiting) into it without stirring until the chalk mounds at the surface; then stir gently to a smooth, lump-free cream the consistency of thin batter. The glue must bind but not be so strong the gesso cracks (test as in 9-B).
- Apply warm, in many thin coats. Brush the first coat well into the sized panel. Keeping the gesso warm and liquid, lay six to ten thin coats, each brushed at right angles to the last and allowed to lose its wet sheen (but not fully harden) before the next. Thin coats bond; thick coats crack.
- Cure, scrape, and sand. Let the gesso dry fully (hard and white), then scrape and sand to a perfectly flat, even surface. Polished with a fine abrasive it takes the near-ivory finish that is the glory of the tempera panel.
- Test. Sound gesso is hard, brilliant white, and rings faintly; it neither powders under a fingernail (too lean) nor shows fine cracks (too strong or thick). Correct the glue strength on the next batch.
Wood panel preparation
The support under the gesso must be dimensionally stable, because gesso and tempera cannot follow a moving panel without cracking.
Protocol 10-B — Preparing a wood panel:
- Choose stable, seasoned wood. Use well-seasoned, defect-free hardwood (historically poplar, lime/linden) or a sound modern stable board. Avoid green, resinous, or knotty wood.
- Plane and clean the working face flat and free of grease, wax, and dust.
- Counter warping by working both faces (size both sides) so the panel takes up and releases moisture evenly, and, for wide panels, by battening or cradling the back against cupping. Sizing one side only invites the panel to bow toward the sealed face.
- Size both faces (Protocol 9-B), then gesso the working face per Protocol 10-A. The panel is then ready for tempera or gilding.
Lime plaster for fresco
The ground for true fresco is wet lime plaster, inseparable from the fresco chemistry of Chapter 11 — the plaster is not merely a surface but the chemical partner that locks the pigment in. The Practitioner lays a coarse lower coat (the arriccio) and, only over the day's area, a fine smooth upper coat (the intonaco) of slaked lime and fine sand. Pigment is applied into this fresh, wet, alkaline intonaco, which carbonates to bind it (Ch. 11). Full protocol follows in Chapter 11.
Paper sizing
Raw paper is a thirsty blotter; size fills its fibres so ink and watercolour sit and flow on the surface instead of feathering and sinking. Size paper by brushing or bathing it in a weak hide-glue size (Protocol 9-B) — or historically a starch or gelatine size — then drying it flat. Correctly sized, a sheet takes a crisp ink line (Ch. 12) and lets watercolour lift and pool; over-sized, it beads; un-sized, it feathers every stroke. Test on a corner and adjust the strength before committing a sheet.
CHAPTER 11 — THE FRESCO METHOD: PAINTING INTO THE WALL
Fresco is the most permanent painting humanity has devised, and the most demanding. In buon fresco (true fresco) the painter has no separate binder at all — the wall binds the paint, by a chemistry that turns soft plaster back into stone with the pigment trapped inside it. The megalithic and dynastic murals that Vol XVI tracks across the Resets survive, where they survive, because they were buon fresco: the colour is not on the wall, it is the wall.
Buon fresco versus secco: the decisive distinction
The Critical Insight: Everything in fresco turns on one distinction. In buon fresco, pigment (ground in nothing but water) goes into fresh, wet lime plaster, and the plaster's own chemistry binds it as it cures — a permanent, integral bond. In fresco secco ("dry fresco"), pigment is applied with a separate binder (egg, casein, glue) onto already-dry plaster — the bond only as good as that surface binder, prone to flaking. The two are constantly confused, and many "frescoes" that have flaked away were secco. Reserve buon fresco for what must last; use secco knowingly, only for detail and correction over a cured buon-fresco surface.
The lime cycle: the chemistry that binds the wall
The Practitioner must understand the lime cycle exactly, because every rule of fresco practice follows from it.
Specification Table 11-1 — The Lime Cycle (the chemistry of buon fresco)
| Stage | Process | Reaction | What the Practitioner does |
|---|---|---|---|
| 1. Burning (calcination) | Heat limestone in a kiln (~900 °C+) | CaCO₃ + heat → CaO + CO₂↑ | (Kiln work; or obtain quicklime/lime putty.) Limestone, driven off its CO₂, becomes quicklime. |
| 2. Slaking | Add water to quicklime | CaO + H₂O → Ca(OH)₂ + heat | Slake quicklime to lime putty. Violent, exothermic, caustic — see warning. Mature the putty for weeks to months. |
| 3. Plastering & painting | Lay Ca(OH)₂ plaster; paint pigment in water into it | (Plaster wet; pigment suspended in it) | Apply intonaco; paint into the wet lime. |
| 4. Carbonation (the set) | Slaked lime reabsorbs CO₂ from the air | Ca(OH)₂ + CO₂ → CaCO₃ + H₂O | Nothing — the wall does this. The lime turns back to limestone, growing crystals that lock the pigment in. The paint becomes stone. |
The cycle is a closed loop, and this final return to limestone — with the pigment particles caught in the freshly grown calcite — constitutes the entire binding of a buon fresco. There is no glue because none is needed: the stone re-forms around the colour.
### ⚠ CANON SIDEBAR — QUICKLIME AND WET LIME ARE CAUSTIC
Slaking quicklime (CaO + water) is violently exothermic — it boils, spits, and can shatter its vessel; the dust and the resulting slaked lime are strongly caustic alkali that burns skin and, above all, eyes. The Practitioner slakes lime only with eye protection, gloves, covered skin, and a face away from the vessel, adding lime to water (not water to a heap of lime) at arm's length, and never breathing the dust. Wet plaster likewise burns on prolonged contact — fresco painters guard their hands. Treat lime with the same respect as the fire that made it.
Giornata: planning the day's work
Because pigment binds only into wet lime, and lime stays paintable for only a single working day before it sets too far, buon fresco is painted in giornate ("days"): the painter lays only as much fresh intonaco as can be painted before it carbonates beyond use, joining each day's patch to the next along a planned seam.
Protocol 11-A — Planning and executing giornate:
- Cartoon the whole design at full size first (Sub-Volume I), and divide it into day-patches — giornate — sized to what can be painted wet in one session.
- Run the seams cleverly. Place join lines along contours, edges, and shadow boundaries where the seam will hide. Begin each day at the top and work down so drips fall on unpainted wall.
- Transfer the day's portion of the cartoon onto the fresh intonaco (pouncing charcoal through pricked lines, or incising the outlines).
- Lay only that day's intonaco over the dampened arriccio — the area you can finish wet — and paint into it with water-ground, lime-stable pigments (earths and safe minerals; never one the alkalinity of lime would destroy).
- Finish each giornata wet. Whatever is not bound while the lime is fresh must be cut away and re-plastered, or added later as secco (less durable). Plan so the wet work is complete.
- Let the wall carbonate. Over the following weeks the plaster cures to stone (Table 11-1, stage 4), the colour locking permanently into the re-forming limestone.
The small test-panel: prove the method before the wall
The Practitioner does not learn fresco on a cathedral. Prove the whole chemistry on a small portable panel first.
Protocol 11-B — A small fresco test-panel:
- Build a shallow tray with a raised edge to hold plaster (a small wooden box-lid or lime-board).
- Lay a coarse arriccio of matured lime putty and coarse sand; let it firm but not fully dry; key its surface with scratches.
- Lay a thin, smooth intonaco of finer lime putty and fine sand over a patch — only as much as you will paint in the next hour or two.
- Paint into the wet intonaco with a few lime-stable pigments (yellow ochre, red ochre, an earth green, carbon black, lime white) ground in water only. Watch the colour sink in and lighten as the lime draws.
- Set the panel aside to carbonate for days to weeks, then test: a true buon-fresco bond cannot be wiped off with a damp cloth — the pigment has become part of the stone. A colour that does wipe off was not bound, telling you that patch went on too late, into lime already set.
- Iterate. From a few such panels the Practitioner learns the working time of the local lime, the colours that survive its alkalinity, and the feel of painting into a wall — before risking a permanent surface.
Art direction
CHAPTER 12 — INKS AND THE SCRIBE'S MATERIALS
The line that opened this Codex must finally be given its permanent fluid and its proper tool. Where the draughtsman's graphite is provisional, ink is committal: the scribe's mark is meant to be read in another century, and the Practitioner who would keep a civilization's words against the next Reset must know how the two great inks are made and what each does to the page over time. For the discipline of the hand, the Practitioner is referred to Vol XIII, the Scribeship; here we give the materials.
Carbon ink: the permanent black of the ancients
Carbon ink is the oldest and, for sheer permanence, the finest writing ink: simply fine carbon (soot/lampblack) suspended in a water-soluble gum binder, classically gum arabic. Because the colourant is elemental carbon — the indestructible pigment of Chapter 8 — it does not fade, change colour, or chemically attack the page; the inscriptions of the ancient world written in it are as black today as when laid. Its only weaknesses: it sits on the surface (so it can be abraded or, while the gum is soluble, water-smudged) and does not bite into the page as gall ink does.
Protocol 12-A — Carbon (lampblack) ink:
- Gather lampblack — pure soot — from the smoke of an oil lamp or resinous flame onto a cool surface (as in Protocol 8-B). The finer and purer the soot, the smoother and denser the ink.
- Make the gum binder. Dissolve gum arabic in warm water to a light syrup; the gum both binds the carbon to the page and keeps the soot suspended.
- Grind together. Mull the lampblack thoroughly into the gum until no dry specks remain and the ink is a smooth, dense, glossy black. Thorough grinding is the whole quality of the ink — under-ground carbon ink is grey and gritty.
- Adjust. Thin with water for flow; if it beads or cracks when dry, too much gum; if it powders or smudges off, too little. Aim for an adherent matte-to-satin black.
- A trace of preservative (a clove, a little vinegar) guards the gum from mould in storage.
Oak gall ink: the ink that bites the page
Iron gall ink was the dominant writing and drawing ink of the West for well over a millennium — the ink of the manuscripts, the charters, the old masters' pen drawings. Unlike carbon ink it is made by a true chemical reaction: tannic/gallic acid (from oak galls) reacts with iron(II) sulphate ("green vitriol") to form a soluble, near-colourless iron–gallate complex that oxidises and darkens to a deep, insoluble black–brown on the page, biting into the fibres so it cannot be washed away. This permanence is its glory — and the seed of its one notorious fault.
Protocol 12-B — Oak gall (iron gall) ink:
- Extract the tannin. Crush oak galls (the tannin-rich growths on oak twigs) and steep them in water (warm, long cold steeping, or a short non-boiling simmer) for a day or more, drawing the tannic and gallic acids into a brown liquor. Strain off the spent galls.
- Prepare the iron. Dissolve iron(II) sulphate (green vitriol) in water.
- Combine. Stir the iron solution into the gall liquor. The mixture darkens — greyish at first, then toward deep black on exposure to air — as the iron–gallate complex forms and oxidises.
- Add gum arabic. Stir in dissolved gum arabic to body the ink, hold the forming pigment in suspension, and improve flow and adhesion.
- Let it mature briefly. The ink writes pale-grey-going-black and darkens fully on the page over hours.
### ⚠ CANON SIDEBAR — THE IRON-GALL CORROSION CAVEAT
Iron gall ink carries a slow, famous flaw the Practitioner must respect: mis-formulated gall ink destroys the very page it is written on. An excess of iron(II) sulphate leaves free iron that catalyses oxidation of the page and forms sulphuric acid, and the ink's inherent acidity embrittles and eats through paper and parchment over decades — the "ink corrosion" that has left holes shaped exactly like the strokes of the writing in many old manuscripts. The safeguards: balance the formula so little or no free iron remains (do not over-add the vitriol); keep the ink from being strongly acidic; and know that a balanced gall ink is far gentler than a vitriol-heavy one. Where the longevity of the support matters most, carbon ink (Protocol 12-A) attacks nothing and is the safer choice. Match the ink to the lifespan you owe the document.
Specification Table 12-1 — Carbon Ink versus Iron Gall Ink
| Property | Carbon ink | Iron gall ink |
|---|---|---|
| Colourant | Elemental carbon (soot) | Iron–gallate complex (chemical reaction) |
| Binds by | Gum sitting on the surface | Reaction biting into the fibres |
| Permanence of colour | Total — does not fade or shift | Permanent; darkens then can brown with age |
| Effect on the page | None — chemically inert | Can corrode/embrittle the page if iron-heavy or acidic |
| Smudge / water resistance | Smudges while gum is soluble | Water-fast once reacted into the page |
| Practitioner's use | Maximum-archival, fragile supports | Crisp permanent line where balanced and the support tolerates it |
Cutting the quill and the reed pen
The ink is nothing without the tool that lays it. The two historical pens — the quill (a flight feather, springy and fine, the West's instrument) and the reed pen (a length of hollow cane, stiffer and bolder, the older Near-Eastern instrument) — are shaped by the same cuts to the same end: a split nib that draws ink to a writing edge by capillary action. Full lettering practice belongs to Vol XIII, the Scribeship; here we need the cut.
Protocol 12-C — Cutting a quill or reed pen nib:
- Prepare the quill (if a feather): clean and harden the barrel (traditionally by curing and a brief heat-tempering in hot sand) so it cuts crisply rather than tearing, and strip the barbs from the gripping length. A reed needs only to be sound, dry, and hollow.
- First cut — the long scoop. With a very sharp blade, make a long, sweeping cut on the underside of the tip, removing a scoop of the barrel/cane to expose the channel and form the underside of the nib.
- Shoulders. Trim a shoulder from each side, tapering the tube toward the point to the nib width you want.
- The slit. Make a short, centred slit up from the tip along the midline. This split is essential — it carries ink to the point by capillary action and lets the two tines spring apart under pressure for line variation.
- The final nib cut. On a hard surface, pen on its back, cut cleanly across the tip to form the square (or obliquely angled) writing edge. A single decisive cut gives a crisp edge; a sawing cut leaves a ragged nib that drags.
- Test and dress. Dip and draw a stroke; the ink should flow evenly and the line break cleanly. If it railroads (two thin lines), the slit is too short or the edge uneven — re-cut the tip. A pen is dressed many times in a session as the nib dulls.
With ink mixed and pen cut, the Practitioner has carried the recording mark of Sub-Volume I all the way to permanence — from the trained eye, through the dug earth, the bound colour, and the prepared wall, to the lasting line set down in ink that another century can read. What the eye sees, the Maker can now make stay. Sub-Volume III takes these same disciplined hands from the flat surface into the worked hide.
SUB-VOLUME III — THE SCULPTOR'S ART: CLAY, STONE, AND FIRE
ME 28 · nam-kù-zu · ART (THE SCULPTOR'S HAND)
The decree of the made thing. Where the draughtsman's discipline of Sub-Volume I taught the Practitioner to fix a likeness in line, the sculptor's hand grants the harder right: to give that likeness mass, to pull a vessel from river mud, a god from a block of limestone, an icon multiplied a thousandfold from a single carved master. Art, in the old lists, was not ornament. It was the power to make a thing that outlives its maker — and clay, stone, and fire are the three doors through which that power is reached.
The draughtsman works in two dimensions and an afternoon. The sculptor works in three dimensions and, often, in geological time. A fired pot is the most durable artifact a culture leaves: pottery is how the archaeologist of Vol XVI dates a layer, because the sherd survives the flood, the fire, and the forgetting that erase wood, cloth, and flesh. A carved stone outlasts the language cut into it. This is why the sculptor's decree sits beside the metalworker's in the recovered arts — both are technologies of permanence, and a people that holds them can speak to its descendants across a dark age in a voice that does not rot.
This sub-volume runs in the order the materials demand. Clay first, because it is everywhere and forgives everything: you will find it in your own ground, process it, and form it before you ever build a kiln. Then the kiln itself — the controlled fire that converts soft mud into stone — and the glazes that seal and color it. Then carving, the subtractive art of wood and stone, where there is no forgiveness and every cut is final. And last, casting: the multiplied form, the method by which one master becomes many, and the sacred image is carried into every household. Work in order; each material teaches the patience the next one requires.
CHAPTER 13 — CLAY: THE FINDING AND THE PROCESSING OF THE GROUND
Clay is decomposed rock — feldspar weathered over ages into plate-like particles so fine that, wetted, they slide across one another and hold any shape you push them into, then lock that shape when fired. Two kinds reach the Practitioner. Primary (residual) clay sits where it formed, on its parent rock; it is pure, pale, coarse, and not very plastic — kaolin, the white clay of porcelain, is the type. Secondary (sedimentary) clay has been carried by water and ground finer along the way, picking up iron and organic matter; it is darker, far more plastic, and lower-firing. The Practitioner finding wild clay almost always finds the secondary kind, and it is the better clay to learn on.
Finding wild clay
Look where moving water has sorted and dropped fine sediment, then where erosion has cut that sediment open: river cut-banks, the bottom of a fresh ditch, a pond margin, the spoil of any excavation below the dark topsoil. Clay reads grey, blue-grey, red, ochre, or near-white; it is slick, not gritty, between wet fingers, and it cuts with a sheen. The field test is in the hand: take a pinch, wet it, and roll it into a thread. If you can roll a thread the thickness of a pencil lead and bend it around your finger without it cracking through, you have plastic clay worth digging. If it crumbles, it is too silty or sandy; it may still serve as temper.
Protocol 13-A — The plasticity tests:
- The thread (ribbon) test. Wet a walnut of clay to firm dough. Roll a thread 3 mm thick; the longer it grows before breaking, the more plastic. Then flatten it to a ribbon over your finger — a clay that ribbons out long and thin without tearing is highly plastic and will form well but shrink and crack more in drying.
- The bend test. Roll a coil the thickness of your finger and wrap it slowly around a dowel of ~20 mm. Plastic clay bends to a full loop with no cracks; lean clay cracks on the outside of the bend. This is the single most useful field judgment of workability.
- The settling jar. Shake a handful of dug material in a tall jar of water and let it stand a day. It layers by weight: sand and grit at the bottom, silt above, clay above that, organics floating. The relative bands tell you what you dug and how much it must be cleaned.
The Critical Insight: Plasticity and drying-strength pull against each other. The slickest, most plastic clays — the ones that ribbon endlessly and throw like silk — shrink most and crack most as they dry and fire. A clay that is slightly less plastic but full of fine sand survives the kiln where a "perfect" plastic clay tears itself apart. The potter's whole art of the clay body is the deliberate ruining of pure clay into something that survives fire.
Processing: from dug earth to working body
Dug clay is full of stones, roots, and lumps. Two roads clean it. The dry road is faster for hard, dry-dug clay; the wet road (slaking) is surer and gives the finer body.
Protocol 13-B — Slaking and levigation (the wet road):
- Dry the raw clay fully, then break it to fragments no larger than a thumb. Bone-dry clay slakes; damp clay only turns to sticky lumps.
- Slake. Add the dry fragments to the water, never the reverse, in a non-reactive tub, and let them collapse undisturbed for a day. The clay drinks and falls apart into a smooth slurry without stirring.
- Blunge — stir hard to a creamy, lump-free slip the consistency of thin paint.
- Sieve. Pour the slip through a sieve to remove roots and stones — start coarse (window screen, ~2 mm) and finish through a fine cloth (a 60–80 mesh, ~0.2 mm, is ample for earthenware). What passes is clean clay in suspension.
- Settle and decant. Let the sieved slip stand until the clay settles and clear water stands on top; pour off the clear water.
- Stiffen. Spread the thick slip on a plaster slab, a dry unglazed bisque platter, or a cloth over dry sand. These wick water from below without contaminating the clay. Turn the clay as it firms.
- Wedge when it reaches firm-dough consistency — knead it like bread, by the ram's-head or spiral method, 30–50 turns, to drive out every air pocket and align the particles evenly. Air left in the body is a steam bomb in the kiln (Chapter 14). Wedged clay cut with a wire shows a uniform face with no holes.
- Age. Bag the wedged clay airtight and let it rest weeks to months. Aging lets water penetrate every particle and lets benign bacteria render the clay more plastic. Old clay throws better than fresh — the one place in this Codex where rot improves a material.
Art direction
Tempering: building the clay body
Pure clay shrinks too much and cracks. Temper (also called filler or grog) is non-plastic material added to open the body, let water and steam escape during drying and firing, reduce shrinkage, and resist thermal shock. The two field tempers are sand (clean, sharp, sieved — never rounded beach sand, never salty) and grog (fired clay, crushed and screened — broken bisque or old sherds ground to grit). Grog is best because it is the same material, already shrunk to its final size. Organic tempers (chopped grass, dung, crushed shell) were universal in ancient low-fire pottery; they burn out leaving pores that make a light, thermal-shock-resistant body — the classic cooking-pot temper.
Specification Table 13-1 — Clay bodies by use
| Body | Composition (by volume) | Maturing range | Use | Notes |
|---|---|---|---|---|
| Coarse cooking body | 70% wild clay + 30% sand or crushed shell | Cone 010–08 (~900–950°C) | Pots for direct fire | Open body survives thermal shock; never glaze the fire face |
| General earthenware | 80% wild clay + 20% fine grog | Cone 08–04 (~950–1060°C) | Tableware, storage, tiles | The everyday body; porous unless glazed |
| Smooth throwing body | 85% sieved clay + 15% fine grog (60s mesh) | Cone 06–03 (~1000–1100°C) | Wheel-thrown vessels | Plastic and forgiving; fine surface for slip |
| Sculpture / handbuilding body | 65% clay + 35% coarse grog (mixed mesh) | Cone 04–1 (~1060–1150°C) | Large forms, relief, figures | Heavy grog resists slumping and cracking in thick sections |
| Pit-fire raw body | 75% wild clay + 25% sand + a little fine grog | Bonfire to ~700–850°C | Burnished pit-fired ware | Tolerates the bonfire's brutal, uneven heat |
Your Commitment: You will keep one bagged, aged, wedged body of known recipe on the bench at all times, and you will write its recipe on the bag. The potter who blends by guess rebuilds her kiln's heartbreak with every load. A clay body is a formula; treat it as the Artificer of Vol I treats an alloy — measured, recorded, repeatable.
CHAPTER 14 — FORMING: THE HAND, THE COIL, THE SLAB, AND THE WHEEL
Clay is formed by four methods, and the Practitioner learns them in this order because each builds the hand-knowledge the next requires.
Pinch. The oldest method: a ball of clay opened with the thumb and squeezed between thumb and fingers, wall thinned and raised by rotation. Pinch a pot for the direct understanding of how clay moves — how far a wall stretches before it cracks, how the rim dries first. Every potter's hands begin here.
Coil. The method of the world's great pottery before the wheel, and the method of any vessel too large to throw. Ropes of clay are rolled, stacked, and welded — each coil scored and slipped onto the last, then smeared together inside and out so no seam remains. Coiling builds storage jars, sculpture, and any asymmetric form. Its discipline is patience: build only as high as the wet wall will bear its own weight, then let it firm before adding more, or the pot slumps.
Slab. Clay rolled to even sheets (over cloth, between thickness sticks, ~6–10 mm) and joined like carpentry into boxes, tiles, and faceted forms. Slabs are joined at leather-hard for crisp edges or soft for organic ones; every join is scored, slipped, welded, and reinforced inside with a thin coil pressed into the seam. Slab work is where the draughtsman's drawing discipline pays off — a slab vessel is built from a flat pattern, exactly as the leatherworker of Sub-Volume IV cuts from a pattern.
Protocol 14-A — A scored-and-slipped join (all hand-building): (1) Both faces to be joined are leather-hard and matched. (2) Score both faces with a needle or serrated rib, a deep crosshatch. (3) Wet both scored faces with thick slip of the same body. (4) Press firmly together and weld — drag clay across the seam with a wooden tool until the join vanishes, then smooth. (5) On the inside, press a thin coil into the corner and blend it both ways. A join that is merely smeared, not welded, will open in drying or firing every time.
The kick wheel
The potter's wheel converts the coil's patient hours into seconds, and the kick wheel — a heavy flywheel spun by the foot, leaving both hands free — is the form the Practitioner can build and the form that does not depend on the electrical grid of a fallen age.
Protocol 14-B — Kick-wheel build (overview):
- Flywheel. A heavy disc, 500–700 mm diameter, 60–100 mm thick, 30–60 kg — the more mass, the steadier and longer the spin. Cast it from concrete in a ring mold around a steel shaft (25–30 mm), or laminate it from hardwood. Mass low and central is the whole secret.
- Shaft and bearings. A vertical steel shaft carries the flywheel at the bottom and the wheel-head (a flat disc, ~300 mm, where the clay is centered) at the top. The shaft turns in two bearings: a thrust bearing at the bottom taking the full weight (a hardened ball in a greased socket serves), and a guide bearing at the top holding it plumb. The shaft must run dead-vertical and with no wobble — check with a level and a scribed test.
- Frame. A rigid timber frame (cross Vol VI — The Builder's Codex for the joinery) holds the bearings in line and carries a seat and a splash tray around the wheel-head. Rigidity is everything; a frame that flexes throws an eccentric pot.
- Kicking. The potter sits, kicks the flywheel rim to speed with the instep, and works the clay above on the head while the stored momentum carries the spin.
Throwing basics
Protocol 14-C — Throwing a cylinder (the root form of all thrown ware):
- Center. Slam a wedged ball onto a damp head. Wet hands and clay. Brace your elbows on your thighs — the body, not the arm, is the lathe-rest — and with steady inward and downward pressure force the spinning clay into a true, motionless cone, then dome. Centered clay runs silent and still under wet hands; uncentered clay slaps. Nothing is possible until this is mastered, and it is the hardest hour in pottery.
- Open. With the wheel spinning, press both thumbs (or braced fingers) straight down into the center, stopping a finger's width from the head, then pull outward to open the floor to width. Check floor thickness with a needle.
- Pull the wall. Pinch the wall between a finger inside and a knuckle outside near the base and raise your hands slowly and evenly up the spinning wall, thinning it and lifting the clay upward into height. Three or four steady pulls raise a cylinder. Keep it wet; keep the rim compressed and true between fingers each pass.
- Shape, then finish. From the true cylinder, belly out a bowl or collar in a neck. Compress the rim. Clean the base, cut free with a wire, and lift.
The Critical Insight: Every thrown form is a cylinder first. The potter who can pull a tall, even, true-walled cylinder can make any vessel; the one who cannot will fight every pot. Spend the first month on cylinders alone — height and evenness, nothing else — and the rest of throwing unfolds from that single skill.
Art direction
Drying discipline: leather-hard, bone-dry, and why pieces explode
A formed piece is mostly water and must lose it evenly and slowly or it tears itself apart. Two named states govern all later work:
- Leather-hard: stiff, cool to the touch, no longer plastic but still damp — the clay has lost its forming water but not its chemical water. This is the state for trimming, carving, joining slabs, attaching handles, and burnishing. It dents but does not deform.
- Bone-dry (greenware): fully air-dried, pale, room-temperature, no cool damp feel — but still chemically fragile and water-soluble. Only bone-dry ware may enter the kiln.
Protocol 14-D — Drying without cracks:
- Dry slowly and evenly, under loose cloth or plastic, away from sun, stove, and draft. Rims and edges dry fastest and crack first; covering slows them to match the thick base.
- Dry pieces on a surface that lets the bottom breathe (a slatted rack, a bisque bat), and turn them so the base dries with the walls.
- Thick-and-thin in one piece is the enemy — a thick base on a thin wall cracks at the join. Throw and build to even thickness for this reason.
- Let large or thick work dry for weeks. There is no hurrying a thick wall.
Why pieces explode in the kiln. Two failures, both fatal, both preventable:
- Trapped water → steam. Any water left in the clay — forming water from incomplete drying, or chemically bound water that leaves around 100–200°C, or water in a hidden air pocket — turns to steam in the fire. Steam's volume is vast; trapped, it blows the piece apart and showers the kiln. Cure: load only bone-dry ware, and bring the kiln up slowly through the boiling zone — a long, gentle "water-smoking" period below 200°C, vents open, before any real heat.
- Trapped air. A bubble left from poor wedging, or a sealed hollow form with no vent hole, expands and bursts. Cure: wedge out all air; pierce every fully enclosed form with a hidden pinhole so trapped air and steam escape.
Your Commitment: You will never fire a piece you are not certain is bone-dry, and you will never seal a hollow form without a vent. One exploded pot can scar an entire kiln-load with its shrapnel; the discipline of patience here protects not one piece but all of them.
CHAPTER 15 — THE KILN: THE CONTROLLED FIRE
Firing is the irreversible step: below about 600°C the chemically bound water leaves and the clay becomes true ceramic — it can never again be slaked back to mud. Higher still, the body begins to vitrify, its particles partly fusing to glass, growing dense, hard, and watertight. The kiln's whole purpose is to reach and hold a target temperature evenly, and to do it slowly enough that the ware survives the journey.
Pit firing: the first fire
The bonfire is the oldest kiln and still the right first fire. It reaches only 700–900°C, makes porous low-fired ware, and gives the smoky flashed surfaces that no controlled kiln can imitate.
Protocol 15-A — Pit firing:
- Dig a pit ~600 mm deep and as wide as the load needs (a metre serves a first firing).
- Pre-warm the ware all the way through beside a separate fire, or in the sun, for hours — pottery placed cold into flame thermal-shocks and cracks. Better still, hold the loaded pit at a smoulder overnight.
- Bed and stack. Lay a base of dry sawdust or fine dung, nest the bone-dry pots in it not touching, surround and cover them with combustibles — sawdust, dung, bark — packed close, and over that build a tepee of split wood.
- Add for color. Materials laid against the pots flash their surfaces: copper carbonate gives reds and greens, salt gives orange flashing, banana skins and seaweed give blacks and greys, iron-rich dung gives warm fire-clouds.
- Fire slowly, then hard. Light the top and let it burn down into the pit, so the ware heats gradually as the fire descends. Once the wood is established, the pit reaches temperature over several hours.
- Cover and slow-cool. When the wood has burned to coals, cap the pit with sherds, sheet metal, or earth to choke it down and trap smoke against the pots. Cool slowly — a full day. Ware pulled hot cracks. Unbury, wash, and (for porous pit ware) finish with wax or milk-protein burnish for water resistance.
The updraft wood kiln
For repeatable higher firing — true earthenware and stoneware — the Practitioner builds a kiln. The simplest reliable design is the updraft kiln: a firebox below, a ware chamber above separated by a perforated floor (the bag wall and flue holes), and a chimney above that pulls flame and heat up through the ware and out. It is essentially a chimney with a room in its throat.
Specification Table 15-1 — A small updraft wood kiln (dimensioned)
| Element | Dimension | Material / note |
|---|---|---|
| Ware chamber (internal) | 600 W × 600 D × 750 H mm | ~0.27 m³ usable; one good load |
| Wall construction | 230 mm thick | Hard-fired brick inner skin + insulating outer skin (soft brick, or brick + earth) |
| Firebox | 600 W × 350 D × 450 H mm, below chamber | Stoked from a front mouth; sloped grate |
| Perforated floor (bag wall) | Brick floor with ~30% open area in flue gaps | Spreads flame; gaps sized to pull heat evenly front-to-back |
| Chimney | 230 × 230 mm internal, 2.5–3.5 m tall | Taller chimney = stronger draw = higher attainable temperature |
| Damper | Sliding kiln-shelf or steel plate at chimney base | Controls draw, atmosphere, and cooling rate |
| Spy holes | Two, 25 mm, plugged | One to read cones, one to read the firebox |
| Door | Bricked up dry each firing, clay-luted | Loose-laid brick, mud-sealed; never mortared shut |
| Foundation | Level, dry, non-combustible, on firm ground | A wet or settling base cracks the kiln |
Fire it from a small establishing flame, raising temperature over hours: a long slow water-smoking below 200°C with the door cracked, then steady climb, stoking little and often, reading the cones through the spy hole. A well-drawing updraft kiln of this size reaches cone 04–1 on hardwood in 8–14 hours.
Specification Table 15-2 — Pyrometric cone reference
The potter does not read temperature directly; she reads heat-work — the combined effect of temperature and time — with pyrometric cones, small angled pyramids of ceramic blended to bend and slump at a known heat-work. When the tip of the target cone touches the shelf, the firing is done. Approximate end-point temperatures (at a normal climb rate):
| Cone | °C | °F | Range / typical ware |
|---|---|---|---|
| 010 | 900 | 1652 | Low earthenware, soft bisque, lustres |
| 08 | 950 | 1742 | Earthenware, low glazes |
| 06 | 1000 | 1832 | Common bisque firing, earthenware glaze |
| 04 | 1060 | 1940 | Earthenware glaze, terracotta |
| 03 | 1100 | 2012 | High earthenware |
| 1 | 1150 | 2102 | Low stoneware / mid-range |
| 4 | 1190 | 2174 | Mid-range stoneware |
| 6 | 1220 | 2228 | Mid stoneware (common glaze body) |
| 8 | 1250 | 2282 | Stoneware |
| 10 | 1285 | 2345 | High stoneware, many ash glazes, reduction |
(Cone numbers count "down" from 022 toward 0, then "up" from 1 to 14 — the higher the firing, the lower the leading zero falls away and the higher the plain number climbs. Memorize the landmarks: 06 bisque, 04 earthenware glaze, 6 and 10 stoneware.)
Reduction versus oxidation
The kiln's atmosphere transforms the ware as much as its temperature.
- Oxidation: ample air, complete combustion, a clean clear flame. Metals in clay and glaze stay in their oxygen-rich state — iron fires tan, rust, and amber; copper fires green. Electric kilns are always oxidizing; a well-vented updraft wood kiln runs oxidizing by default.
- Reduction: air starved deliberately (damper closed in, firebox choked) so the hungry fire pulls oxygen out of the clay and glaze. Iron reduces to grey-green celadon and the warm "toasted" stoneware flashes; copper reduces to deep ox-blood reds. Reduction is a stoneware art (cone 6–10), demanding and smoky, and worth a lifetime's study.
Protocol 15-B — Kiln safety (standing orders):
- Never fire enclosed. A wood kiln makes carbon monoxide and vents flame; fire outdoors or under a high open-sided roof with clear air. CO is silent and deadly.
- Clearance and ground. Non-combustible base, generous clearance to anything that burns, a charged water source and a beater to hand. Sparks travel on the chimney draft.
- Slow through the water zone. Rushing below 200°C explodes ware and can spall the brick.
- Eyes against radiant heat. Reading cones at high fire, shield the eyes; the glow at cone 10 carries enough infrared to burn the cornea over time.
- Cool slowly and never open hot. Cracking the door above ~200°C dunts the ware — cooling cracks — and thermal-shocks the kiln. Let a stoneware firing cool a full day or more.
- Lift with sense. Kiln furniture and green ware are heavy and awkward; the leatherwork apron and gloves of the maker's bench earn their place here.
Art direction
CHAPTER 16 — GLAZES AND SURFACES
A glaze is a layer of glass fused to the clay surface — it seals porous ware watertight, hardens it against wear, and carries color. But the Practitioner reaches glaze last, because the oldest and safest surfaces need no glaze at all, and because one category of glaze is forbidden in this Codex outright.
CANON SIDEBAR — THE LEAD PROHIBITION. For four thousand years, from the potters of Mesopotamia to the redware of the colonial age, the easiest bright glaze was a lead glaze: galena or lead oxide melts low, flows clear and brilliant, and forgives every error. It also poisons. Lead leaches from the fired glaze into anything acidic — vinegar, fruit, wine, brine — and accumulates in the body as a cumulative neurotoxin: the long, quiet harm catalogued in Vol V (The Body) and named again wherever the recovered arts brush against the old poisons of convenience. This Codex forbids lead glaze on any surface that contacts food, drink, skin, or breath — without exception, and the prohibition is permanent. It is one of the rare lines the recovered arts draw in absolute terms, beside the Artificer's ban on breathing metal fume. The substitutes are complete and safe: for a low-fire melt, use a boron flux (a frit, or natural borate) in place of lead; for a glassy seal without any glaze, use terra sigillata and burnishing; for a true high-fire glassy surface, climb to stoneware temperature where ash and feldspar melt of themselves. No effect lead gives is unobtainable safely. The convenience is not worth a single poisoned child, and the Practitioner who carries this art carries the prohibition with it.
Slip decoration
Slip is liquid clay — the simplest decoration, applied to leather-hard or bone-dry ware before firing. White or colored slips (clay stained with iron for red-browns, with copper for greens, with cobalt for blue, with manganese for purple-black) are painted, poured, trailed from a fine nozzle (slip-trailing), or carved through a contrasting coat to reveal the body beneath (sgraffito — the draughtsman's line, cut in clay). Slip must match the body's shrinkage or it flakes; use the same clay, stained.
Burnishing
Before glaze existed, potters made earthenware shine and partly seal by burnishing: rubbing the leather-hard surface with a smooth stone, bone, or back of a spoon until the fine clay platelets lie flat and reflective. Burnished and pit-fired ware (Chapter 15) carries a soft, deep luster — the surface of the oldest fine pottery on earth. It is not waterproof; a low fire preserves the sheen (above ~900°C the burnish dulls), and a final rub of wax or oil deepens it. Burnishing over a coat of terra sigillata gives the highest polish of all.
Terra sigillata
Terra sigillata — "sealed earth," the surface of Roman redware and Greek black-figure — is the finest fraction of a clay, separated by settling and applied as a gossamer slip that burnishes to a near-glaze sheen at low fire, with no glaze and no risk.
Protocol 16-A — Making terra sigillata:
- Blend a slick clay (a red earthenware or ball clay) with plenty of water and a pinch of deflocculant (a little wood-ash lye, or washing soda) — the deflocculant keeps the finest particles suspended.
- Let it settle a full day in a tall jar. It separates into three: heavy grit at the bottom, the prized ultra-fine terra sigillata in the cloudy middle, clear water at top.
- Siphon off the clear water, then carefully siphon off the cloudy middle layer — that is your sigillata. Discard the heavy bottom.
- Concentrate it to the body of thin cream and store sealed.
- Apply thin coats to bone-dry ware with a soft brush or cloth and burnish each coat with a soft cloth before it fully dries. Fire low (cone 010–06). The result is a hard, slightly glossy, food-safe sealed surface in the clay's own color.
Ash glaze (safe high-fire glaze)
The first true glaze in history was an accident of the wood kiln: wood ash settling on stoneware at high heat melts into a glassy skin. The Practitioner makes it deliberately, and it is entirely safe — no lead, only plant ash and rock.
Protocol 16-B — A simple ash glaze (cone 8–10 stoneware):
- Collect and prepare wood ash. Burn untreated hardwood to clean grey ash. Sieve out charcoal. Wash it carefully — ash is caustic (it is lye); soak, settle, decant the lye water two or three times, gloved and goggled, then dry. Washing removes the harshest alkali and makes the glaze reliable.
- A starting recipe by volume: roughly 40% washed wood ash, 30% feldspar, 30% clay (the same body clay serves), blended with water to thin cream. This is a true high-fire glaze that melts from its own ingredients with no added flux.
- Test before you trust. Glaze chemistry is endless; every ash is different. Make test tiles, fire them in the load, record the recipe and result. Adjust: more ash flows and runs more; more clay stiffens and matts.
- Apply to bisque ware by dipping or brushing an even coat, keep it off the foot (glaze glues pots to the shelf), and fire to stoneware temperature, oxidation or reduction. Reduction (Chapter 15) turns the iron in the ash and clay to soft celadon greens.
The Critical Insight: Every glaze is a balance of a glass-former (silica), a flux that makes it melt at a reachable temperature, and a stabilizer (alumina, from clay) that keeps it from running off the pot. Lead was only ever a cheap, poisonous flux. Boron at low fire and wood-ash-plus-feldspar at high fire are fluxes that harm no one. Learn the three roles, and you can read — and build — any glaze without ever touching the old poison.
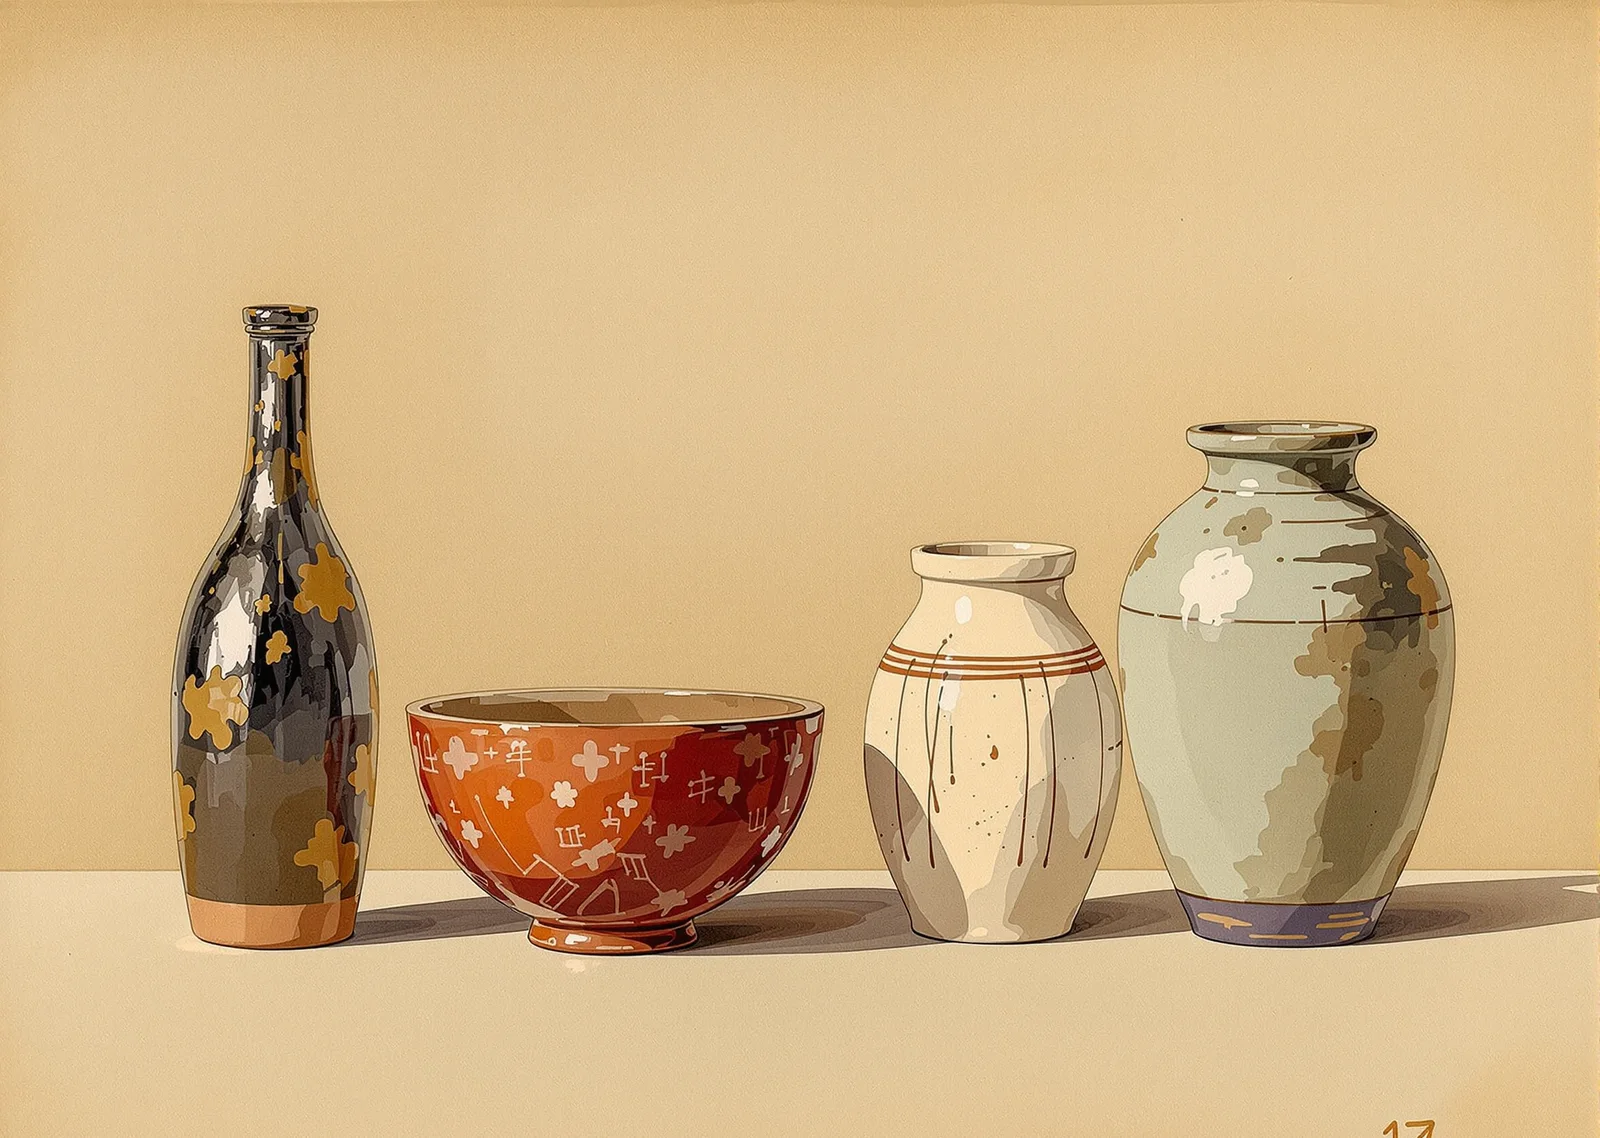
Art direction
CHAPTER 17 — CARVING: THE SUBTRACTIVE ART OF WOOD AND STONE
Clay is additive and forgiving; carving is subtractive and final. You cannot put back what you cut away, so the carver's whole discipline is reading the material before the tool touches it, and removing waste in the right order — large to small, rough to fine, always leaving stock to refine.
Wood relief: the grain strategy
In relief, the design stands proud of a lowered ground. Wood's behavior is governed entirely by grain direction, and the carver who ignores it tears the work.
- With the grain ("downhill"): the tool slices clean. Always read which way the fibers rise and cut so the blade lays them down, not lifts them.
- Against the grain ("uphill"): the tool digs under fibers and tears out chunks below the surface. Reverse direction the instant the cut roughens.
- End grain: hardest; needs the sharpest tool and lightest cut. It bruises and crumbles if forced.
- Short grain: a thin projection running across the grain has almost no strength and snaps. Design relief so delicate parts run along the grain; orient the whole panel so the fragile elements are supported by fiber length.
Choose close, even-grained hardwoods for fine relief — lime/basswood (the carver's wood, soft and grainless), pear, walnut, cherry. Wide-grained woods (oak, ash) carve boldly but resist fine detail.
Specification Table 17-1 — Wood-carving tools
| Tool | Form | Use |
|---|---|---|
| Straight gouge | Curved cutting edge, various sweeps (flat No.3 to deep No.9) | The primary carving tool; removes ground, models curves |
| V-tool (parting tool) | V-section, 45°–60° | Outlining the design, cutting fine lines, detail |
| Skew chisel | Straight edge, angled corner | Cleaning corners, flat grounds, fine paring |
| Straight chisel / firmer | Straight edge | Bosting, flat work, stop-cuts |
| Fishtail gouge | Splayed thin neck | Reaching into tight corners |
| Bent / spoon gouge | Cranked shaft | Hollowing deep concave areas a straight tool can't reach |
| Veiner | Tiny deep U | Fine veins, hair, texture |
| Carver's mallet | Round turned head, ~400–600 g | Drives gouges for waste removal; round head strikes from any angle |
Sharpening is the carver's first and last duty, and the standard is set in Vol I (The Artificer's Codex) — the same progression of stones from coarse to fine to a leather strop charged with polishing compound, the same test (a sharp edge will not reflect light along its line; it is invisible). A gouge is honed on a shaped slipstone inside the sweep and a flat stone outside, the bevel kept true. A dull carving tool is dangerous — it needs force, slips, and tears wood and hand alike. Stop and strop the moment the cut grays.
Protocol 17-A — Cutting a relief (order of work):
- Transfer the design to the planed panel (the draughtsman's grid of Sub-Volume I).
- Outline the design with the V-tool or by setting in — vertical stop-cuts with gouges matched to the curves, inside the line, never on it.
- Boste (waste) the ground down to depth with gouge and mallet, working toward the stop-cuts so chips break free at the outline, never under the design.
- Level the ground with flat gouges and the skew; texture it (a punched or stippled ground throws the relief forward).
- Model the raised forms — round, undercut slightly for shadow, refine high to low.
- Detail last with veiners and the V-tool. Finish from the tool where you can; sanding blurs crisp carving and fills the grain with dust that dulls the next cut.
Stone: the subtractive art at its hardest
Stone carving removes material by fracture, not slicing — every blow spalls a chip. The Practitioner selects stone by hardness, because hardness dictates every tool and every hour.
Specification Table 17-2 — Carving stone by hardness
| Stone | Type | Mohs hardness | Working character |
|---|---|---|---|
| Soapstone (steatite) | Metamorphic (talc) | 1–2.5 | Carves with knife and rasp; for first work and fine detail |
| Alabaster | Gypsum | ~2 | Soft, translucent, water-soluble — indoor work only |
| Limestone | Sedimentary | 3–4 | The great building-carving stone; even, predictable, takes detail |
| Marble | Metamorphic limestone | 3–4 | Limestone recrystallized; harder, denser, holds the finest edge — the sculptor's stone |
| Sandstone | Sedimentary | 6–7 (grain-bound) | Gritty, abrasive on tools, bold forms; quality varies with its cement |
| Granite | Igneous | 6–7 | Extremely hard; demands carbide or pneumatic tools and great patience |
For hand work, begin in limestone or marble — hard enough to hold detail, soft enough to cut with hand steel.
The pointing progression — the carver's coarse-to-fine logic in steel:
- Point (punch): a pointed chisel struck hard, used at a low angle to bruise and remove waste fast in the roughing stage. Never drive a point straight in near the finished surface — it cracks deep.
- Claw (tooth) chisel: a toothed edge that crosses the bruised surface, knocking down the high points to an even, controlled level. The claw is where the form is found; it removes the point's damage and refines toward the surface.
- Flat (bull-set / drove) chisel: the straight edge that cleans the claw marks to a true smooth plane and cuts crisp detail and edges. The final shaping tool before abrasion.
- Abrasives: rifflers (shaped rasps), then coarse-to-fine grit and water, polish the marble to its final sheen.
Always work across the form, not into it, and leave stock — once a chip is gone it cannot return, so approach the surface from above, slowly, claw before flat. Stone carving is the most patient art in this sub-volume and the most permanent: a marble cut true outlives every other thing the Practitioner will make.
Letter cutting
Inscription is where carving meets the draughtsman's letterform (Sub-Volume I). The standard incised letter is the V-cut: a channel cut at ~60°, deepest at the stroke center, the two cut faces meeting in a clean line at the bottom. In stone: draw the letters, define the center line, then chisel each face down to it from both sides at a constant angle so light catches the V and reads the letter as shadow. In wood: the V-tool roughs the channel and a chisel pares the faces clean. Crisp serifs and even depth are the whole craft; a V-cut letter, well made, is legible for two thousand years — which is precisely the point, and precisely the dup šimati's purpose in stone.
Art direction
CHAPTER 18 — CASTING AND THE MULTIPLIED FORM
Everything before this chapter made one thing. Casting makes many — it is the technology by which a single carved or modeled master becomes a hundred identical copies, and it is therefore the technology of distribution: the tile that paves a city, the cup that fills a market, the sacred image that reaches every household. The principle is constant: make a mold — a negative of the form — and fill it repeatedly.
Press molds
The simplest mold. A shape is carved or modeled, a mold is taken of it (in plaster, or in fired clay), and soft clay is pressed into the negative by hand, peeled out, and finished. One-piece press molds make tiles, plaques, relief ornament, and the faces of figures — any form with no undercuts, so the clay lifts free. The ancient world tiled its temples and stamped its votive plaques by the thousand this way. Dust the mold with fine grog or cornstarch as a release; press an even thickness of clay firmly into every detail; let it stiffen to leather-hard in the mold (the clay shrinks as it dries and releases itself), then lift, trim, and join press-molded parts into whole forms.
Plaster molds
Plaster of Paris (gypsum, calcined and reground — itself a product of the kiln) is the mold material of the casting bench, because it sets hard from a liquid, captures every detail, and is porous — it drinks water from slip, which is the secret of slip casting.
Protocol 18-A — Mixing and pouring plaster:
- Measure by weight for repeatability (roughly 70 parts water to 100 parts plaster by weight for pottery plaster, but follow the plaster's own ratio).
- Add plaster to the water — sift it in steadily and let it slake undisturbed two or three minutes until islands of dry plaster stand at the surface. (As with clay: solid into water, never the reverse.)
- Mix by hand under the surface, smoothly, without whipping in air, until it thickens to thin cream.
- Pour at once over the model in its retaining wall ("cottle"), the model coated with a release (soft soap or oil) so the plaster does not bond to it. Vibrate gently to bring bubbles up.
- Wait. Plaster warms as it sets (an exothermic reaction — a useful sign), goes off in minutes, then cures and dries over days. Use it only fully dry, or it will not absorb slip.
Multi-part molds (for forms with undercuts) are built in sections divided along parting lines so each piece draws away cleanly, keyed with natches (registration notches) so they reassemble exactly.
Slip casting
Slip casting fills a dry plaster mold with casting slip — clay suspended in a minimum of water by a deflocculant (sodium silicate and soda ash), so it pours like cream at low water content. The porous plaster sucks water from the slip at the mold wall, depositing a layer of firm clay that thickens with time.
Protocol 18-B — Slip casting:
- Assemble and band the dry mold. Pour it brim-full of well-mixed casting slip.
- Wait for the wall to build — minutes, judged by experience; the slip level drops as the mold drinks, so top it up.
- Pour out the still-liquid center when the wall has reached thickness. A hollow shell of clay remains, lining the mold.
- Let it firm and shrink; the cast releases from the mold as it stiffens.
- Open, lift, fettle — trim the seam lines left by the parting lines, sponge smooth, dry, and fire. One mold yields casting after casting, all identical. This is industrial multiplication achievable on a field bench.
Lost-wax casting (the metal cross-reference)
The supreme casting method belongs properly to metal and is given in full in Vol I — The Artificer's Codex (bronze and the lost-wax method); the sculptor must know its shape because so many sculpted forms end in metal. The model is made in wax, invested in a clay or plaster-and-grog mold, the whole heated so the wax melts and runs out (is "lost"), leaving a perfect cavity, into which molten bronze is poured. The wax can itself be cast from a master in a flexible mold, so even unique-seeming bronzes are multiplied from one sculpted original. Where the sculptor models the wax, the Artificer pours the metal; the two decrees meet in the mold, and the great bronzes of the recovered world are the offspring of that meeting.
CANON SIDEBAR — THE MULTIPLIED ICON. The single most consequential thing the casting arts ever did was multiply the sacred image. From the first votive figurines pressed by the thousand in the temple workshops of Sumer, to the mold-made terracotta gods sold at every shrine of the classical world, to the cast bronze icons and the stamped pilgrim badges of later ages, the holy image was never, for most of history, a unique object — it was an edition. A master modeler (the kù-zu, the one of the knowing hand) carved or modeled the archetype once; the workshop took molds; and the god went out into ten thousand households in identical multiples, each one as real to its keeper as the master in the sanctuary. This is the quiet engine beneath the decree of Art: the Sculptor's hand is not only the hand that makes the one true image but the hand that reproduces it faithfully, so that a whole people may hold the same face. Across every Reset in the chronology of Vol XVI, it is the multiplied, buried, scattered image that survives — no single statue, but the edition, salted by the thousand into the ground, too numerous for any fire to erase. The Practitioner who masters the mold inherits this power and its burden: to decide which image is worth multiplying, and to make the master so true that ten thousand faithful copies carry the meaning intact. The draughtsman fixes the likeness; the sculptor gives it mass; the mold gives it numbers; and numbers are how an image outlives the age that made it.
Art direction
The ground has given its clay, the wheel and the hand have raised the form, the kiln has turned mud to stone, the safe surfaces have sealed and colored it, the gouge and the point have freed the figure from wood and from marble, and the mold has multiplied the made thing into an edition that no single fire can erase. The Sculptor's hand is the decree of permanence: of every art in this Codex, it leaves the longest record, because a fired sherd and a cut stone outlast the language, the people, and the flood. Sub-Volume IV takes up the second skin — the leatherworker's decree, where a living hide is converted into the most versatile material the maker owns.
The decree of Art is carried in clay, in stone, and in fire. Let the made thing outlive its maker.
SUB-VOLUME IV — THE LEATHERWORKER'S DECREE
ME 45 · nam-ašgab · CRAFT OF THE LEATHERWORKER
The decree of the second skin. The Agrarian of Vol VII raises the beast; the slaughterer takes its flesh for the table and its tallow for the lamp; and what remains — the hide, that great sheet of skin that held the animal's whole life against the world — would rot to nothing in a week were it not for this decree. The leatherworker's power is the power to arrest decay: to take a thing that is, at the moment of flaying, already dying, and turn it into a material that outlasts the creature it came from by a hundred years. Leather is the second skin — the skin a man wears who was not born to it, the skin a vessel wears to hold water, the skin a bellows wears to breathe fire. In the old lists the leatherworker stood close to the smith, for both are keepers of made permanence; but where the smith fixes form in cold metal, the leatherworker fixes life-supple strength in a thing that still bends, still breathes, still warms to the hand. To tan is to win a wrestling match against rot — and the prize is a material no loom and no forge can equal.
The Practitioner approaching this craft must first unlearn a comfortable lie: that leather is a substance. It is not. Leather is a condition — a particular chemical state into which raw animal skin is driven and in which it is thereafter held. Raw skin is protein and water; left alone, the water's own bacteria eat the protein and the skin liquefies into stinking glue. Dried hard without treatment, that same skin becomes rawhide — board-stiff, horn-hard, and ruined the instant it wets. The whole art of this sub-volume lies between those two failures: to remove the water that feeds rot and to bind the protein fibers so they will never again either putrefy or set hard, but remain forever flexible, strong, and shed of water. Every method in Chapter 20 — bark, brain, alum — is a different chemistry for accomplishing that single transformation, and the leather each yields differs because the chemistry differs.
Work this sub-volume in the order the hide itself dictates. The skin first: how it is taken, saved from the rot that begins at the knife, and read for its grain and its splits. Then tanning, the heart of the craft — the long conversions that turn skin to leather. Then the bench, its tools, and the economy of the cut. Then construction, where leather becomes goods: the saddle stitch that outlives the machine, the rivet, the burnished edge. Then the essential goods themselves, pattern by pattern. And last, the two cousins of tanned leather that the decree also governs — rawhide, the skin made hard on purpose, and parchment, the skin made into a page, which carries this Codex's own words and binds this sub-volume to the scribes of Vol XIII. Master them in sequence; the hide teaches the tanning, the tanning teaches the cut, and the cut teaches everything that follows.
CHAPTER 19 — THE HIDE: FLAYING, CURING, AND THE READING OF THE SKIN
A hide is the largest single organ of the largest animal the Practitioner is likely to process, and it begins to spoil the moment it leaves the body. Heat, the hide's own enzymes, and the bacteria already living on the skin combine within hours to loosen the hair, slip the grain, and — if unchecked through a warm night — rot the skin past saving. The first discipline of leatherwork is therefore not at the bench but at the carcass: the race between the knife and the rot.
Flaying: taking the hide whole and clean
The flayer's whole aim is a hide removed intact, clean, and unscored. Every knife-cut that goes too deep and nicks the skin from the flesh side becomes a hole or a weak point in the finished leather; every patch of flesh and fat left clinging becomes a seat of rot and a refuge for the grease that ruins a tan.
Protocol 19-A — Flaying for leather:
- Bleed and cool first. A hide taken from a properly bled carcass keeps far better; blood left in the skin feeds bacteria.
- Open along the lines. Make the opening cuts down the belly midline and the inside of each leg, cutting from the inside out — knife-edge up, lifting the skin onto the blade — so the cut parts the skin cleanly without scoring the grain side beneath.
- Fist and fell, not blade, where you can. Once the edges are started, separate the hide from the carcass by pushing with the fist and the side of the hand in the loose fascia between skin and flesh. The knife is used only where the skin is tightly attached (along the back, around the head); everywhere else the fist spares the grain.
- Score nothing. A flaying cut that breaks through to the grain side is a permanent fault. Work patiently; a torn hide is the flayer's signature and the tanner's grief.
- Lay it out flesh-up at once and proceed to fleshing and curing without delay. A hide rolled flesh-to-flesh and left warm overnight in summer may be hair-slipped and half-spoiled by dawn.
Fleshing: the removal of the membrane
Fleshing strips from the flesh side every scrap of clinging flesh, fat, and the tough subcutaneous membrane (the fell). This is done over a smooth, rounded fleshing beam — a half-log or a curved length of timber set at a slant, the worker leaning his weight to pin the hide — using a two-handled fleshing knife, drawn in long strokes that shave the membrane away without cutting the skin. Fleshing serves three ends: it removes the grease and flesh that rot and that bar the tan; it opens the flesh side so curing salt and tanning liquor can penetrate evenly; and it reveals the true thickness of the skin. A hide left unfleshed tans only on its faces and stays raw in its heart.
The Critical Insight: Grease is the tanner's secret enemy. Fat left in the hide — in unfleshed membrane, in the fatty flank, around the tail — does not tan. It blocks the liquor, it goes rancid, it leaves greasy translucent patches that no later work can correct, and in a bark pit it can stop the tan dead in a whole region of the hide. Half of all tanning failures are grease failures. Flesh the hide as if your finished leather depended on it, because it does.
Curing: arresting the rot for storage
A hide cannot always be tanned the day it is flayed. Curing is the temporary preservation that holds a raw hide stable for days, weeks, or months until it can be tanned. It does not make leather; it only stops the clock. Two roads serve the Practitioner.
Salt curing (the sure road). Salt draws water from the skin by osmosis and makes the remaining water too saline for bacteria. Lay the fleshed hide flat, flesh-up, and cover the entire flesh side with a heavy, even layer of clean salt — generously, a finger's depth, worked into every edge and fold and especially the thick neck and butt. Stack salted hides flesh-to-flesh on a sloped surface that drains the brine away. After a week, shake off the wet salt and re-salt for long keeping. A properly salt-cured hide ("cured flint-dry" or held in heavy salt) keeps for many months and travels well. Cross Vol VII — The Agrarian for the winning and storage of salt itself, which the leatherworker consumes in quantity.
Dry curing (the desert road). In hot, dry, fly-free conditions a thin hide may simply be stretched on a frame and air-dried hard. It keeps indefinitely while dry but must be soaked back ("relaxed") before tanning, and it is vulnerable to insects and to wetting. Dry-salting — a light salt followed by drying — combines the virtues of both and is the best field cure where salt is scarce.
Your Commitment: You will cure every hide within hours of flaying, or you will lose it. There is no tanning a spoiled hide; the grain that has slipped does not come back, and the skin that has begun to rot will tear in the pit. Treat the green hide as the dairyman treats fresh milk — it is perishable on the scale of hours, and the cure is not a chore but a rescue.
The anatomy of the skin: grain, corium, and split
To work leather well the Practitioner must see the skin in section. A hide is three layers, and which layer he keeps decides what leather he holds.
- The grain (epidermis-side surface and upper dermis). The outer face, where the hair grew. Its surface — the grain proper — is dense, smooth, tight-fibered, naturally water-shedding, and beautiful; it is the most valued face of the leather, and full-grain leather (the entire grain surface intact, unsanded) is the strongest and finest, because its fibers are the tightest and run unbroken.
- The corium (the deep dermis). The thick middle, a felt of strong collagen fibers woven in three dimensions. This is the body of the leather and the source of its strength and substance.
- The flesh side and the split. A thick hide can be split through the corium into two or more layers on a splitting machine or, anciently, by a skilled knife. The upper layer carries the grain (top-grain if its surface has been corrected, full-grain if not); the lower layer, all corium and no grain, is the split (suede, or — coated — a lesser grain-embossed leather). The Practitioner without a splitting machine keeps the hide full-thickness and reduces it where needed by skiving (Chapter 21).
Reading and selecting the hide
Not every part of a hide is equal, and not every species suits every use. The skin is densest and strongest along the backbone and butt (the bend, the prime leather of any hide), looser and stretchier in the belly and flanks, and thin and irregular at the neck, head, and legs (the offal, used for laces, small parts, and rawhide). The seasoned worker cuts his most demanding parts — a belt, a strap that bears load — from the bend, where the fiber is tight and the stretch is least, and consigns the belly to parts where give does not matter. Cut load-bearing straps along the backbone line, never across it: leather stretches far more across the spine than along it, and a strap cut the wrong way will elongate and fail.
Specification Table 19-1 — Hides and skins by species and use
| Skin | Typical substance | Character | Best tanned by | Fit for |
|---|---|---|---|---|
| Cattle hide (steer/cow) | Heavy (3–6 mm at bend) | Strong, thick, firm; the universal leather | Vegetable (bark) | Saddlery, harness, belts, soles, sheaths, heavy goods |
| Calf | Light (1–2 mm) | Fine tight grain, supple, even | Vegetable or alum | Fine straps, bookbinding (cross Vol XIII), uppers, small goods |
| Deer / elk | Light–medium | Soft, stretchy, very tough, breathable | Brain / oil (buckskin) | Garments, gloves, moccasins, pouches, lashings |
| Goat | Light | Tight-grained, strong for its weight, water-shedding | Vegetable or alum (tawing) | Fine leather, bookbinding, bottles, gloves, parchment |
| Sheep | Light, fatty | Soft, weak, stretchy, very greasy | Alum (tawing); parchment | Linings, parchment/vellum (cross Vol XIII), wool-on shearling |
| Pig | Medium | Open, tough, distinctive three-hole grain | Vegetable | Saddle seats, work goods, abrasion-resistant parts |
| Horse | Medium–heavy | Dense butt ("shell") extremely hard-wearing | Vegetable | Straps, strops, the hardest-wearing small goods |
Art direction
CHAPTER 20 — TANNING: THE CONVERSIONS THAT MAKE LEATHER
Tanning is the irreversible chemistry that converts perishable skin into permanent leather. Every true tan does two things at once: it displaces the free water that feeds rot, and it inserts a tanning agent between the collagen fibers that bonds to the protein, props the fibers permanently apart, and so prevents them from ever again either gluing together (rotting) or sticking together (drying hard). The agent the Practitioner chooses — plant tannin, animal-fat aldehydes, or alum salts — determines the whole character of the leather. This chapter gives the three classical tannages in full, then sets them side by side.
Before any tan, raw or cured skin passes through the beamhouse preparation: soaking (relaxing a cured hide back to full softness and washing out salt, blood, and dirt), and — for hair-off leather — unhairing. The ancient unhairing is the lime pit or a wood-ash bucking liquor: the hide is steeped days to weeks in a strong alkaline bath of slaked lime (or hardwood-ash lye) that loosens the hair and the epidermis and swells the fiber open to receive the tan. After liming the hide is unhaired over the beam with the back of a knife, fleshed again, and — critically — deliming and bating return it from its swollen alkaline state toward neutral so the tan strikes evenly. (For brain-tanned buckskin and for parchment the hair is also removed by liming or by sweating, but those skins are not then bark-tanned; see below and Chapter 24.)
Vegetable (bark) tanning — the leather of permanence
Vegetable tanning uses tannins (tannic acids) leached from bark, wood, leaves, and galls. Tannin molecules bind to the collagen and crosslink it into a firm, dense, water-resistant, long-lived leather — the brown, full-bodied leather of saddlery, soles, belts, and sheaths, and the only leather that tools, molds, and burnishes to a hard finish and a carved relief. It is slow: a heavy hide may spend many months in the pits. It is also the most durable leather known — bark-tanned goods survive centuries.
Sourcing the tannin. The richest common barks are oak (bark and the galls), hemlock (the classic North-temperate tanbark, reddening the leather), chestnut, mimosa/wattle, and sumac (leaves; the finest, palest, most delicate tan, prized for bookbinding — cross Vol XIII). Bark is stripped in spring when the sap runs and it peels freely, dried, and ground or shredded to expose its surface. Tannin content runs roughly a tenth to a quarter of the bark's dry weight; the Practitioner needs, by old reckoning, roughly the hide's own weight in good bark, or more, to fully tan it.
Protocol 20-A — Vegetable tanning in pits (the full conversion):
- Prepare the hide through the beamhouse: soak, lime, unhair, flesh, delime, and bate as above, then rinse well. The hide enters the tan clean, hair-off, swollen open, and near-neutral.
- Make the liquor (the "ooze"). Steep ground bark in soft water — cold-leaching over days, or a gentle warm infusion — and draw off the brown tannin liquor. Keep liquors of three strengths: a weak spent liquor, a medium, and a strong fresh ooze.
- Strike in the weak liquor first. Hang or lay the hides in the weakest liquor first. This is the cardinal rule: a hide plunged straight into strong ooze "case-hardens" — the surface tans and seals so fast that liquor cannot reach the center, leaving a raw, undertanned core that will later rot. The weak start lets the tan penetrate fully before it fixes.
- Handle and strengthen. Over weeks, move the hides through progressively stronger liquors, handling (lifting and re-hanging) them regularly so they tan evenly and do not crease. The brown front of the tan creeps inward from both faces.
- Lay away in the strong pits. Finally bed the hides flat in pits, interlayered with solid ground bark, packed in strong ooze, and leave them for the long months of full penetration. The hide is tanned through when a cut edge shows uniform brown clear to the center with no pale raw streak.
- Total schedule by weight. Thin skins (calf, goat): a few weeks. Medium hides: two to four months. Heavy butt leather and sole leather: six months to well over a year in the old slow yards. Tannin cannot be hurried past the speed at which it diffuses into the fiber; haste makes case-hardened, rotting leather.
- Finish. Rinse, slick out surplus liquor over the beam, then stuff/curry the damp leather with warmed tallow and oils (fatliquoring) to lubricate the fibers, set it out smooth, and dry it slowly in the shade. Curried bark leather is supple, strong, and water-resistant for life.
Specification Table 20-1 — Vegetable tanning pit schedule by hide weight
| Hide class | Substance | Beamhouse (lime → bate) | Suspender / handling (weak→strong) | Layaway (strong pits) | Total | Result |
|---|---|---|---|---|---|---|
| Calf / goat (light) | 1–2 mm | ~1–2 weeks | 1–2 weeks | 1–3 weeks | 4–8 weeks | Fine supple grain leather |
| Cow side (medium) | 2–3 mm | ~2 weeks | 3–6 weeks | 4–8 weeks | 2–4 months | General strap & goods leather |
| Steer bend (heavy) | 4–6 mm | ~2–3 weeks | 1–2 months | 3–9+ months | 6–14+ months | Saddle, harness, sole leather |
Brain (oil) tanning — the buckskin of the breathing skin
Brain tanning makes buckskin: soft, stretchable, breathable, immensely tough, and — when smoked — washable and weather-stable. It is not a true mineral or vegetable tan but an oil/aldehyde tannage: the emulsified fats and lecithin of the animal's own brain (or any fatty oil/egg-yolk emulsion) are worked into a dehaired, dressed skin, which is then worked continuously as it dries so the fibers lubricate and separate individually rather than gluing into a stiff board. The old saw holds that every animal is born with just enough brains to tan its own hide — and where brain is scarce, egg yolk, fatty soap, or neatsfoot oil emulsions serve. Smoking sets it: the aldehydes in wood smoke crosslink the fibers, lock the softness, deepen the color, and make the skin able to dry soft again after wetting — the single step that turns a fragile dressed skin into durable, washable buckskin.
Protocol 20-B — Brain-tanning buckskin (the full conversion):
- Dehair and membrane. Soak the green or relaxed skin; remove the hair and grain by bucking in wood-ash lye or by sweating/soaking, then scrape both faces clean over the beam — all hair, epidermis, and the flesh-side membrane must go, or the brains cannot penetrate and a glassy patch results. (Buckskin is typically taken to white, grainless skin on both faces.)
- Wring out the water. Wring the dressed skin hard — twisted on a stake — to drive out as much water as possible, opening the fiber to drink the dressing.
- Dress with the brain emulsion. Mash the brains (or substitute) into a warm, lukewarm emulsion in water. Soak and work the warm dressing thoroughly into the wrung skin until every fiber has drunk it, inside and out. Wring, re-warm, and re-dress a second and third time; full saturation is what makes the skin soft.
- Soften by working until bone-dry. This is the labor that makes buckskin. As the wet, dressed skin dries, it must be worked without pause — stretched, pulled over a stake or a cable, rubbed, and stropped in every direction — so that it dries in motion. The instant working stops while moisture remains, the fibers glue and the skin dries to rawhide-hard board. Worked to the very last of its dampness, it dries to a soft, white, stretchable suede. If it dries stiff anywhere, re-wet that area, re-dress, and re-work it soft.
- Smoke to set. Sew the soft skin into a loose bag, hang it over a pit or punk-wood smudge fire (no flame — cool, dense smoke from rotten/punk hardwood), and smoke both sides to an even tan-brown over a few hours. Smoking is not optional for usable buckskin: it sets the tan, colors and scents it, repels insects, and — decisively — makes the skin re-soften after it gets wet instead of drying hard. An unsmoked dressed skin is fragile and reverts to rawhide when wetted; a smoked one washes and dries soft for a lifetime.
Alum tawing — the white leather
Tawing with alum (potassium aluminium sulphate) and salt makes white leather ("tawed" leather): bright white, supple, and very strong, the classic leather for fine straps, gloves, falconry furniture, and old bookbinding. Strictly it is not a permanent tan — alum is water-soluble and washes out, so tawed leather is not truly waterproof and can revert if soaked — but stabilized with egg yolk, flour, and oil in the old "tawing paste," it is durable, beautiful, and far faster than bark.
Protocol 20-C — Alum tawing: Beamhouse the skin (soak, lime/unhair, flesh, delime) to clean dehaired pelt. Make a tawing paste of alum and salt (roughly two parts alum to one of salt) blended with flour, egg yolk, and a little oil into a soft dough with warm water. Work this thoroughly into the damp pelt; pack the pasted skins folded together and leave warm for some days, re-working once or twice; then slowly stake-dry and soften as for buckskin (working as it dries keeps it supple). The result is supple white leather — keep it dry.
Specification Table 20-2 — The three tannages compared
| Property | Vegetable (bark) | Brain / oil (buckskin) | Alum (tawing) |
|---|---|---|---|
| Tanning agent | Plant tannins (oak, hemlock, sumac…) | Fat/lecithin aldehydes + smoke | Alum salts + paste |
| Time to make | Weeks to over a year | 2–4 days of intense labor | A few days |
| Color | Browns (bark-dependent) | Cream to smoke-tan | Bright white |
| Hand / feel | Firm, full, dense | Very soft, stretchy, breathable | Soft, supple |
| Water resistance | High; sheds and survives wetting | Good once smoked; washes & dries soft | Poor; alum leaches if soaked |
| Durability / permanence | Highest — survives centuries | High once smoked; needs no re-tan | Good if kept dry; not permanent |
| Workability | Tools, molds, carves, burnishes | Sews & shapes soft; will not tool | Sews soft; will not tool or burnish |
| Best for | Saddlery, belts, sheaths, soles | Garments, gloves, moccasins, pouches | Fine straps, gloves, bookbinding |
The Critical Insight: There is no single "best" tan — there is only the right tan for the load. A man who brain-tans a sole or alum-taws a harness has wasted a hide; a man who bark-tans a shirt will wear a board. Match the tannage to the duty: bark for everything that bears load, sheds water, or must be tooled; brain for everything that touches the skin, breathes, and must stay soft; alum for fine white work that lives indoors and dry. The decree gives three chemistries because the world asks three different things of leather.
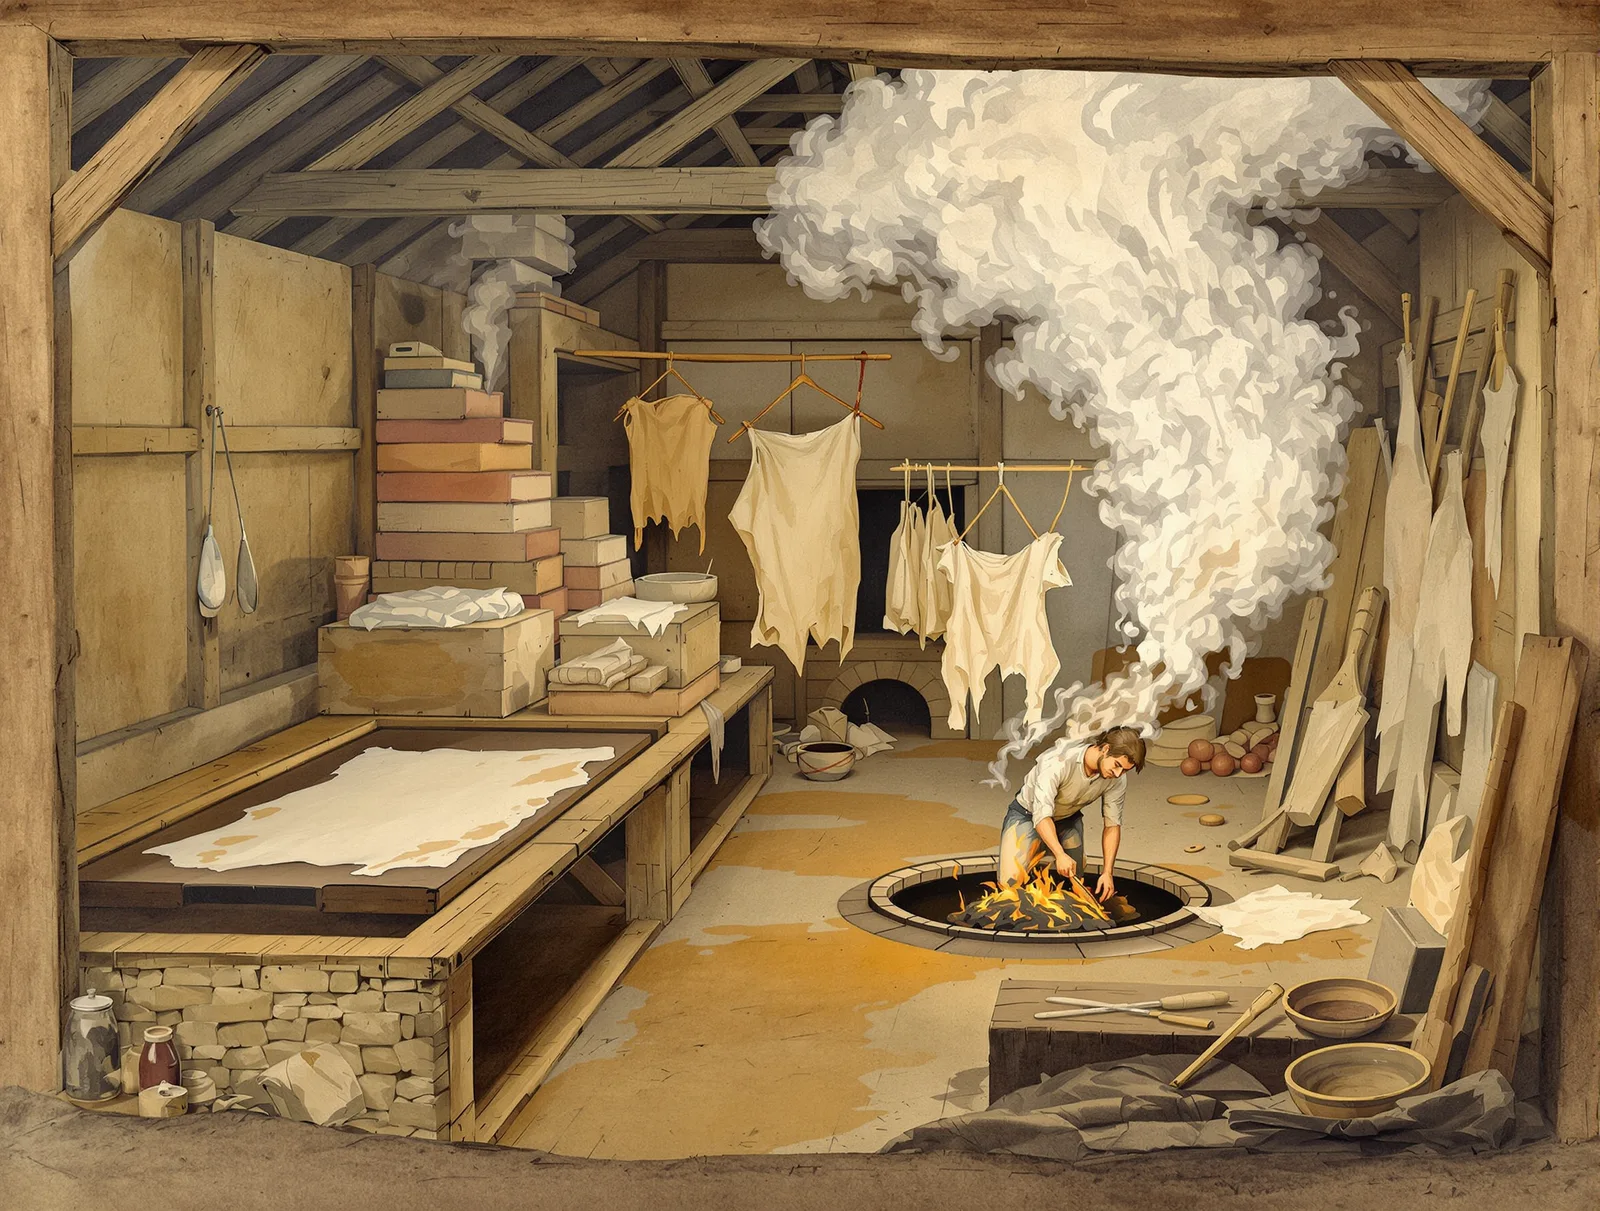
Art direction
CHAPTER 21 — THE LEATHERWORKER'S BENCH
Tanned, the hide becomes the leatherworker's stock, and the craft moves indoors to the bench. Leatherwork is a craft of cutting, joining, and finishing, and its tools are few, ancient, and — kept sharp — sufficient for nearly everything. A dull leather tool is worse than useless: it tears where it should sever and crushes where it should pierce. The first law of the bench is the strop.
The bench and its tools
The leatherworker's bench is a heavy, flat, well-lit table with a cutting board (end-grain hardwood, or a self-healing mat, or a marble slab for some operations) that takes the knife without dulling it, a fixed edge for straightedge work, and a stitching clamp ("pony" or "horse") — a sprung wooden vise gripped between the knees that holds the work upright with both the worker's hands free for the two-needle saddle stitch (Chapter 22).
Specification Table 21-1 — The leatherworker's tools
| Tool | Form | Function | Notes |
|---|---|---|---|
| Head / round knife | Crescent half-moon blade, kept razor-sharp | The master cutting tool — straight cuts, curves, and skiving in one | The signature leather knife; mastered, it does most cutting work |
| Skiving knife | Flat-ground, very keen, low bevel | Paring/thinning leather edges (skiving) | Honed glass-sharp; a dull skiver tears |
| Utility / clicker knife | Straight replaceable blade | Pattern cutting against a straightedge | Easiest for the learner; nick the line, then cut |
| Strap cutter / plough gauge | Adjustable guided blade | Cutting straps and belts to exact, parallel width | Essential for even straps; ride it along a true edge |
| Awls (diamond & scratch) | Diamond-section blade; fine scriber | Piercing angled stitch-holes; marking | The diamond awl makes the slit the saddle stitch needs |
| Stitching groover | Adjustable hooked cutter | Cuts a shallow channel to recess and protect the stitch line | Run before pricking; sinks the thread below abrasion |
| Pricking iron / stitch chisel | Toothed chisel, fixed SPI (stitches/inch) | Marks (or punches) evenly spaced, angled stitch holes | Sets the even, slanted stitch of fine work |
| Punches (round drive & rotary) | Hollow tubes, graduated sizes | Holes for rivets, buckles, lacing, hardware | Struck on an end-grain block or poly board |
| Edge beveler | Hollow-ground V-gouge | Pares the sharp corner from a cut edge | First step of edge finishing |
| Burnisher (slicker) | Grooved hardwood, bone, or glass | Friction-polishes the edge to a hard slick gloss | Used with water, gum, or wax |
| Mallet / maul | Rawhide, poly, or wooden head | Drives punches, chisels, stamps; sets rivets | Never a steel hammer on a cutting tool |
| Wing dividers | Sprung scribe compass | Marks stitch lines parallel to an edge; spacing | Scribes the gauge line for the groover |
| Bone folder | Smooth flat bone | Creasing, folding, slicking, settling seams | Borrowed from the binder (cross Vol XIII) |
The economy of the cut
Hide is the leatherworker's costliest material and his most variable: it has a fixed and irregular area, a head and legs that yield only scrap, weak bellies, prime bends, and natural flaws — brand scars, healed gashes, warble holes, neck wrinkles. The discipline of the cutting economy is to lay the pattern so that function and yield are both served.
Protocol 21-A — Laying out and cutting the hide:
- Read the hide first in good raking light: chalk-mark the prime bend, the stretchy bellies, and every flaw. Tap and flex to find thin spots and loose grain.
- Place demanding parts on prime leather, aligned to the spine. Belts, straps, and any load-bearing piece go on the firm bend with their length along the backbone line, for least stretch and most strength. Orient a sheath's spine, a strap's run, to the line of the back.
- Nest the patterns to waste as little as possible — but never let yield override function. It is false economy to win one more strap by cutting it weak across the belly; it will stretch and fail. Yield serves the goods, not the reverse.
- Cut on the board with a sharp knife held vertical, the off hand safely behind the blade's travel. Score the line first if it curves, then commit. One confident pass cuts cleaner than many timid ones.
Skiving: thinning the leather where it must fold or join
Skiving pares leather thinner — at an edge that will fold (a strap-end, a wallet edge), at an overlap that would otherwise double in thickness (a seam, a glued lap), or across a whole panel to reduce its substance. It is done with a glass-sharp skiving knife (or a safety skiver, or an English-style paring against a litho stone) drawn at a shallow angle to shave a long, even, feathering taper. The whole art is the angle and the edge: a keen blade held low takes a clean bevel; a dull blade or a steep angle gouges, tears, and ruins the piece. Skive a folded edge to a long feather so the fold lies flat; skive two lapped edges complementarily so the joined seam ends up the thickness of a single layer. Practice skiving on scrap until the taper is even and the surface unscarred before you skive a piece that matters.
Your Commitment: You will strop before you cut and hone before you skive — every time, without exception. The leatherworker's edge is not maintained between jobs; it is maintained between cuts. A craft of sharp tools punishes the dull blade immediately and visibly, in torn grain and ragged edges that no later step can hide. Keep a strop on the bench and use it as reflexively as you breathe.
CHAPTER 22 — CONSTRUCTION: STITCH, RIVET, AND EDGE
Cut pieces become goods through joining and finishing. The leatherworker's joins are mechanical — there is no welding a skin — and the king of them is the saddle stitch, a hand stitch so strong and so fault-tolerant that it has outlived every machine invented to replace it.
The saddle stitch — and why it outlasts the machine
A sewing machine makes a lockstitch: one thread above, one below, locked by a loop pulled into the middle of the leather. It is fast — and fatally fragile in a way that matters for goods that must last: if the thread is cut or worn through at any single point, the lock releases and the seam unravels in a run, like a dropped knitting stitch, because it is one continuous thread looped through itself. The hand saddle stitch is fundamentally different and fundamentally stronger: two needles, one on each end of a single thread, pass through the same hole from opposite sides, so each hole is filled by two threads crossing. Because each stitch is effectively independent and the threads interlace through every hole, a saddle-stitched seam cannot unravel: cut or wear through the thread at one point and the stitches to either side simply hold — the damage stays local. This single property is why every serious harness, saddle, and heirloom good is saddle-stitched by hand and why the stitch has survived two centuries of machinery. It is slower; it is incomparably more durable.
Protocol 22-A — The saddle stitch:
- Groove the stitch line. Run the stitching groover along a wing-divider gauge line set parallel to the edge, cutting a shallow channel both sides. The channel recesses the thread below the surface, where wear and abrasion cannot reach it — the thread lasts far longer for being sunk.
- Mark and pierce the holes. Walk a pricking iron (or stitch chisel) along the groove to mark evenly spaced, slanted holes at a chosen stitches-per-inch, then open each with a diamond awl held to the same consistent angle, piercing square through both layers held in the clamp. Even spacing and a consistent angle are the whole look and half the strength of fine stitching.
- Thread two needles, one each end of a single length of strong waxed thread (linen, drawn through beeswax or hand-wax; cross Vol VII for flax/linen and Vol I for the hand-needle's steel). Thread length ≈ the seam length times four.
- Stitch. Pass the first needle through the first hole; pull the thread to its midpoint so both sides are even. Then for every hole: pass one needle through from the front; pass the second needle through the same hole from the back, taking care it does not pierce or split the first thread (cast it slightly to one side). Pull both threads snug with even tension every stitch. Each hole now carries two crossing threads.
- Lock the ending. At the seam's end, back-stitch two or three holes (re-sewing over the last stitches), trim the threads close, and singe or press the cut ends. The backstitch and the buried channel together make an ending that cannot start to unravel.
Lacing, riveting, hardware, and edge finishing
Lacing joins or decorates an edge with a continuous strip of leather (or rawhide, or sinew) threaded through punched or slit holes — running stitch, whip, or the doubled cordovan/Mexican lace. Lacing is strong, handsome, and forgiving, and it joins thick edges (sheaths, cases, armor) where needle-stitching would be slow; punch the holes evenly with a thonging chisel or a fixed-spacing punch, and bevel the lace so it lies flat.
Riveting is the fastest mechanical join and the right one wherever two layers must be locked at a point under shear or peel — strap ends, belt keepers, bag gussets, harness splices. A copper rivet and burr is the strongest: drive the rivet through punched holes, seat the burr down the shank with a setter, cut the shank to ~1.5 mm proud, and peen it over the burr into a tight dome with the ball of a hammer. (Tubular and double-cap rivets set with a die and a single mallet blow and serve for lighter goods.) Set a rivet wherever a stitched seam would peel — at the end of a stitched strap, at a buckle's fold — to take the concentrated load the stitches cannot.
Hardware — buckles, rings, snaps, conchos — is set into punched or slit holes (cross Vol I — The Artificer's for the casting and forging of the metal furniture itself: buckles, D-rings, harness hardware). A buckle is held by a folded, skived, and then stitched and/or riveted keeper; the chape (the fold of leather around the buckle bar) is the highest-load point of a strap and must be both stitched and riveted, never trusted to stitch alone.
Edge finishing turns a raw cut edge into a sealed, durable, handsome one — and a finished edge is not vanity: a sealed, burnished edge sheds water and resists the abrasion that starts a leather good's failure at its edges.
Protocol 22-B — Finishing an edge (vegetable-tanned leather):
- Bevel both arrises with the edge beveler to round the sharp corners.
- Sand the edge smooth and flush if layers are stacked.
- Damp the edge with water (or a gum/edge solution).
- Burnish: rub the damp edge hard and fast with a grooved wood, bone, or glass slicker — the friction heats and compresses the fibers, "ironing" them down into a hard, glassy, rounded, water-shedding slick. A little wax burnished in finishes it to a gloss.
- Re-coat and re-burnish for a harder edge. Burnishing only works on vegetable-tanned leather — bark-tanned fiber compresses and polishes; brain- and alum-tanned leather will not slick and is finished by folding, binding, or lacing the edge instead.
Art direction
CHAPTER 23 — THE ESSENTIAL GOODS
With the hide read, tanned, cut, and the joins mastered, the Practitioner builds. These are the irreducible goods — the things a recovered settlement needs of its leatherworker before any ornament: the belt that carries the load, the sheath that guards the blade, the pouch that holds the small things, the flask that carries water, the footwear that meets the ground, the bellows-leather that feeds the forge, and the harness that yokes the animal to the work. Each is given as a build, with its pattern logic and its load discipline.
The belt
The simplest load-bearing good and the proving-ground of strap craft. Cut a single strap from the bend, along the spine, to length and to even width with the strap cutter (a working belt is typically 3–4 mm full-thickness bridle or harness leather). Skive and round one end to a point and punch the adjustment holes (an odd number, centered, spaced to a fixed gauge); skive, fold, and form the buckle end around the buckle bar, punch the bar-slot and the tongue-slot, set the keeper(s), and both stitch and rivet the chape — the buckle fold is the belt's highest-stress point and must never rely on stitch alone. Bevel, damp, and burnish all edges. A belt cut across the hide or trusted to stitches at the buckle will stretch, sag, and ultimately tear at the fold.
The knife sheath
A guard for an edge and for the body that carries it. The build is a folded or two-piece welted sheath in firm vegetable leather. Protocol 23-A: (1) Pattern the sheath to the blade with a snug margin; cut front, back, and a welt — a strip of leather that sits between front and back along the cutting edge. (2) The welt is the whole secret: it spaces the two faces apart so the stitching line never crosses the blade's edge, and it gives the edge a strip of leather to ride against instead of the thread — a sheath sewn without a welt is cut open from the inside by its own knife within a season. (3) Glue the welt in place, clamp, groove, pierce, and saddle-stitch the seam through front-welt-back. (4) Wet-form (mold) the damp vegetable leather tight around the blade for retention, let it dry hard, then bevel and burnish the edges and treat the leather. Add a belt loop stitched and riveted to the back.
The pouch (belt bag)
The universal carrier. A simple, sound pattern is a single piece folded into a front, a bottom, and a flap, with two gusseted sides (or two side seams) giving it depth. Saddle-stitch (or lace) the side seams; a lined or doubled top edge takes the closure (a turn-button, a strap-and-buckle, or a toggle). Skive the folds; burnish the exposed edges; rivet the stress points where the strap or belt loop meets the body. Brain-tanned or alum leather makes a soft, quiet pouch; vegetable leather makes a firm, structured one that can be tooled.
The pitch-lined water flask (leather bottle)
The recovered art of carrying water in skin. A leather bottle (the old costrel or bottél) is built of vegetable leather, wet-formed over a mold to shape, its seams saddle-stitched (or the whole formed from a folded blank), and — the essential step — sealed inside with pitch or beeswax so the leather, which is porous, holds water without wetting through and without the water spoiling the leather. Protocol 23-B: (1) Pattern and cut two body halves and a neck; (2) saddle-stitch the seams flesh-side-out, leaving the neck open; (3) wet the leather and form/stuff it to a full, hard shape over a mold or with damp sand, dry it hard (this "cuir bouilli" hardening sets the form); (4) turn or finish to grain-out, fit a neck and a stopper; (5) melt brewer's pitch or a beeswax-tallow blend and slosh it through the warmed interior to coat every surface and seal every stitch-hole from within; pour out the surplus and let it set. The pitch lining — not the leather — is what holds the water; renew it when it cracks. Cross Vol I for the metal flask as the alternative vessel, and Vol VII for the beeswax and rendered tallow.
Sandals and turnshoes
Footwear is the leatherworker's contract with the ground. Two builds serve.
- The sandal: a sole cut from heavy vegetable bend (single or laminated and stitched), shaped to the foot, edged, and held by skived, riveted, and stitched straps through slots cut in the sole. Simple, repairable, and right for warm ground.
- The turnshoe: the medieval closed shoe, sewn inside-out and then turned. Protocol 23-C (overview): pattern an upper and a sole in supple vegetable or alum leather; stitch the upper to the sole flesh-side-out, inside-out, with a tight grain-to-grain edge-flesh seam around the lasted form; then turn the whole shoe right-side-out so the seam is enclosed and protected inside, and the grain faces the world. The turn hides and shields the only seam, which is why the turnshoe kept feet dry for a thousand years. Sole wear is met with an added, stitched or pegged outsole. Cross Vol VII for the animal that yields the sole and Vol I for hobnails and pegs.
Bellows leather
The leatherworker's gift to the smith. The forge bellows of Vol I — The Artificer's depends on a leather that is airtight, supremely flexible through millions of flexings, and heat- and spark-tolerant at the edges. Use a thick, soft, oil/vegetable-tanned hide (the old "bellows hide" — a well-stuffed, supple cowhide); cut the gussets and the lung-panels generously with the flex across the soft direction so the leather folds without cracking; saddle-stitch and then tack/rivet the leather to the wooden boards through a sealing batten, with the grain side out, every seam sealed. An airtight, supple bellows leather is what lets the smith reach welding heat; a stiff or porous one starves the fire. Build it of the best soft hide and stitch it to last, for the forge cannot run without it.
Harness basics and the discipline of load
Harness yokes the animal of Vol VII — The Agrarian to the cart, the plough, and the load, and here the leatherworker's stitches carry not a wallet's contents but a working beast's full draught — and a man's safety behind it. The governing law of all harness is that the leather, the stitching, and the hardware must each exceed the working load with a generous margin, and that the load path must run through leather chosen and cut for strength, never through a flaw, a thin belly, or a single line of stitching at a point of fold.
Protocol 23-D — Harness load discipline:
- Cut every load strap from the firm bend, along the spine, at full substance — never from belly or neck, never across the back.
- Double the leather and the stitch at every point the load turns — every buckle chape, every ring attachment, every fold under tension — and rivet in addition to stitching at these points; a turn of leather under draught load will peel a stitch line that a rivet holds.
- Saddle-stitch all load seams (never a lockstitch) so a worn thread cannot unravel the seam under a working animal.
- Set hardware (rings, buckles, hames-furniture) of sound forged metal sized to the load (cross Vol I), seated in skived, stitched, and riveted leather.
- Inspect before every working use: flex every strap and look for cracked grain, drawn stitches, started rivets, and worn billets. Retire any strap whose grain has cracked through or whose stitches have begun to draw. A harness fails at its weakest unwatched point, and a draught failure can kill the beast, the load, and the man. Safety is the first specification of harness; appearance is the last.
Art direction
CHAPTER 24 — RAWHIDE AND PARCHMENT: THE SKIN MADE HARD AND THE SKIN MADE PAGE
The decree of the second skin governs two materials that are not tanned at all — that are, in fact, the very rot-and-stiffen failures of Chapter 19 turned to deliberate use. Rawhide is skin dehaired, dried, and never tanned: board-hard, horn-tough, immensely strong in tension, and — its one weakness, here made into a tool — softening when wet to be worked, then drying back to iron hardness. Parchment is rawhide's refined cousin: skin limed, dehaired, scraped thin, and dried under tension into a smooth, pale, durable writing surface — the page on which this Codex and the records of Vol XIII are written.
Rawhide: the skin made hard
Making rawhide. Take a green or relaxed hide; dehair it by liming or by bucking in wood-ash lye (or, for some uses, leave the hair on); flesh it clean; then stretch it taut on a frame and let it dry hard, scraping both faces as it dries. Dried untreated, the collagen sets into a translucent, bone-hard, extraordinarily strong sheet. Rawhide is worked by wetting it back to pliable, forming or lacing it while damp, and letting it dry to lock the form with great rigidity and grip.
Rawhide's recovered uses are many and essential:
- Lacing and binding — cut into thongs, applied wet, rawhide dries tight and grips like no cord: it binds axe-heads to hafts, lashes joints, splints, and frames, and shrinks down to an unbreakable bond as it dries. Cross Vol I for the tool-heads it binds.
- Containers — the parfleche and the rawhide box: wetted, folded to a pattern like stiff card, and dried to a hard, light, weatherproof case.
- Drumheads — the prime craft-bond to Vol XXIII — The Musician's: a drumhead is rawhide, scraped to an even thinness, soaked, stretched wet over the shell or hoop, lashed or tacked under high even tension, and dried taut to a hard, resonant membrane whose pitch rises as it dries and tightens. The leatherworker prepares and mounts the head; the musician of Vol XXIII tunes and voices it. (Cross also Vol XXIII for the lacing patterns that tension a rope-tuned drum.) Goat and calf give the finest heads; deer and cow serve for larger, deeper drums.
- Sole bends, shields, armor, and horn-hard fittings — anywhere a light, rigid, tough, formable plate is wanted, hardened rawhide (and its boiled, faster-hardening form, cuir bouilli) serves.
Parchment and vellum: the skin made page
Parchment is the leatherworker's contribution to the scribe, and the binding craft-link to Vol XIII (parchment, scribes, and the made book). It is limed and scraped skin dried under tension — never tanned. Vellum properly means the finest parchment, of calf (or kid or lamb), prized for the whitest, smoothest, most durable leaves.
Protocol 24-A — Making parchment (the scribe-grade finish):
- Select a clean skin — calf or kid for vellum, sheep or goat for ordinary parchment. Flay it free of scores and cuts (a flaying nick becomes a hole in the page).
- Wash and soak the skin clean and fully relaxed.
- Lime. Steep the skin in a strong lime (or wood-ash lye) bath for days to a couple of weeks, moving it daily, until the hair and the epidermis loosen completely. Liming both unhairs the skin and begins to split and clean the fiber that gives parchment its smooth, even body.
- Unhair and flesh the limed skin over the beam — remove all hair, all epidermis, and all flesh-side membrane.
- Mount on the herse (the stretching frame) under even tension. This is parchment's defining step. Lace the wet skin all around to a frame (the herse) by cords and adjustable pegs (or pierced tabs), and tension it taut and even on every side. Drying under tension is what makes parchment a flat, smooth, dimensionally stable sheet instead of a shrunken, cockled rawhide; the fibers dry stretched into a parallel plane rather than relaxing into a felt.
- Scrape on the frame with the lunellum — a crescent-bladed scraping knife (the lunellarium, kin to the leatherworker's head-knife). As the skin dries on the herse, scrape both faces repeatedly with the curved blade, wetting and re-scraping in cycles, to pare the skin down to an even, fine, translucent thinness and to remove every last trace of flesh, membrane, and grease. The scraping, done while drying under tension, thins and densifies the sheet evenly across its whole area.
- Finish the surface for the scribe. When dry, taut, and pared even, the parchment is taken off the herse, the writing surface(s) pounced and prepared — rubbed smooth and de-greased with pumice, raised with a little chalk/whiting to take ink crisply without feathering, and finally smoothed. The result is a strong, supple, pale, dimensionally stable leaf that holds ink sharply for a thousand years. (Cross Vol XIII for the ruling, the inks, the writing, and the binding of these leaves into the made book; and Vol XIII for the gathering and sewing of the codex itself.)
The Critical Insight: Tanning, rawhide, and parchment are one chemistry seen from three angles. All three begin at the same dehaired skin. Let that skin dry untreated and you have rawhide — hard, because the bare fibers glue together. Drive a tanning agent between the fibers before drying and you have leather — soft and permanent, because the fibers are propped apart and bound against rot. Dry the limed skin under tension while scraping it thin and even, and you have parchment — a hard, flat, smooth sheet, because the fibers are stretched into a dense parallel plane rather than a glued felt. The single variable that separates a drumhead from a saddle from a Codex page is what is done to the fiber in the hours it dries. Master that one idea and the whole decree becomes one craft, not three.
Leather care and conservation
Leather is permanent only if kept. It fails by three roads, each preventable.
- Drying out. Leather is collagen plus bound fats and moisture; lose the fats and it goes brittle, cracks, and powders ("red rot" in old vegetable leather). Cure: keep leather conditioned with appropriate dressings — a light, neutral leather oil or a beeswax-tallow conditioner (cross Vol VII) — fed sparingly and regularly, never soaked. Over-oiling rots stitching and goes rancid; feed little and often.
- Wetting and heat. Soaking swells and weakens leather and leaches alum tannage; heat is worse than water — leather dried fast by fire or sun shrinks, hardens, and is permanently ruined (the same heat-shrinkage that hardens cuir bouilli destroys a good worn wet). Cure: dry wet leather slowly, away from all heat, stuffed to shape, and re-condition it as it dries.
- Rot, mold, and vermin. Damp storage molds leather and corrodes its stitching; insects eat untanned and alum-tawed skin especially. Cure: store leather clean, dry, dark, cool, and ventilated — never sealed damp, never in contact with corroding metal, never folded sharply (a sharp fold cracks the grain along the crease). Hang straps; lay flat or roll grain-out; keep hardware from staining the leather.
Your Commitment: You will treat every finished good as a tool that outlives its maker only if maintained — fed against drying, dried slow and cold against heat, and stored clean against rot. The leatherworker's true measure is not the good that looks fine on the bench but the strap still sound, supple, and safe a generation after it left his hands. To tan was to win the wrestling match against rot once; to keep is to win it every year thereafter, and that long victory is the whole point of the second skin.
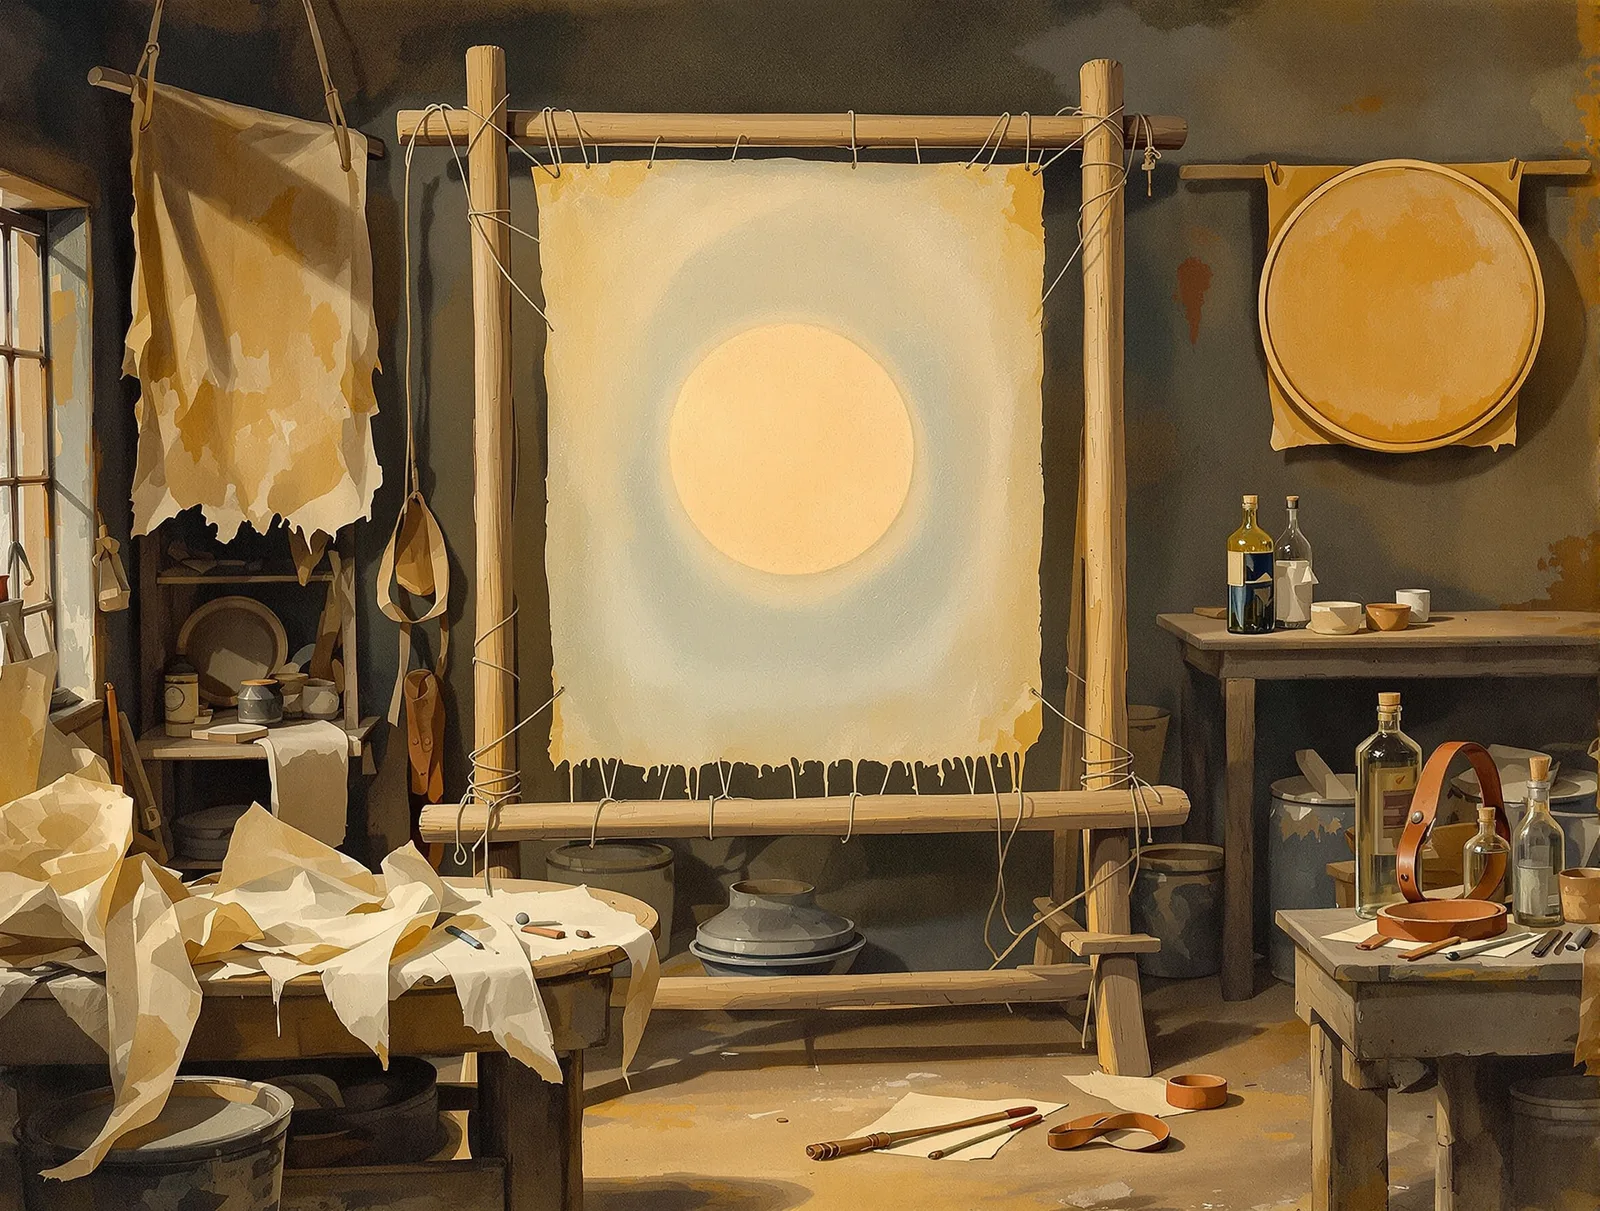
Art direction
The decree of the second skin closes here, where it began — at the boundary between rot and permanence, the thin wet membrane of hours in which the leatherworker does his whole work. He cannot stop a thing from dying; the beast is dead before the hide is his. What he can do is decide what that dying skin becomes: glue, if he is careless; rawhide, if he lets it set hard; a saddle that carries a rider for forty years, a bottle that holds water across a desert, a drumhead that calls a people together, or a page that carries this very Codex past the next dark age and into hands not yet born. The smith of Vol I makes permanence from metal that was never alive; the leatherworker makes permanence from a skin that was, and that is the rarer art — to take the most perishable thing a beast leaves behind and make of it the thing most likely to survive. Tan well, cut true, stitch so it cannot unravel, and keep what you make. The second skin is the craft of giving a dead thing a second life that outlasts the living.
SUB-VOLUME V — THE BASKET WEAVER'S DECREE: FIBER ARTS
ME 47 · nam-ad-KID · CRAFT OF THE BASKET WEAVER
The decree of the gathered field. Carried among the holy measures, the nam-ad-KID grants the Practitioner the right and the burden of turning the standing plant into the carried vessel — the conversion of reed, willow, bark, and grass into containers that hold a harvest, traps that catch a meal, mats that floor a house, and nets that comb a river. Where this decree is held, the marsh and the granary are one craft, and the weaver stands as its officer. It is the eldest of all the maker's decrees, older than the wheel and older than the pot: before the Practitioner could fire a vessel of earth, she wove one of grass and carried the field home in it.
This is the decree the modern world buried deepest, because its products were the most completely replaced. The plastic sack and the steel drum did to basketry what nothing did to metalwork or masonry: they made an entire civilization forget that the container is a made thing at all. Yet for the overwhelming majority of human time, every harvest that reached a mouth passed through a woven vessel. The grain came from the field in a burden basket; it was cleaned in a winnowing tray; it was stored in a coiled silo; it was carried to market in a pack frame; it was measured in a woven sieve. The fish came from the river in a woven trap. The floor was a mat, the wall was wattle, the roof was thatch, the bed was a hammock. Strip the fiber arts out of the human record and the record collapses — there is no granary, no fishery, no house. This sub-volume restores the gathered field as working knowledge: which plants give fiber and when to cut them; how to lay two strands into cordage stronger than either; the four weaves on which every basket on earth is built; the forms that turn those weaves into tools that serve; the soft architecture of mat, net, and thatch; and the weaver's calendar that keeps the whole craft fed. Every material grows within a day's walk of most Practitioners. Every build can be made with a knife, an awl, and patient hands. Work in order — the materials chapter is the jig for everything that follows, and the cordage you lay in Chapter 26 is the thread that binds half the builds in this Codex.
CHAPTER 25 — FIBER MATERIALS: THE HARVEST OF THE PLIANT WORLD
Before a single weave, the Practitioner must learn the standing crop. Basketry materials divide by their mechanical behavior under the weaver's hand, and the whole craft is the marriage of two opposite parts: stakes — the stiff, load-bearing skeleton that holds a form — and weavers — the supple strands that lace the skeleton tight. A reed that springs back is a stake; a reed that lies down where you bend it is a weaver. Learn to feel that difference and half of material selection is done before you read a word of the table.
The agrarian foundation of every species named here — its growth habit, its coppice cycle, its soil — is carried in full at Vol VII — The Agrarian Codex; this chapter takes up only the fiber the plant yields and the preparation that makes it weave.
Willow and the coppice cycle
Willow (Salix species — particularly S. viminalis, S. triandra, S. purpurea) is the master material of the temperate basket because it is the master of coppicing: cut a willow to its stool in winter and it answers in spring with a crown of straight, unbranched, year-old rods called withies, perfect for weaving. A single managed stool yields rods for a century. This is the decree's deep economy — the weaver does not consume the plant but harvests its annual surrender.
Protocol 25-A — Coppicing and the willow year:
- Cut in dormancy. Harvest withies between leaf-fall and bud-break (roughly the cold quarter), when the rod's sap is down and its sugars stored in the root. Cut every rod off the stool low, to a clean angled face 50–75 mm above last year's cut, with a sharp hook or knife. The stool builds a low knuckle over the years; cut just above it.
- Grade by length as you cut — bundle short rods with short, long with long. A working grade runs from 0.6 m bottoms to 2.4 m tops.
- Sort by quality. Reject any rod that is forked, kinked, wind-snapped, or covered in side shoots; these will not bend true.
- The three states of willow. A withy is used in one of three conditions, and confusing them ruins work:
- Green — cut and woven within days. Shrinks hard as it dries, so a green-woven basket loosens; used only for rough, immediate work.
- Brown (seasoned, then soaked) — the standard. Rods are dried with the bark on for weeks to months until cured, stored dry indefinitely, then re-soaked to working pliancy before use. This is the material of the durable basket.
- White / buff / steamed — bark stripped. White willow is stripped in spring when the sap rises and the bark slips; buff willow is boiled in its bark (the bark's tannin stains the wood a warm brown) then stripped; both give a refined, smooth surface for fine work.
- The soaking schedule (the single most-violated rule in basketry). Dry, seasoned willow is brittle and will crack the moment you bend it; it must drink before it will weave. Soak by the rod's butt diameter, in cold water, then mellow (wrap in a damp cloth or sack) for a day so the water equalizes through the rod:
Specification Table 25-1 — Willow soaking schedule (seasoned brown rods, cold water)
| Rod butt diameter | Approx. length | Soak time (cold water) | Mellow (wrapped damp) |
|---|---|---|---|
| 3 mm (fine) | up to 0.9 m | 1 hour | overnight |
| 5 mm | 0.9–1.2 m | 2–3 hours | overnight |
| 8 mm | 1.2–1.8 m | 1 day | 1 day |
| 12 mm (stout) | 1.8–2.4 m | 2 days | 1 day |
| 16 mm+ (stakes) | 2.4 m+ | 3–5 days | 1–2 days |
A rod is ready when it can be wrapped around its own butt in a full circle without splitting or whitening at the bend. Over-soaked willow goes grey, slimy, and weak; under-soaked willow snaps. Test, do not guess.
The Critical Insight: Willow does not become brittle as it ages — it becomes brittle as it dries, and that is fully reversible. A bundle of seasoned rods is not a perishable harvest but a stored one, a granary of weavable material that waits dry on the rafter for years and comes back to life in a tank of cold water. The weaver who grasps this stops racing the harvest and starts banking it.
Reed, rush, and cattail — the children of the marsh
The wetland is the weaver's other great field, and its plants are softer-handed than willow — used flat or whole, they make the supple weavers, the chair seats, the mats, and the coiled work.
- Common reed (Phragmites australis) — tall, hollow, jointed cane. The whole stem thatches and screens; split, it weaves. Cut in late summer to autumn once the stem has hardened and the leaf has dropped.
- Soft rush (Juncus effusus) and the true bulrushes (Scirpus/Schoenoplectus lacustris) — round, pithy, jointless stems. The bulrush is the classic seat-and-mat material: cut full-length in mid-to-late summer, dried slowly in the shade out of sun (sun makes it brittle and bleached), then dampened and mellowed before working, often twisted into a soft rope as it is woven.
- Cattail / reedmace (Typha latifolia) — the broad strap-like leaves are among the easiest beginner materials. Harvest the green leaves in late summer, dry them flat in shade until they go from green to tan (they will shrink to perhaps two-thirds their width — never weave them green, or the finished work loosens to rattling gaps), then re-dampen with a wet cloth and mellow before plaiting or twining.
The shade rule governs all the marsh plants: dry them out of direct sun. Sunlight bleaches and embrittles rush and cattail; shade-dried material stays supple and holds a soft, even color.
Bark strips — the skin of the tree
Inner bark (the bast, the living conductive layer just under the outer bark) peels in long, strong, flexible ribbons in spring and early summer when the sap is running and the bark slips — separates cleanly from the wood. The peeling window is short and seasonal; miss it and the bark locks to the trunk until next year.
- Cedar (Thuja, Juniperus, and the western redcedar of the Pacific peoples) — the premier bark of the temperate world. Peeled from a young trunk or limb in a single long strip, the outer bark is separated from the inner, and the inner bark is split down into fine, even, weavable ribbons that dry to a warm red-brown and last generations. Harvested respectfully from one side of a tree, leaving the cambium intact, the tree lives on — the culturally modified tree of the old forests, scarred but alive for centuries.
- Elm, basswood/linden (Tilia), and hickory — the great bast fibers. Basswood inner bark is retted (soaked in water for weeks until the fibers loosen, exactly as flax is retted) and separates into ribbons and, finer still, into cordage fiber. This is the same bast you will spin into rope in Chapter 26.
- Birch — the outer bark here, not the inner: harvested as flexible sheet, it makes folded and stitched containers (cross to the seamed forms of the leatherworker's sub-volume) rather than woven ones, but it belongs in the weaver's material kit.
Grasses and the splint woods
- Sweetgrass, beargrass, and the strong meadow grasses — gathered in bundles, dried, and either coiled (as the foundation core or the wrapping strand of coiled basketry) or twined. Their virtue is fineness and, in sweetgrass, fragrance.
- Splint wood — the pounded ash. A unique and beautiful technology: a straight, clear log of black ash (Fraxinus nigra) is pounded along its length with a wooden maul, which crushes the soft springwood between the growth rings and frees the dense summerwood as long, flat, satiny splints, one growth-ring thick. The tree's own annual layers become the weaving material. Oak and hickory split (rather than pound) into similar splints. This is the material of the durable pack basket and the heavy carrier.
Specification Table 25-2 — Material properties at a glance
| Material | Part used | Harvest season | Role (stake / weaver) | Pliancy | Durability | Prep |
|---|---|---|---|---|---|---|
| Willow (seasoned brown) | Year rod (withy) | Dormant / cold quarter | Both, by gauge | High when soaked | Very high | Soak + mellow per Table 25-1 |
| Common reed | Whole / split stem | Late summer–autumn | Stake; weaver split | Moderate | High | Dry; dampen to split |
| Bulrush / soft rush | Whole stem | Mid–late summer | Weaver (soft) | Very high | Moderate | Shade-dry; dampen + mellow |
| Cattail | Leaf strap | Late summer | Weaver (soft) | Very high | Moderate | Shade-dry to tan; dampen |
| Cedar inner bark | Bast ribbon | Spring (bark slips) | Weaver | High | Very high | Split to width; dampen |
| Basswood bast | Retted fiber | Spring–summer | Weaver / cordage | High | High | Ret weeks; strip |
| Sweet/beargrass | Whole blade | Summer | Weaver / coil core | High | Moderate | Dry; dampen |
| Black ash splint | Pounded ring | Spring–summer | Both, by width | High | Very high | Pound; split to width |
| Oak / hickory splint | Riven ring | Spring | Stake / heavy weaver | Moderate | Very high | Rive; dampen |
Your Commitment: You will learn one local material completely before you scatter across many. The Practitioner who knows the willow of her own valley — its soaking time, its season, its three states — weaves better baskets than the one who has handled ten species and mastered none. The marsh and the coppice are libraries; read one volume to the end.
Art direction
CHAPTER 26 — CORDAGE: THE LAYING OF THE TWO-PLY STRAND
Before the basket, the string. Cordage is the most fundamental fiber technology the Practitioner owns — older than weaving, the parent of the net, the snare, the bowstring, the lashing, the sewn seam, and the very thread that binds a coiled basket. Its principle is one of the most elegant in all the practical arts: a twisted bundle of short, weak fibers becomes a continuous, strong cord, because the twist converts the fibers' tendency to slide past one another into friction that locks them together. Twist is the engine; friction is the grip. Master the reverse-wrap and you can make a kilometer of rope from a meadow.
The fiber sources
Cordage fiber is the long, strong bast (inner-bark and stem fiber) of certain plants, freed from the soft tissue around it:
- Stinging nettle (Urtica dioica) — the temperate cordage king. Tall summer stems yield long, fine, strong bast. Harvest mature stems, strip the leaves (carefully — the sting is real, but dead nettle does not sting), and either use fresh-stripped ribbons or ret and dry them. Nettle cord is fine and very strong.
- Dogbane / Indian hemp (Apocynum cannabinum) — the premier cordage plant of the temperate Americas, prized above almost all others. Harvest the dry, dead stalks in autumn or winter (not green); the bast is already cured on the standing stem. Split the hollow stalk, snap the woody core out in sections, and peel the ribbon of bast free. Exceptionally strong and fine.
- Yucca and agave — the desert's leaf fibers: the long, stiff leaves are pounded or retted to free the fiber, which is coarse, very strong, and comes with its own needle (the leaf tip). The material of the arid lands.
- Bast trees — basswood/linden, elm, cedar, willow bark — retted as in Chapter 25, the inner bark of these trees gives ribbon and fiber for heavier cordage and lashing.
The universal test of a cordage fiber: pull a single strand between your hands. If it breaks with a clean snap and resists hard before it goes, it will make cord. If it crumbles or stretches dead, it will not.
The reverse-wrap two-ply method — the master protocol
This single technique makes everything from sewing thread to anchor rope; only the bundle size changes. It produces a balanced two-ply cord that will not unravel, because the twist within each ply opposes the twist between the plies, and the two lock in tension.
Protocol 26-A — The reverse-wrap (two-ply):
- Prepare the fiber. Take a thin, even bundle of fiber — for a first cord, about as thick as a few hairs to a thin pencil lead. Dampen slightly; damp fiber grips and lays better than bone-dry.
- Find the kink point. Hold the bundle near one end and twist it tight until, at one spot, it buckles and kinks back on itself, folding the bundle into two unequal legs. (Place this kink about a third of the way along, never at the middle, so your two plies run out at different lengths — this staggers the splices.) Pinch the kink between left thumb and forefinger. You now have two legs hanging down: a near leg and a far leg.
- The two motions, repeated forever. With the right hand:
- (a) Twist the far leg away from you (tighten it) — roll it clockwise between right thumb and finger until it is firm and wants to coil.
- (b) Wrap that twisted leg toward you, over the top, crossing it to become the near leg — bringing it across counter-clockwise so it lies over its partner.
- The legs have now swapped. The pinch in your left hand walks forward to the new crossing point.
- Repeat (a) and (b) on the leg that is now far. Twist away, wrap toward; twist away, wrap toward. That is the entire stroke.
- Splice in new fiber before a leg runs out. When a leg shortens to a hand's length, lay a fresh, thinned and tapered bundle of new fiber alongside it (overlapping by 50–75 mm), and simply twist-and-wrap the doubled material as one. Because your two plies are staggered (step 2), you never splice both at once, so the cord never has a weak point where everything joins. This is the secret of continuous rope: the splice is hidden inside the twist and the staggering keeps the splices apart.
- Keep the diameter even by adding the same amount of fiber each time you splice. A cord's strength is set by its thinnest point; consistency is everything.
- Finish by tying off, or by reverse-wrapping the last few centimeters extra-tight and letting the natural twist hold — a well-laid cord stays laid.
The Critical Insight: The reverse-wrap works because of opposed twist. Each ply is twisted in one direction (say, clockwise — an "S" twist within the strand); the two plies are wrapped around each other in the opposite direction (counter-clockwise — a "Z" twist between them). Under load, the plies try to untwist, but untwisting one tightens the other against it. The rope is in permanent self-locked tension — it holds itself together with the same force that holds your load. Every rope on earth, from a sewing thread to a ship's hawser, is built on this single balance of opposed twist.
Laying heavier rope and the rope-walk
To make rope thicker than two fine plies, you scale up: lay several two-ply cords, then lay those together by the same reverse-wrap, producing a three-strand or cabled rope. Traditionally this is done on a rope-walk — a long straight space where strands are hooked to a fixed point at one end and to a spinning hook (a simple cranked frame) at the other; the strands are twisted hard, then a grooved wooden top is run down between them as they are let to wind together, the top regulating an even lay. A field rope-walk is nothing more than two posts, a hand-crank, and a notched stick. The principle is identical to the hand-laid cord, only mechanized for length and thickness.
Specification Table 26-1 — Cordage fiber comparison (relative, single 2-ply cord of equal diameter)
| Fiber | Source part | Harvest | Relative breaking strength | Fineness | Notes |
|---|---|---|---|---|---|
| Dogbane | Dead stalk bast | Autumn/winter | Very high | Fine | Often rated the strongest temperate wild fiber |
| Nettle | Summer stem bast | Summer | High | Very fine | Excellent fine thread and cord |
| Yucca/agave | Leaf fiber | Any | High | Coarse | Built-in needle; desert standard |
| Milkweed | Stem bast | Autumn | Moderate–high | Fine | Brittle if too dry; ret lightly |
| Basswood bast | Retted inner bark | Spring–summer | Moderate | Medium | Heavy cord, lashing |
| Cedar bark | Inner bark ribbon | Spring | Moderate | Medium | Soft, abundant, fast |
| Rawhide (cross-ref) | Animal skin lace | — | Very high | — | The leatherworker's cord; see leather sub-volume |
Strength is relative and field-comparative; the true measure for any batch is the break test below.
Protocol 26-B — Field breaking-strength test. Lay a standard 300 mm sample of each fiber to identical diameter. Tie one end to a fixed bar; to the other tie a basket and add known weights (stones weighed on a steady balance) until it parts. Record the weight at break. Test three samples and average. This converts the relative table above into numbers true for your plants, your season, and your hand — the only numbers that matter when the cord must hold.
Art direction
CHAPTER 27 — THE FOUR WEAVES: COILING, TWINING, PLAITING, WICKERWORK
Every basket made by any people in any age is built from one or a combination of four structural families. Learn these four and you have not learned four baskets — you have learned the grammar from which all baskets are spoken. Each weave has a distinct structural logic, and the form a basket must take dictates which weave serves it. Build a first basket in each before you read the next chapter; the forms there are only these four put to work.
Weave I — Coiling: the sewn spiral
Structural logic. Coiling is not weaving at all in the strict sense — it is sewing. A continuous bundle of foundation material (the core — grass, rush, pine needle, or a fine rod) is wound in a tightening spiral, and each new round is stitched to the round below with a wrapping strand (the stitch fiber) passed through with an awl. The basket's strength is in the stitching; the result is dense, rigid, can be made watertight, and is the natural method for bowls and storage jars. Coiling builds the basket the way a potter builds a pinch-pot — by adding to a wall, not by interlacing a frame.
Protocol 27-A — First coiled basket (a small bowl):
- Materials. A long supply of even core bundle (e.g., a finger-thick rope of grass or rush, kept uniform), a softer flexible stitch fiber (split rush, raffia, cedar bark, or yucca), and a bodkin or coiling awl to open holes.
- Start the center. Taper the end of the core bundle and wrap it tightly with the stitch fiber for 30–40 mm. Bend this wrapped tail into a tight curl and begin spiraling the core around it.
- The stitch. As each new round of core lies against the previous, push the awl through the round below, pass the stitch fiber through the hole, and pull it snug over the new round — binding new to old. Repeat every few millimeters. Common stitches: the simple plain wrap (each stitch independent) and the figure-eight / Navajo stitch (each stitch also catches the round below in a locking cross).
- Keep the core fed. As the core thins, lay in new material tapered alongside so the bundle stays one even diameter — exactly the staggered feeding of cordage (Chapter 26).
- Shape by stacking. To make the wall rise and curve, place each round directly on top of the last (vertical wall) or slightly outward (flaring bowl) or inward (closing toward a neck). The basket's whole form is governed by where you set each round relative to the one beneath.
- Close the rim. Taper the core to nothing over the last 50 mm and stitch the diminishing end down tight.
A coiled basket so tightly stitched that the core is fully buried can be made to hold water once the fibers swell — the technology behind the watertight cooking basket, into which fire-heated stones were dropped to boil food before pottery.
Weave II — Twining: the paired weaver
Structural logic. Twining uses rigid radiating stakes (warps) and a pair of weavers (wefts) that twist around each other between every stake — one weaver passing in front of a stake while the other passes behind, then they swap with a half-twist before the next stake. Because two weavers cross between each warp and trap it, twining grips the stakes far more firmly than a single weaver could; it makes a strong, often flexible, finely controllable fabric, and it is the method behind a vast range of soft bags, hats, and traps.
Protocol 27-B — First twined basket (a small round bowl):
- Lay the warp. Cross two groups of stiff stakes at their centers in a spoke pattern (e.g., four over four), or pierce one group through the other, making a radiating star — these are the warps, the skeleton.
- Start the twine. Bend a single long weaver in half around one warp spoke; you now have two weaver-ends, a front one and a back one.
- The twining stroke. Bring the back weaver forward, over the next warp; bring the former front weaver behind that same warp; cross them (a half-twist) so they swap places. Move to the next warp and repeat: the strand that was behind comes forward over the next stake; they cross and swap. The two weavers spiral around the warps, locking each one as they pass.
- Separate the spokes. After the first round or two binds the center, spread the warp spokes evenly like the hours of a clock; the twining now holds that spacing.
- Build the wall. Continue twining round and round, bending the warp spokes upward where you want the base to end and the wall to begin. Add weaver length by splicing in (overlap behind a warp).
- Finish the rim by folding each warp down and tucking it into the weave alongside its neighbor (a trac border), or bind the top edge with a wrapped band.
Weave III — Plaiting: the woven checker
Structural logic. Plaiting (also called wickerwork's flat cousin or matting weave) interlaces flat, flexible strands of equal flexibility in two directions — there is no stiff warp and supple weft as in twining; both elements are the same and both bend. The simplest is plain plait (checkerwork): over-one, under-one, like a checkerboard. Twill plait floats over two or more (over-two-under-two), producing diagonal patterning and a more flexible, often stronger fabric. Plaiting is the method of mats, of soft folded bags, and of square-bottomed baskets, and it is the fastest of the four. Its logic is the textile loom's logic — orthogonal interlacing — done by hand without a loom.
Protocol 27-C — First plaited mat / basket base:
- Lay the first direction. Place a row of flat strips (cattail, palm, split reed, ash splint) side by side, all running one way, held down at the top.
- Weave the second direction. Take a cross-strip and go over-one, under-one across the whole row. Take the next cross-strip and offset the pattern (over where you last went under), beating each row up snug against the last. This is plain checkerwork. For twill, go over-two-under-two and step the start of each row by one to walk the diagonal.
- Square the base. A plaited square, woven loose at first, is the floor of a basket.
- Turn up the walls. At the base's edge, bend all the strips upward and continue plaiting them as the walls — now weaving the standing strips together in the round, or folding corners to make a box. The strips that were the base become the walls; nothing is added at the corner.
- Border the rim by folding each strip back down into the weave and trimming.
Weave IV — Wickerwork: the single weaver on rigid stakes
Structural logic. Wickerwork is the classic stake-and-strand basket: a framework of stiff, fixed stakes (uprights) is woven with single supple weavers passing alternately in front of and behind each stake (over-one, under-one), round and round. Unlike twining (paired weavers), wickerwork uses one weaver at a time; unlike plaiting (both elements flexible), it has a clear stiff skeleton and supple skin. It is the method of the willow basket, the strong open carrier, the round-bottomed pannier. Its logic is the frame logic: build a rigid cage, then skin it.
Protocol 27-D — First wicker basket (round willow):
- Make the base slath. Cut 6 stout base stakes; split 3 of them through the middle and thread the other 3 through the splits, making a cross of 6-through-6 — the slath.
- Pair the base out. Take two fine weavers, loop them around the slath arms, and twine (pairing) for two rounds to lock the cross — even a wicker base starts with a twined center. Then spread the 12 spokes into evenly spaced rays and weave round (single weaver, over-under) until the base reaches its diameter.
- Stake up. Sharpen and insert a long side stake beside each base spoke; cut off the base spokes. Bend all the side stakes upward and tie them in a temporary bundle at top.
- Upset the basket. Work several rows of waling (a strong three-weaver twined band) at the base of the upright stakes to fix them firmly vertical and set the spacing — this is the foundation course that makes the basket stand.
- Weave the wall (randing). With a single weaver, simply go in front of one stake, behind the next, all the way round, adding new weavers butt-to-butt, packing each row down. Continue to full height. Vary with slewing (several weavers at once for speed) or decorative fitching as skill grows.
- Wale and border. Finish the top with a band of waling, then lay down a border: bend each stake down in turn and weave it along behind the next two or three, locking the rim into the strong rolled edge that gives a willow basket its tough lip.
Specification Table 27-1 — The four weaves compared
| Weave | Elements | Action | Resulting fabric | Best for | Speed | Watertight? |
|---|---|---|---|---|---|---|
| Coiling | Core + stitch fiber | Sew a spiral | Rigid, dense, smooth | Bowls, jars, storage | Slow | Yes, if tight |
| Twining | Rigid warp + paired weft | Twist two weavers per stake | Strong, flexible, fine | Bags, hats, traps | Moderate | Sometimes |
| Plaiting | Flat strips, both flexible | Over/under interlace | Flat, foldable, fast | Mats, square bags, bases | Fast | No |
| Wickerwork | Rigid stakes + single weaver | One weaver over/under | Strong, rigid, open | Willow carriers, panniers | Moderate | No |
The Critical Insight: The four weaves are not four crafts but four answers to one question — how does a strand hold a form? Coiling holds it by stitching a wall upward; twining by trapping each stake between twisted pairs; plaiting by orthogonal interlace; wickerwork by skinning a rigid cage. The accomplished weaver does not "know baskets" — she reads the job (Does it hold water? Must it fold? Must it bear weight? Must it strain a liquid?) and selects the structural logic that answers it. Every basket in the next chapter is one of these four, chosen for its task.
Art direction
CHAPTER 28 — FORMS THAT SERVE: THE BASKET AS TOOL
A weave is grammar; a form is a sentence with a purpose. This chapter takes the four weaves and shapes them into the working vessels that carried civilization — each form a solved engineering problem, its geometry dictated by its task.
The burden basket and the pack frame
The burden basket is the load-carrier worn on the back, its weight taken by a tumpline (a broad strap across the forehead or chest) or shoulder straps. Its engineering is conical-to-cylindrical: wide mouth, narrowing base, woven in strong wicker or twining over stout stakes, often with a reinforced rim and a doubled base where wear is worst. The cone gathers a large volume toward a stable point against the back.
For heavy and rigid loads, the basket marries a pack frame — a light wooden ladder-frame of two side rails and rungs (ash or other tough wood, mortised or lashed), to which the basket is lashed and against which the back rests. The frame transfers load to the hips via a waist strap and spares the spine. This is the direct ancestor of every load-bearing carry, and its load-distribution geometry — tumpline to skull, frame to hip — is treated alongside the journey-load and the porter's burden at Vol XI — The Navigator's Codex, which carries the long-haul carrying systems in full.
The winnowing tray — geometry as machine
The winnowing tray is a shallow, open, often fan-shaped or scoop-shaped basket whose entire form is a grain-cleaning machine. Threshed grain — kernels mixed with light chaff — is tossed from the tray into a breeze (or thrown up and caught): the heavy kernels fall back into the tray while the wind carries the light chaff away over the lip. The tray's shallow flare and smooth tightly-plaited or twined surface let the grain slide and toss cleanly; the open front lets the cleaned grain be poured off. There is no moving part — the geometry is the machine, harnessing gravity and a breeze to separate by density. A close-woven winnower also doubles as a sieve and a serving platter.
The fish trap — the funnel logic
The woven fish trap (the weir basket, the eel-buck, the fyke) is one of the most ingenious forms the decree carries, and its principle is pure: the non-return funnel. A long woven basket — wickerwork or twining over a hoop frame — has, set inside its mouth, an inward-pointing funnel (a throat) woven to a narrow opening. The fish, following bait or current, swims in through the wide funnel mouth and out its narrow inner end into the trap's body; but to escape it must find that small inner hole from the wrong side, among the converging spikes of the funnel's end, and it cannot. Easy in, impossible out. A second internal funnel deeper in makes escape still less likely. The trap is set in a current or a weir gap, often baited, and lifted to empty through a closable end.
Protocol 28-A — The funnel throat (the heart of the trap):
- Weave the trap body as an open-ended tube on hoop ribs (wicker over willow hoops works well).
- Weave a separate cone of stakes and weavers, wide at one end, narrowing to a ring of stiff, inward-pointing spike-ends at the other — leave these ends free and springy, surrounding a hole just large enough for the target fish.
- Insert the cone into the trap's mouth, wide end out, and lash its rim to the trap mouth. The springy inner spikes yield inward to a fish pushing in and close against a fish pushing out.
- Close the far end with a removable woven plug for emptying.
Storage baskets and the lid
Storage demands a different brief: capacity, a stable form, protection from vermin and damp, and a lid. Storage baskets are typically coiled (for density and a smooth pest-resistant surface) or close-twined, built tall and full-bodied. The lid is woven as a shallow inverted basket sized to cap the rim — either a loose nesting cap or one hinged with a cord loop and toggled shut. A coiled granary basket, plastered inside and out with mud or dung (cross to the daubed wattle of Chapter 29), becomes a sealed silo. The basket is, in the deepest sense, the first granary — the technology that let a harvest be kept rather than eaten at once (see this chapter's canon sidebar in Ch. 30).
The sieve and the riddle
A sieve is a basket whose virtue is its holes. Woven to a deliberate, even mesh — an open plait or a twined grid on a hoop — it sorts material by size: flour from bran, fine seed from coarse, gravel from sand. The riddle is its coarse cousin, a stout open-woven or rod-gridded hoop for sorting soil, stones, or roots. The mesh gauge is set by the spacing of the stakes and the beat of the weave; a graded set of sieves (coarse to fine) is a complete sorting kit.
Specification Table 28-1 — Form, weave, and the problem it solves
| Form | Typical weave | Geometry | Problem solved |
|---|---|---|---|
| Burden basket | Wicker / twining | Cone to cylinder, reinforced base | Carry bulk load on the body |
| Pack frame + basket | Wicker on wood frame | Basket lashed to ladder-frame | Transfer rigid/heavy load to hips |
| Winnowing tray | Tight plait / twine | Shallow fan or scoop | Separate grain from chaff by density |
| Fish trap | Wicker / twine on hoops | Tube + non-return funnel(s) | Catch fish: easy in, impossible out |
| Storage + lid | Coiling / close twine | Tall body, capping lid | Keep harvest from vermin and damp |
| Sieve / riddle | Open plait / rod grid | Flat mesh on hoop | Sort material by particle size |
Your Commitment: You will build the form to the task, not the task to the form. Measure the load before you size the burden basket; measure the fish before you size the funnel throat; measure the grain before you set the sieve's mesh. A basket is a tool with a job, and a tool built without measuring its job is an ornament.
Art direction
CHAPTER 29 — MATS, NETTING, AND THE SOFT ARCHITECTURE
The fiber decree does not stop at the vessel. The same hands that weave a basket floor a house, screen a window, sleep a body, catch a river, and roof a shelter. These are the soft architectures — fiber structures that become furniture and building. Where they meet the standing house, the structural carpentry is carried at Vol VI — The Builder's Codex; this chapter supplies the woven membranes that clothe and complete it.
Rush and reed matting
A mat is a plaited or twined fabric of marsh plants, the oldest floor and the oldest wall-hanging. Bulrush, cattail, and reed are plaited flat (Chapter 27, Weave III) into rectangular mats, or the stems are laid parallel and twined across at intervals with cord — a row of twining every hand's-width binding hundreds of parallel stems into a roll-up mat (the reed mat of the marsh house, the mudhif screen). Twined reed mats make movable walls, sleeping surfaces, door screens, and the underlayment of floors and roofs. The technique is the same as a twined basket wall, simply laid flat and large.
Net making — the knotted grid
Netting is fiber engineering at its most efficient: a strong, light, open grid that strains a large volume of water (or air) for fish, birds, or game, made entirely of cordage and a single repeated knot. Its parameters are two — the knot and the gauge (mesh size) — and both are controlled by simple tools.
The net is built with a netting needle (a flat shuttle, notched at both ends, that holds a long supply of wound cord and passes through the loops) and a gauge stick (a flat stick or mesh board whose width sets the size of every mesh — each loop is formed around the gauge, so every mesh comes out identical).
Protocol 29-A — The sheet bend / netting knot, in sequence:
- Set the foundation. Tie a row of starting loops to a taut head-rope (a horizontal cord), one loop per mesh of the net's width, each loop formed over the gauge stick so they are even.
- Charge the needle with cord. Work left to right (or as you prefer, consistently).
- Form the mesh. Lay the gauge stick under the working area. Pass the needle up through the loop hanging from the row above. Bring the cord down around the front of the gauge stick and back up, forming the new loop's size against the stick.
- Tie the netting knot (sheet bend). Bring the needle so the cord crosses over the two strands of the loop above, then pass the needle behind both strands and out through the bight it has just made — drawing it down onto the top edge of the gauge stick and pulling tight. This sheet bend locks the new mesh to the old and will not slip even when the net is wet and loaded.
- March across the row, one mesh per loop above, every loop sized by the same gauge stick.
- Drop to the next row, turn, and work back. Slide the gauge stick down as each row completes; its width has guaranteed every mesh is identical.
- Selvage and rig. Finish the side edges with a doubled selvage cord; rig the head-rope with floats and the foot-rope with weights (stone or fired-clay sinkers) so a gill or seine net hangs as a vertical wall in the water.
The gauge governs the catch: a small mesh strains small fish, a large mesh lets the young swim through and takes only the grown — the woven conservation rule built into the tool itself.
The hammock and the slung bed
A hammock is a net or open-twined sheet slung between two points, its load spread to a gathered cord (the clew) at each end. Built as a wide, coarse-meshed net or as a plaited/twined cloth with selvage edges, every mesh shares the sleeper's weight, and the gathering clews concentrate that distributed load onto two suspension ropes. It is the net principle turned to rest: maximum support, minimum material, no frame.
Thatch — the woven roof
Thatch roofs a building by laying overlapping courses of dried stem material — reed (the longest-lived, a reed roof lasting generations), straw, rush, or grass — bundled and fixed to the roof's wooden framework so that water runs down the outside of the stems and never penetrates the deep, springy layer. The fiber craft in thatch is in the binding and the laying:
Protocol 29-B — Thatch basics:
- Bundle. Tie the stems into even bundles (yealms or nitches), butt-ends aligned.
- Lay from the eave up. Fix the first course along the bottom edge, butt-ends down and pointing out, and work upward so each higher course overlaps and covers the fixing of the one below — the tying is always buried under the next course, never exposed to rain.
- Fix each course to the roof battens with a tarred or twisted-fiber cord and a long hooked spar or sway (a rod laid across the course, pinned down by hooked sticks driven into the underthatch).
- Pitch steep. A thatch roof must be steep (typically very steep) so water sheds fast and never soaks in; pitch is the chief preservative.
- Dress the courses tight and even with a wooden leggett (a ridged paddle) that drives the butt-ends up flush, making the dense water-shedding surface.
- Cap the ridge with a folded, pegged course or a turf/clay capping — the most exposed and most often renewed part.
The structural roof timbers beneath — rafters, purlins, and battens — are the Builder's work (Vol VI); the weaver supplies the skin.
Wattle — the woven wall
Closely kin: wattle is wickerwork at building scale — supple rods (hazel, willow) woven horizontally between upright stakes (the sails between the studs) to make a stiff woven panel, which is then daubed with a mud-dung-straw plaster (wattle and daub) to make a solid, insulating wall. The weave is pure wickerwork (Chapter 27); only the scale and the daub are new. Here the basket-weave literally becomes the house.
Art direction
CHAPTER 30 — THE WEAVER'S ECONOMY
The fiber arts are governed by the calendar more strictly than almost any other craft in this Codex, because the material is alive and its quality is set by the day it is cut. The weaver who works without a harvest calendar is forever short of good material and forever fighting bad. This closing chapter gives the year, the kit, the repair, and the place of the basket in the deep human story.
The harvest calendar
Each material has a window — a season when it cuts strongest and prepares best. Miss the window and the material is brittle, weak, or locked to the plant. The weaver's year is a rotation of cutting, drying, and storing against the working seasons.
Specification Table 30-1 — Harvest calendar by material
| Material | Cut when | Why then | Then |
|---|---|---|---|
| Willow withies | Dormant (cold quarter, leaf-off) | Sap down, rod cured, straight | Season dry; soak before use |
| Dogbane / nettle bast | Autumn–winter (dead stalk) | Bast already cured on stem | Strip, store dry, lay to cord |
| Cedar / basswood bark | Spring (sap rising, bark slips) | Inner bark peels clean | Split / ret; store damp-stable |
| Bulrush / cattail / reed | Mid–late summer | Stem mature, leaf set | Shade-dry slowly; dampen to weave |
| Sweet/beargrass | Summer | Blade long and supple | Dry; dampen to coil |
| Black ash splint | Spring–summer | Springwood soft, pounds free | Pound, split, store flat dry |
The Critical Insight: The calendar reveals the fiber arts as a two-season craft — a cutting half and a working half. The marsh and the bark are summer harvests; the willow and the dead-stalk cordage are winter harvests; and the weaving itself fills the dark months when the field is bare. This is why basketry universally became the indoor winter work of agrarian peoples: the year cuts the material in its season and stores it, and the cold months — when there is nothing to grow and everything to mend — turn the stored harvest into the vessels that will carry next year's. The weaver's calendar interlocks perfectly with the farmer's (Vol VII), each filling the other's idle hours.
The weaver's tool kit
The fiber arts need astonishingly few tools, which is exactly why they survive every collapse — there is nothing in the kit that cannot be made by hand:
Specification Table 30-2 — The weaver's bench
| Tool | Form | Use |
|---|---|---|
| Bodkin / awl | Tapered steel or bone spike, handled | Open holes for coiling stitches and tucking ends |
| Rapping iron | Flat heavy iron bar | Beat down weave rows tight and even |
| Shears / knife | Sharp blade | Cut stakes, trim ends, point stakes |
| Side cutters / secateurs | Bypass cutters | Cut and trim willow cleanly |
| Netting needle | Notched flat shuttle | Hold and pass cord in net making |
| Gauge / mesh stick | Flat sized stick | Set uniform mesh in netting |
| Coiling gauge | Small ring or tube | Hold the core bundle to even diameter |
| Soaking tank | Trough or tarpaulin | Soak and mellow willow and rush |
| Cleaving brake / pounder | Wooden tool / maul | Split rods (cleaves); pound ash splint |
| Leggett (for thatch) | Ridged paddle | Dress thatch butt-ends flush |
A bodkin, a knife, a beater, and a soaking trough will carry the Practitioner through ninety percent of all fiber work; the rest is hands and time.
Repair — the basket that lasts
A basket is repairable to a degree few crafted objects match, because a weave is a continuous skin that can be re-entered anywhere:
- Replace a broken stake by sharpening a new one, soaking it, and threading it into the weave alongside the broken one before cutting the old one out — the same insertion used in the original build.
- Re-weave a worn patch by tucking in a fresh weaver where the old has failed and continuing the original over-under, the new weaver's ends buried behind stakes.
- Re-bind a failed rim by laying a new border or whipping a wrapped band over the damage.
- Re-coil a burst stitch by re-sewing through the sound rounds on either side with fresh stitch fiber.
- Patch a holed mat or net by darning new cord across the gap in the original mesh and knotting it in.
A well-made basket, kept dry between uses and re-dampened before hard flexing, repaired at the first broken stake rather than the tenth, serves for decades. Repair is not failure; it is the craft continuing.
CANON SIDEBAR — THE FIRST GRANARY: THE ELDEST CARRIED DECREE. Of all the maker's decrees, the nam-ad-KID is the deepest in time. The reconstructed chronology of this Codex (Vol XVI — The Historian's Codex) places the working of fiber before the working of fired earth — and the wider human record agrees: the impressions of woven baskets and cords survive on the inside of the very earliest pottery, because the first potters lined a basket with clay and fired it, burning the basket away and keeping its woven print on the pot. The vessel of grass came first; the vessel of clay was its cast. Twisted cordage and netting are attested across tens of thousands of years — a fragment of two-ply cord, a knotted net's stone weights, the loop-impressions on a hearth's clay — reaching back, in the deep reconstruction, before the last great cold of the Younger Dryas, before the megalithic resonance era, before the Lyres of Ur slept in their chambers and long before the Reset of 1177 BCE burned the palaces above ground. When a civilization falls, the fiber arts are the first craft to come back, because they need no kiln, no forge, no quarry — only a marsh, a knife, and a pair of hands that remember the four weaves. This is why the scribes ranked the Basket Weaver among kingship and law and music: the woven vessel is the technology that made the harvest keepable. A field reaped into a basket is a field saved; a field reaped onto bare ground is a field lost. The granary, the silo, the storehouse — every institution of stored surplus, and so every settled society that surplus made possible — begins with one Practitioner who could weave a vessel tight enough to hold the gathered field through the hungry months. Before the wheel turned and before the pot fired, the basket carried civilization home. It is, in the most literal sense the decree allows, the first granary — and the oldest thing the dup šimati carries.
The materials are known and their seasons learned; the cord is laid; the four weaves are in the hands; the forms stand ready to serve; the soft architectures floor, screen, sleep, and roof the house; the calendar feeds the craft and the bench is light enough to carry through any collapse. The gathered field is no longer a thing that rots in the open but a thing that keeps in the woven vessel — and a people that can weave its own containers can save its own harvest, which is the beginning of every settled thing.
The nam-ad-KID is carried. Let the field be gathered, and let it keep.
SUB-VOLUME VI — THE SACRED PERFORMERS
ME 18 · kur-ĝar-ra · THE KURGARRA
ME 19 · ĝír-ba-da-ra · THE GIRBADARA
ME 20 · sa-gur₅-ra · THE SAGURSAG
The three decrees of staged meaning. Among the sixty-four holy measures, three are given not to the maker of things but to the maker of moments — the offices of the performer who stands before the gathered community and, by voice and mask and moving body, makes a thing happen in the shared mind of a people that was not there before. The kur-ĝar-ra grants ecstatic performance: the dance that breaks the ordinary frame, the rite that crosses the threshold the rest may not cross. The ĝír-ba-da-ra, the dagger-bearer, grants the edged drama: the staged ordeal, the mock combat, the danger shown so that it may be mastered. The sa-gur₅-ra grants the lament and the turning — the voice that carries grief for the whole assembly and turns the year. Where these decrees are held, a community stages its own meanings; where they are lost, it watches meanings staged for it, and forgets it ever held the stage at all.
These are the three decrees the modern world handed to professionals and forgot it once held itself. Performance became something done to an audience by paid specialists behind a velvet rope, and the community that for the whole of human time made its own meanings — danced its own harvest, masked its own gods, told its own dead into the ground and its own children into adulthood — became a paying spectator of someone else's imagination. This is the deepest of the maker's losses, because it is the loss of the means of collective meaning itself. A people that cannot stage its grief must rent its grief. A people that has forgotten how to turn its own year stands outside the year, watching it pass on a screen.
The Sumerian lists knew otherwise. They set these offices in the same catalogue as kingship, law, and the smith's fire — not as ornament to civilization but as load-bearing structure of it. This sub-volume restores the performer's decrees as working knowledge: the told story that holds a hall without a page; the mask that lets an ordinary face become a god, a fool, or a stranger; the seasonal theater that stages a community's own mysteries; the dance that moves a crowd as one body; and the small stage of the puppet, which can say to power what no living mouth dares. Work the chapters in order; each assumes the presence built in the one before.
CHAPTER 31 — THE THREE OFFICES: WHAT THE SOURCES SHOW, AND THE OFFICE RESTORED
What the cuneiform record actually shows
The Practitioner who would restore these offices must first meet them honestly, as the scholarship meets them. The three names at the head of this sub-volume belong to real cultic personnel of the temples of Inanna in Sumer and her later counterpart Ištar — performers attached to the goddess of love, war, and threshold, whose worship demanded exactly the staged, boundary-crossing performance the rest of temple life did not.
The kurgarra (Akkadian kurgarrû) appears as an ecstatic performer of Inanna's cult: a dancer in her processions, associated with weapon-dances and, in some festival accounts, with ritual self-laceration and reversal — performances that broke the ordinary order because the goddess they served was the goddess of broken orders. The gala / kalû was at root the lamentation singer — the voice of public grief who chanted the great laments over the dead, over fallen cities, and over the dying-and-rising seasonal god, and who sang them in Emesal, a register of Sumerian the texts associate with the speech of women and of certain cultic performers. The sagursag (sa-gur₅-ra) is named in the offering-lists and hymns among Inanna's performers, grouped with the kurgarra and gala as the goddess's company. The girbadara — ĝír-ba-da-ra, readable as "dagger-bearer" — sits with the edged, martial side of this performance: the staged blade, the danced weapon, the drama of the shown and mastered danger that Inanna, goddess of war as much as love, drew to herself.
Two features of these offices the Practitioner must understand without sensationalizing, because they are the very features that made the performers able to do their work.
The first is gender liminality, and the scholarship is genuinely divided. The texts give real evidence that these performers occupied a role between or across the ordinary gender categories of their society: the gala sang in the Emesal register associated with women's speech; some kalû bore feminine names; ritual texts and proverbs associate the closely related assinnu and the kurgarra with cross-dressing within the cult and with a liminal sexual role; and one strand of scholarship reads the assinnu and kurgarra together as embodying, within the rite, the combined masculine and feminine aspects of Inanna — the whole spectrum of gender the goddess encompassed. Other scholars caution against reading modern identities back into them, noting that some performers had children and may have taken on their liminal presentation only in ceremony. The honest summary: these were ritually gender-liminal cultic roles, occupying a recognized threshold-position, and that position was not incidental to the work but the engine of it. The performer who stood between categories could stand between worlds — which is exactly what the central myth asks.
The second feature is the myth of the recovery. In the great Sumerian poem of Inanna's Descent to the Underworld, the goddess descends through seven gates into the realm of her sister Ereshkigal, is stripped at each gate, judged, struck dead, and hung as a corpse on a hook. Her minister Ninshubur appeals to the gods, and it is Enki — god of wisdom and craft — who answers. From the dirt under his fingernails Enki fashions two small beings, the kurgarra and the galatur, described as neither male nor female. He gives them the food of life and the water of life and sends them down. Because they are genderless and weep with Ereshkigal — answering her labor-cries and groans not with force but with perfect echoing empathy, moan for moan and cry for cry — they pass where armed gods could not, and the grateful queen grants them the corpse of Inanna. The kurgarra sprinkles the food of life upon it; the galatur sprinkles the water of life; and Inanna rises.
This is the founding charter of the performer's office. The two who go down to bring the goddess back are not warriors; they are performers of empathy, beings of the threshold whose entire power is the capacity to take another's grief into the body and give it back so faithfully that the griever is moved. They cross the ultimate boundary — death — not by breaking it but by performing their way through it. The lament the gala sang, the ecstatic dance the kurgarra danced at the turning of the year, the staged danger of the girbadara's blade all descend from this single act: the performer goes where the community cannot, carries the community's feeling there, and brings something back alive.
CANON SIDEBAR — THE OFFICE OF THE THRESHOLD-WALKER
In the recovered chronology of Vol XVI, the performer's decree predates every fixed temple and every written rite. Before the first wall of Uruk, the community that gathered at the resonant places of the megalithic era (cross the acoustic-architecture canon of Vol XX) needed someone to stand at its thresholds — of the season, of adulthood, of marriage, of death — and conduct the crossing. The Mystery School transmission held this the oldest of the staged arts, older than drama and older than scripture, because the crossing of a threshold is the oldest thing a community must do together. The kurgarra and galatur of the Descent are the mythic memory of this office: the ones who can be sent to the far side because they already live on the line. When the Practitioner takes up the performer's decree, she takes up this charter — not to entertain a community but to walk its thresholds ahead of it. The Critical Insight is structural: entertainment and ritual performance are not the same art degraded and refined; they are the same art turned outward (toward a watching crowd) or inward (toward a crossing community). The restored office is the inward turn.
The office restored: the licensed performer of meaning
Strip away the specific theology of a vanished pantheon and what remains is a functional role every durable community has filled under one name or another: the licensed performer of meaning — the person the community appoints, trains, and protects to stage its collective experiences so they land in the shared mind and not merely the private one. The restored office carries four standing duties, and the five following chapters equip each:
- To carry the community's memory aloud (Ch. 32). The performer holds the stories that make a people a people and tells them so they are received and retained.
- To stage the community's gods and strangers (Ch. 33–34). Through the mask, an ordinary neighbor becomes the god, the ancestor, the season, the enemy, the fool — so the community can meet these powers and survive the meeting.
- To turn the year and conduct its crossings (Ch. 34–35). The performer stages the sowing and harvest, the solstice and the rite of passage, moving the assembly through the turning as one body.
- To speak the unspeakable safely (Ch. 36). Through the small stage and the protected license of the fool, the performer says what no ordinary mouth may, and keeps the community honest with itself.
Your Commitment: You will hold this office as a trust, not a talent. The performer who treats the stage as a place to be admired has mistaken the outward art for the inward one and will, in time, do the community harm — for a crowd that has learned to watch has unlearned how to cross. The restored performer's measure is never the applause; it is whether the grief was carried, the threshold walked, the year turned, the truth spoken.

Art direction
CHAPTER 32 — STORYTELLING CRAFT: THE VOICE THAT HOLDS THE HALL
Before the written page, the entire memory of a people lived in the mouths of its tellers, and it survived because the oral tradition is not loose talk but a precision technology of remembering. The Practitioner who imagines the old storyteller as a free improviser has it backward: the teller worked inside a tight architecture that held a vast body of material stable across generations and freed the teller to perform it live without a text.
The oral-formula architecture
The deep discovery about oral epic is that traditional narrative is built from prefabricated parts, assembled live. The teller has internalized a kit of reusable components and the rules for combining them, and composes the telling in performance. Three component-types do most of the work:
- The formula — a fixed phrase filling a fixed metrical slot, recurring whenever its meaning is needed. "The wine-dark sea," "rosy-fingered dawn": not decorations but load-bearing modules, ready answers to the recurring problem of naming a familiar thing in meter without composing it fresh. Build your own kit from your community's world: a fixed epithet for the river, the headman, the mountain, death, the harvest moon — each a phrase the tongue reaches for without thought.
- The theme (type-scene) — a standard episode with a standard sequence, customized to the moment. The arming of a hero, the arrival of a guest, the burial of the dead: each unfolds through the same ordered beats every time, the teller varying only the particulars.
- The story-pattern — the largest unit: the shape of the whole tale (departure–ordeal–return; descent–recovery–rising, exactly as in the Descent). The pattern is the skeleton the themes hang on and the formulas clothe.
The three structural engines
- The opening. The told tale begins not with content but with a boundary marker — a fixed opening formula that lifts the hall out of ordinary time. "In the days when the gods walked." It silences the room, sets the rules (we are now in story-time), and gives the teller a running start on a passage the tongue knows cold.
- The triad (the rule of three). Events come in threes: three brothers, three trials, three gates, three nights. Three is the smallest number that establishes a pattern, confirms it, and breaks it — the audience feels the structure and anticipates the turn, and the third member is where the reversal and climax live.
- Repetition and the refrain. Verbatim repetition — which the untrained ear mistakes for clumsiness — is the tradition's signature and its strength. It lets the audience join (they learn the refrain and lean in), marks structure (a recurring passage is a landmark in a long tale), and rests the teller on known ground. Incremental repetition — the same frame advanced one element each time (the first gate… the second… the seventh) — drives a long episode forward at almost no cost to memory.
The Critical Insight: The structures that make an oral tale easy to remember are the very same structures that make it powerful to hear. The triad that lightens the teller's memory is the triad that grips the listener; the refrain that rests the teller is the refrain the hall joins. The modern writer, freed by the page from any need to remember, abandoned these structures and produced literature that must be read because it can no longer be held. The restored teller composes for the ear and the memory together, and so produces tales that live in mouths.
Voice and presence
The architecture holds the tale; the body delivers it. Four controls govern the teller's instrument:
- Pace and the pause. The most underused tool is silence — the held breath before the third gate, the stillness after the death. The novice rushes; the master waits, and the waiting is where the hall leans in. Gallop the journeys, slow the reckonings, stop dead at the turn.
- Pitch and the character-voice. Mark each speaker with a distinct register so the hall always knows who speaks without "he said." But use the full range sparingly — a teller who tells low and quiet can break the hall with a single raised line.
- The eye and the body. Hold the hall by the eyes, fixing individuals at the charged moments. The body sketches, never mimes: a turn of the head is the hero looking back; suggest, and let the listener's mind build the rest.
- The ceremonial frame. The teller commands attention by taking it — a fixed entrance, a settling, an opening formula delivered into silence. The rhythmic and ceremonial architecture of holding a gathering is carried in full at Vol XXIII — The Musician's Codex (Ch. 36); the teller and the musician share this threshold-craft.
Memorization architecture: the palace and the meter
To hold a long tale, the teller binds two ancient systems. The first is the memory palace (method of loci) — the material placed, image by vivid image, along a familiar route through a remembered place; to recall the tale, the teller walks the route, and each location yields its image and its passage. Because human spatial memory is vast and durable where verbal memory is fragile, a tale laid along a walked path is held far longer and recovered far more reliably than bare words.
The second is verse meter itself. A line built to a fixed metrical pattern is self-checking: a remembered line that does not scan tells the teller at once that something is missing, because the rhythm has a hole in it. Meter, rhyme, and alliteration are not ornament but error-correcting code for the memory — which is precisely why the oral traditions are in verse and not prose. The full craft of meter is the rhythmic discipline of Vol XXIII (Ch. 36); here we note only that the teller thinks in meter and uses it as the scaffold the formulas hang upon.
Bind the two: lay the episodes along the palace (so the large structure is spatial and unforgettable), and hold the lines within each episode in meter and formula (so the words are self-checking and self-supplying). The palace gives the order of the rooms; the meter gives the words in each. Together they let a single trained mind carry a tale of thousands of lines and deliver it the same way for fifty years.
Protocol 32-A — The storyteller's training (twelve weeks to the first full telling)
- Weeks 1–2 — Build the formula kit. Choose one tale of your community; compose fixed epithets for its recurring things and one fixed opening and closing formula. Drill each aloud until the tongue reaches it without thought.
- Weeks 3–4 — Set the meter. Choose a strong line natural to your language (four beats serves most) and recast the key passages into it. Cross Vol XXIII Ch. 36 for the construction of the line.
- Weeks 5–6 — Build the palace. Choose a route you know perfectly; place each episode at a station as a single vivid, exaggerated image. Walk it in the mind until the order is automatic.
- Weeks 7–8 — Marry palace to meter. Tell the tale by walking the palace, supplying lines in meter from the kit. Where you stumble, repair the kit or the palace.
- Weeks 9–10 — Add the voice. Layer presence onto the held structure: character-voices, pace, pauses, the eye. Drill the charged moments until the silence before each lands.
- Weeks 11–12 — Tell to a hall. Tell first to one listener, then a circle, then the gathered community. Where attention drops, the structure is weak, not the audience. You will know the craft is in you the day you stop reciting the tale and start living it before them.
Art direction
CHAPTER 33 — MASK AND COSTUME: THE INSTANT TRANSFORMATION
The mask is the oldest theatrical technology and the most powerful, because it does in an instant what no acting can fully do: it removes the performer and puts a power in their place. Behind the mask, the neighbor is gone; the god, the ancestor, the demon, the fool stands in the neighbor's body, and the community can meet that power face to face. The full material craft — leatherwork, carving, modeling, casting — is carried in the leatherworker's and sculptor's arts of the earlier sub-volumes; here we apply those crafts to the made face.
Mask builds: three roads to the made face
Build A — Papier-mâché (cast-and-laminated). The fastest, lightest, most forgiving road; learn it first.
- Model the positive in clay over a board, life-size, exaggerating the features the character needs; keep it convex and undercut nothing so the shell will lift.
- Release with grease or a plain wet-tissue film so the shell parts from the form.
- Laminate. Tear (never cut) paper into strips — torn edges blend, cut edges ridge. Coat each in flour paste or thinned hide glue and lay them overlapping, crossing the direction each layer, six to eight layers, firming between every two or three.
- Dry hard, then lift — slowly and completely (days, not hours; a rushed mask warps).
- Finish — trim, cut the eyes (and mouth, if spoken through), bind the rim with cloth or thin leather, seal and paint. Rig with a tie, a bite-bar, or a held rod.
Build B — Molded leather (cured face). The mask of the durable, close-fitting theatrical tradition — light, strong, and able to catch light on a sculpted plane like no other material.
- Carve a wooden positive (the forma), generous in its planes since leather rounds every edge.
- Soak vegetable-tanned leather until fully pliant (cross the wet-forming and cuir-bouilli craft of the leatherworker's sub-volume — the same molding and hardening principles govern the mask).
- Mold the wet leather over the form, working it into every plane with a smooth tool and the heel of the hand, fixing the edges to hold the shape.
- Dry on the form, then harden. Heat-set or wax-hardened (cuir-bouilli), it becomes rigid as a shell while staying light.
- Edge, line, dye, and seal. A well-made leather mask outlasts its maker and is the working tool of the performer who wears one nightly.
Build C — Carved wood (sculpted face). The most permanent and, in many traditions, the most sacred — the mask that is the ancestor or god, kept and fed between festivals.
- Choose a light, even-grained wood (lime, willow, the soft carving woods — cross the sculptor's sub-volume).
- Block out the mass from a half-log and hollow the back first to a uniform wall — this keeps the wall even and prevents splitting.
- Carve the front from broad planes to fine features, with the grain, the planes angled to catch the firelight the mask is seen in.
- Finish to the tradition — oiled raw, gessoed and painted, or charred and burnished. Rig and, where asked, consecrate.
Specification Table 33-1 — The three mask materials compared
| Material | Build method | Weight | Durability | Expressive strength | Build time | Best for |
|---|---|---|---|---|---|---|
| Papier-mâché | Laminate over positive | Very light | Moderate | High, soft-edged | 1–2 days + drying | Learning; processional giants; one-season masks |
| Molded leather | Wet-form + harden over forma | Light | Very high | Very high, plane-catching | 2–3 days | The worn, nightly theatrical mask |
| Carved wood | Subtractive from blank | Moderate–heavy | Very high (generations) | High, hard-edged, sacred | Days–weeks | The kept ancestral / divine mask |
The neutral mask: the foundational exercise
Before any character mask, the training tradition puts a neutral mask on the face — a plain, balanced, expressionless full mask, neither smiling nor frowning, neither young nor old. Because it has no expression, it cannot lie and it cannot help the performer: every meaning must come from the body. Wearing it, the performer learns the iron law of the mask — the mask does not act; the body acts, and the mask focuses.
This teaches two things the masked performer cannot do without. First, economy: the mask amplifies, so a small true movement reads hugely and a large false one reads as flailing; the masked body must be quieter and truer than the bare one. Second, the fixed face moves: a single well-carved expression, turned in the light on a living body, appears to change — lifted to the light it seems to brighten, dropped it seems to grieve. Protocol 33-A is the neutral-mask sequence: simple actions (enter a space, discover an object, meet another, depart) performed in the neutral mask until the body alone tells the whole story. No performer should wear a character mask before the neutral mask has taught the body to carry the meaning.
The Critical Insight: The mask works by subtraction, not addition. The untrained maker carves more and more emotion into the face and produces a mask frozen into one moment and dead in every other. The master carves a mask poised on the edge between expressions — a face the living body and the moving light can tip in any direction — and so a mask alive in a hundred moments. The emptier mask is the more powerful one. This is the same law as the teller's pause: the performer's power lives in what is withheld and released, not in what is poured out at once.
Costume as instant signification
Costume tells the audience who and what before a word, and its principle is legibility at a distance: in the open air, by firelight, across a crowded square, it must signify instantly through bold, exaggerated signs, not realistic detail no one can see.
- The silhouette first. The eye reads the outline before color or texture — so character lives in the silhouette: the towering headdress of the god, the hunched crone, the broad-shouldered warrior, the bells and patches of the fool. Build the outline so it reads as a black shape against the sky.
- Color as code. Each community fixes its color meanings — of mourning, of harvest, of the sky-god, of the underworld — and deploys them consistently across the cycle, so the crowd knows what kind of figure approaches before the features resolve.
- The single exaggerated sign. One enlarged, unmistakable attribute does more than a hundred accurate details: the god's enormous hands, the death-figure's white, the king's height. Choose the one sign that is the character and make it big.
Processional giants and effigies
The largest costume is worn over the whole body or carried above the crowd. The processional giant — a towering figure on a light internal frame, head and shoulders above the crowd — turns one performer into a being of myth scale, visible to the whole square at once. The effigy — a built figure paraded and then ceremonially burned, drowned, or dismantled at the festival's climax — lets the community embody a power (the old year, the death of winter, a named evil) and destroy it together, among the most cathartic acts a community performs.
Protocol 33-B — The processional giant (light frame):
- Build a backpack-borne vertical spine of stout cane or light wood rising above the performer's head, with a transverse shoulder-yoke to spread the weight (cross the pack-frame craft of the fiber-arts sub-volume — the giant is a worn frame).
- Form the head on the frame's top in papier-mâché over a light armature (Build A), oversized and bold-featured for distance.
- Drape the body in cloth from the shoulder-yoke and head, falling to the ground to hide the performer, painted with the figure's signs.
- Cut sight-slits at chest height and rig hand-poles if the arms move. Balance is everything: the giant is top-heavy and wind-caught; rehearse the carry, and never build taller than the performer can control in a gust.
Art direction
CHAPTER 34 — RITUAL THEATER: STAGING THE COMMUNITY'S OWN MYSTERIES
Ritual theater is the performer's decree at its fullest: the whole community gathered not as spectators of a story but as participants in a rite that does something — turns the year, marks the dead, makes the adults, blesses the field. This is the inward-turned performance of the Chapter 31 sidebar, and it is the oldest theater there is, for the earliest drama everywhere grew out of seasonal rite: the dying-and-rising god enacted at the turn of the year, the descent and recovery (the Descent of Inanna is itself such a drama), the combat of summer and winter staged so the right side might win.
Staging the seasonal cycle
The performer's calendar is the agricultural and solar year (the full agrarian calendar at Vol VII; the solar and seasonal observation at Vol IX and Vol XI), and four hinges anchor the cycle of dramas:
- The sowing drama stages the burial and the trust: the seed-god laid in the dark ground, the lament for the buried life, the planted hope — grief and faith together.
- The harvest drama stages the return and the thanks: the cut grain, the last sheaf made into a figure (the corn-mother, the harvest-king), the feast. The seed-god buried at sowing rises as the harvest; the descent has become the recovery.
- The solstice dramas stage the turn of the light — at midwinter the death of the old sun and the kindling of the new (cross Vol IX — The Energy Codex for the staged flame and the new-fire ceremony); at midsummer the height and the turning-back. These are combats and kindlings, fought out before the crowd so the crowd may take the right side.
- The threshold rites — the rites of passage (birth, adulthood, marriage, death) — are stagings too, conducted by the performer as threshold-walker. Their architecture of separation, threshold, and reincorporation is shared ground with the ceremonial craft of Vol XXIII (Ch. 36) and the consciousness disciplines of Vol XVII — The Mystic's Codex.
Processional versus fixed stage
The processional (moving theater) travels — through the village, around the fields, shrine to shrine — the action happening in stations along the route. Its virtues are inclusion (the whole settlement is the stage) and consecration (the route is blessed by the passage — the carried god encircling the fields). Stage it as a sequence of stations, each a small scene at a fixed place, linked by movement and music (cross the processional rhythm of Vol XXIII).
The fixed stage (gathered theater) brings the audience to one place. Its virtues are focus and spectacle — the reveals a fixed place allows. The threshing-floor — flat, round, central, already the gathering-place — is the natural first stage (cross the acoustic siting of Vol XX; the old performance-places were chosen for sound), and the round playing-space ringed by the standing crowd is the eldest theater plan there is.
The audience as congregation
The deepest difference between ritual theater and entertainment lies here: the audience is not a crowd of watchers but a congregation of participants. The crowd has lines to speak (the response, the refrain, the acclamation), things to do (process, kneel, raise the cry, feed the fire), and a stake in the outcome (the year really turns, the dead is really mourned, the adult is really made). The performer's task is not to hold attention as spectacle does but to conduct the audience's own action — to be the one who knows the rite and leads the community through its parts. A ritual theater in which the people merely watch has already decayed toward entertainment and lost half its power.
Protocol 34-A — Writing the community's own mystery play
The Codex restores to the Practitioner the right and the means to write the community's own mystery. The template below is original, drawn from the deep pattern the seasonal dramas share (descent and recovery, death and rising), to be filled with the community's own gods, story, and meaning. Compose no copied script.
- Choose the hinge and the need. Fix the festival (sowing, harvest, a solstice, a passage) and name what the rite must do — grieve a buried seed, give thanks, turn the light, make the adults. The need is the play's true subject.
- Find the community's own myth of that need — a descent, a sacrifice, a return. Use your own; do not borrow another's. (Where the living myth is lost, the office includes composing one — but from the community's own ground and names.)
- Build on the deep three-act pattern.
- Act I — The Order and the Loss. Establish the world in balance, then break it: the god descends, the seed is buried, the light fails, the child must leave childhood. End on the loss, fully felt — let the lament (the sagursag's office) be heard.
- Act II — The Threshold and the Ordeal. The crossing into the dark: the underworld, the buried season, the trial. Stage the descent and the empathy that wins passage (the kurgarra and galatur's way — not force but feeling). End at the lowest point, the corpse on the hook.
- Act III — The Recovery and the Return. The rising: the food and water of life, the harvest from the buried seed, the new sun kindled, the adult returned transformed. The congregation acts here — they kindle, they feast, they receive the made adult. End on the restored order, raised higher than before.
- Assign the congregation's part in every act — their responses, movements, and acts.
- Choose the form (processional or fixed) by the rite, and site it (cross Vol XX for sound).
- Set the music and rhythm with the community's players (cross Vol XXIII) — the lament, the procession, the rising acclamation.
- Rehearse the crossing, not the show. The measure is never how it looked but whether the year turned, the grief was carried, the adult was made.
Your Commitment: You will write your own community's mystery, of its own ground and gods, and you will write it so the people do it and are not merely shown it. The performer who imports a foreign rite, or who reduces the community to spectators, has failed the office twice over. The decree's gift is the means of a people's own self-staging.
Art direction
CHAPTER 35 — DANCE AND MOVEMENT: THE BODY THAT MOVES THE CROWD
Dance is the performer's decree written in the body, and it does most directly what the office exists to do: it moves a gathering as one. A crowd that watches is many; a crowd that dances together is briefly one body, one rhythm, one breath — and that unity is itself the rite. The kurgarra's ecstatic dance, the chain that winds through the harvest square, the stamping circle around the solstice fire are not entertainments but engines of communion.
The basic movement vocabulary
All dance is built from a small kit of fundamentals, each controlled before combining:
- Weight and the ground. The root of movement is where the weight is and how it shifts. The grounded, heel-driven step (the stamp, the tread) is the body of communal and ritual dance the world over; the lifted, toe-driven step (the leap, the spring) is its ecstatic opposite.
- The eight directions and the level. The body travels and gestures forward, back, to either side, and the four diagonals, and does so high, middle, or low. Vocabulary is built by combining a direction with a level with a weight.
- The basic actions — step, stamp, hop, jump, leap, turn, sway, gesture. The turn deserves special discipline: it is the gateway to the ecstatic and also to falling and dizziness, so learn to spot (fix the eyes on a point, whipping the head around last) and the slow spin before the fast.
- Rhythm in the body. The down-movement (the weight-drop, the stamp) marks the strong beat; the up-movement marks the weak. The dancer's first rhythmic discipline is to put the weight down precisely with the drum's strong beat.
Circle and chain dances and their floor-patterns
The eldest and most universal communal dances are the circle and the chain (line) — dancers linked by hand, belt, or shoulder, moving along a shared floor-pattern. Their power is structural: no one watches, everyone dances, and the linked bodies enforce a single rhythm on the whole ring. They need no partners and no stage, scale to any number, and include everyone — which is why they are the form of the festival.
The performer notates the floor-pattern so it can be taught and kept. A simple notation suffices: mark the floor-track (the path the line travels — clockwise, counter-clockwise, in, out, spiraling) and the step-sequence (the repeating pattern of steps — e.g., "two steps right, one in, one out"). The two together — where the body travels and what the feet do — fully define a communal dance.
Specification Table 35-1 — The communal dance forms and their floor-patterns
| Form | Linkage | Floor-track | Typical step-engine | Communal function |
|---|---|---|---|---|
| Closed circle | Hands joined, ring closed | Rotates either way; in/out | Side-step, grapevine, in-out tread | Unity, enclosure, the turning year |
| Open chain (line) | Hands/belts, two ends | Snakes, leads anywhere, spirals | Walking/running steps, stamps, leader's calls | Procession, gathering, leading the crowd |
| Spiral / serpentine | Linked line | Winds inward to a center, then unwinds | Steady tread, leader walks the coil | Descent-and-return (cross Ch. 34) |
| Counter-rotating rings | Two concentric circles | Inner and outer turn opposite ways | Mirrored side-steps | Meeting, exchange, the cosmos turning |
| Processional file | Pairs or single file | Travels a route, station to station | March-step locked to the drum | The moving theater (Ch. 34) |
Rhythm partnership with the drummers
Dance and drum are one art with two bodies (the drummer's full craft is carried in Vol XXIII — The Musician's Codex). Three principles govern the partnership:
- The lock. The dancer's weight-drop and the drum's strong stroke must coincide exactly; when they do, the crowd feels dance and drum as a single force, and the unity that is the dance's purpose snaps into being.
- Call-and-response. In the living tradition the lead dancer and lead drummer converse: the dancer signals (a gesture, a stamped figure, a held pose) and the drummer answers (a break, an accent, a shift), reading the body to know when to drive harder and when to break.
- The build and the break. Communal dance is built on the long accelerando — the gradual quickening that drives the ring toward an ecstatic peak — and the break, the sudden stop that releases it. The performer shapes this arc with the drummers (cross Vol XXIII for the rhythmic construction of the build).
Endurance and safety: the dancer's discipline
The ecstatic dance is a physical ordeal, and the performer who leads it holds the office's recovered duty of care:
- Condition for the duration — the festival dance can run for hours; build the endurance to lead it long before the day (cross the physiology of Vol V — The Body).
- Warm the body first — cold muscles tear; raise the heat gradually before the demanding figures.
- Manage the spin and the trance. The fast turn and the long driving rhythm can carry a dancer into dizziness or an altered, trance-like state — the ecstatic dance's deliberate end (cross the consciousness craft of Vol XVII — The Mystic's Codex for the disciplined induction and safe return). The performer who leads others into them watches for the dancer who goes too far.
- Water, heat, and the ground. Hard ground, fire-heat, and hours of exertion mean real risk of injury and heat-illness. The leading performer keeps water moving, watches the fire's proximity, knows the signs of the body in trouble, and is ready to stop the dance — for the office that leads the communion is responsible for bringing every dancer home from it safe.
The Critical Insight: The communal dance achieves its end — the many made briefly one — through constraint, not freedom. It is precisely because the circle-dancers are locked into a shared floor-pattern, step, drum-beat, and physical linkage that the separate bodies fuse into the single moving body the rite intends. The modern "free dance," each body doing its own thing, produces only proximity, never communion; the shared constraint produces the unity. This is the dancer's form of the law that runs through the whole decree: the structure that binds is the structure that empowers — the formula binds the teller and frees the tale, the mask seals the face and frees the meaning, the floor-pattern binds the feet and frees the crowd into one body.
Art direction
CHAPTER 36 — PUPPETRY AND THE SMALL STAGE: THE VOICE THAT POWER ALLOWS
The last branch of the performer's decree is the smallest stage and, in one crucial respect, the most powerful: the puppet. A figure of wood, cloth, and string, moved and voiced by a hidden performer, the puppet is a complete theater one person can carry on the back, set up in any square, and strike in a moment — and it can say, with safety, what no living mouth in the community dares.
The three principal puppet builds
Build A — Rod puppet (the figure on sticks). The most direct expressive carried puppet, moved from below or behind by rods.
- Build the figure light — a head (papier-mâché over a form, Build A of Ch. 33, scaled down), a cloth body over a light shoulder-bar, jointed limbs.
- Fix the main rod to the body's core to carry and turn the whole figure.
- Fit control rods to the hands so gestures move independently of the body — the rod puppet's expressiveness lives in the hands.
- Voice it from behind (the character-voice craft of Ch. 32 applies).
Build B — Glove (hand) puppet. The fastest, most robust, most immediate — the puppet of the street-corner comedy and the satirical turn.
- Build a hollow head (papier-mâché over a form, with a tube for the finger) and a glove body sewn to it.
- Wear it: the index finger drives the head, thumb and middle finger the two hands — the whole puppet is the hand.
- Its virtue is speed and punch — it hits, grabs, and gestures with the snap of a real hand, which is why it is the eternal vehicle of the broad, fast satire the live actor cannot risk.
Build C — Shadow puppet (the figure of light). The flat figure pressed to a lit screen and seen as a moving shadow — among the most beautiful and most ancient of the puppet arts.
- Cut the figure flat from thin hide (scraped translucent — cross the rawhide and parchment craft of the leatherworker's sub-volume) or stiff card, in sharp, exaggerated profile (the shadow reads only the silhouette — the same legibility-by-silhouette law as costume in Ch. 33).
- Pierce the figure with cut patterns; where translucent hide is dyed, the pierced areas glow in color on the screen.
- Joint and rod it — articulate the limbs with knotted pivots, moved on thin rods from the screen's back.
- Set it to the screen (below).
Specification Table 36-1 — The puppet types compared
| Type | Control | Strength | Limitation | Best for |
|---|---|---|---|---|
| Rod puppet | Rods from below/behind | Expressive gesture; reads at distance | Heavier, two-handed | Epic, mythic, processional theater |
| Glove puppet | Worn on the hand | Fast, robust, punchy, immediate | Limited fine gesture | Satire, street comedy, the protected fool |
| Shadow puppet | Rods against a lit screen | Beauty, scale, the dreamlike | Profile only; needs darkness + light | Myth, the uncanny, the staged dream |
The shadow screen and its light
The shadow theater marries three things: a screen (a stretched translucent sheet — fine cloth, oiled paper, or scraped hide — framed and lit from behind, the audience before it), a light, and the figures worked in the narrow space just behind the screen, pressed close to it, the light behind them. The whole art is the control of the light, and here the performer crosses to Vol IX — The Energy Codex, which carries the full craft of light sources — the oil lamp, the controlled flame, the focused and diffused light. Three principles govern the screen:
- Distance sets the sharpness. A figure pressed against the screen casts a hard, sharp, true-sized shadow; drawn back toward the light it casts a larger, softer, blurred one. The puppeteer plays this — the demon looms huge and soft out of the dark, then snaps sharp and small against the screen.
- A single point-source gives the cleanest shadow; a broad or multiple source blurs and doubles it. A small steady flame or a single focused lamp (cross Vol IX) is the shadow-master's light.
- The flame's life is the screen's life. A living flame flickers, and the whole shadow-world breathes with it — a beauty the steady modern light loses.
Why the puppet can say what the council cannot
Here the chapter reaches the recovered heart of the small stage. Across the world's traditions, the puppet — and its cousin the masked fool — has held a peculiar and precious license: it may mock and speak truths about the powerful that would bring punishment on any citizen who spoke them in their own voice. The puppet-master ducks behind the booth and the puppet says the dangerous thing; the figure of cloth insults the headman, names the corruption, mocks the priest — and because "it is only a puppet," because the satire is wrapped in comedy and displaced onto a thing of wood, the truth gets said and survives the saying.
This is not a trick but a recovered constitutional function. A community needs a channel through which it can tell itself the truths its dignity and its power-structure otherwise suppress — the headman's greed, the council's folly, the drift toward tyranny — before those truths must be spoken in anger or not at all. The protected satirist is that channel: by licensing the fool and the puppet to say the unsayable under cover of comedy, the community keeps itself honest, lets pressure escape before it bursts, and holds its powerful accountable to laughter when it cannot yet hold them accountable to anything else.
CANON SIDEBAR — THE PROTECTED OFFICE OF SATIRE
Among the performer's decrees, the office of satire holds a special and recovered protection, and the restored community must guard it deliberately. The principle: the satirist's license to mock the powerful is not a privilege granted by the powerful but a safeguard the community holds against them — and it must therefore be protected from the powerful, including from a council the satire targets. The performer who takes up this office through the puppet, the masked fool, the comic turn speaks a truth the community needs spoken and cannot safely speak in its own voice; and the community, in turn, owes that performer protection from the retaliation the truth invites. This is the deepest reason the office is wrapped in comedy and displaced onto puppets: the laughter and the mask are the armor that lets the truth be carried, exactly as the kurgarra's neutrality was the armor that let it cross into death. The full doctrine of how a community holds its powerful accountable, channels dissent, and protects the speakers of inconvenient truth is carried at Vol XIX — The Diplomat's Codex; the performer's decree supplies that doctrine its oldest and most beloved instrument — the fool who, because he is only a fool, may tell the king he is naked. The Critical Insight: the protected satirist is not the enemy of the community's order but its immune system — the mechanism by which a healthy body politic detects and names its own sickness early, while it can still be laughed at and cured, rather than late, when it can only be wept over or overthrown. Guard the office; a people that loves its fools is a people still able to see itself.
The performer's decree closes where it began — at the threshold. The kurgarra and galatur went down to death and brought the goddess back by the power of carried feeling; the teller goes into the community's memory and brings its dead and its gods back alive in the hall; the masker goes behind the made face and lets a neighbor become a power; the ritual-maker takes the whole community across the turning of its year; the dancer melts the many into one moving body; and the fool, behind his puppet and his mask, goes where the truth is dangerous and brings it back wrapped in laughter so the community can survive hearing it. Six branches, one office: the licensed performer of meaning, who walks the community's thresholds ahead of it and conducts it safely across. The decrees of staged meaning are recovered. The Practitioner who holds them holds the means by which a people stages, and so possesses, its own imagination — and a people that possesses its own imagination can never again be made to rent it.
SUB-VOLUME VII — THE APPLIED DECREE
THE MAKER IN THE WORLD
The six decrees have been taught one craft at a time: the line, the vessel, the hide, the basket, the mask, the rite. This sub-volume sets them down where they actually live — in a workshop with a floor and a door, inside an economy that must price them, across a year that calls for them by season, in the hands of children who must inherit them, and along the long timeline of Volume XVI, where the maker's capability was built, broken, suppressed, demolished, and is now being rebuilt. A craft known alone is a hobby. A craft housed, paid, scheduled, taught, and defended is a civilization. The Practitioner who finishes here stops being a person who can make things and becomes a maker — an institution of one, ready to become an institution of many.
CHAPTER 37 — THE MAKER'S WORKSHOP AS INSTITUTION
A workshop is not a room where making happens. A workshop is a machine for making makers. The Practitioner who treats the bench as private equipment will produce private objects and die with the craft. The Practitioner who treats the bench as an institution — a place that takes in the unskilled, organizes their hands around real commissions, and turns them out as masters who will found benches of their own — produces a lineage. Volume XXIII built this case for the music; the maker's decrees demand it more sharply, because the visual and tactile arts decay faster in the dark than song does. A melody hides in a memory and waits. A glaze recipe, a tanning schedule, a proportion canon, a mask-laminating method — these die the moment the last pair of trained hands stops moving, and no humming brings them back.
The floor plan: logic before layout
Every working ME workshop, from the temple ateliers of Uruk to the restored benches the Practitioner is building now, obeys the same circulation logic. Material enters dirty, wet, and raw at one end; it leaves clean, dry, and finished at the other; and it never crosses back over itself. The contamination gradient runs one way. This is the single rule from which the whole floor plan derives.
Lay the shop in four zones along that gradient:
- The dirty intake (the wet end). Hide fleshing, clay wedging, bark crushing, fiber retting and splitting, the slaking pit, the soak vats. Stone or earth floor with a drain fall. Water in, slop out. Keep this zone downwind and down-slope of everything else, and never let its dust or its damp reach the finishing.
- The forming zone (the working core). Wheels, draughting tables, the loom and weaving frames, the leather bench with its beam and stitching clam, the modelling stand. This is where the trained hand spends its day. Light is the governing constraint here — see below.
- The transformation zone (the fire and the dark). The kiln and its fuel store, the smoke-house or curing chamber, the dye pots, the drying racks, and — set apart and shaded — the pigment and glaze store. Heat and fume segregate here, walled or sited away from both the wet slop and the dry finishing.
- The clean finishing and the archive (the dry end). Final assembly, painting and gilding, varnish and dress, inspection, and the shelved record: the pattern library, the recipe tablets, the proportion cartoons, the sample boards. Dust-controlled, dry, and lit for true colour judgement. The finished work and the knowledge that made it live together here, at the far pole from the mud.
The Critical Insight: Light dictates the core, and only the core can be sited for light. The forming zone wants steady, indirect, north-facing daylight — the cool even light that does not throw moving shadows across a drawing or a glaze or a stitch line, and does not swing in colour from dawn to dusk. The ancient atelier was built around its window before it was built around anything else. Every other zone is placed in relation to that window: the wet end where light does not matter, the fire where light must not start a fire, the archive where light must be kept off the pigments. Plan the light first; the rest of the floor falls into place behind it.
Art direction
The apprenticeship structure
A bench takes in raw hands and returns masters. The progression is not a matter of years served but of competencies demonstrated; the year ranges below are the typical span over which those competencies mature in a working shop, not a sentence to be waited out. A fast pair of hands advances on proof, not on the calendar.
| Stage | Typical span | Granted the title | Competencies that define the stage | Authority |
|---|---|---|---|---|
| Novice (learner) | Years 0–2 | taken in | Tends the shop: keeps the wet end, hauls and preps material, wedges clay, splits fiber, crushes bark, sweeps and tends the fire. Learns by preparing what others form. Owns no commission. | Works only under direct watch; spoils only practice stock |
| Apprentice (bound hand) | Years 2–5 | bound to the bench | Forms under supervision: throws true cylinders, cuts and skives a clean line, twines a sound basket wall, lays flat washes, builds a simple mask core. Executes parts of real commissions to the master's tolerance. | May execute graded production work; the master signs and answers for it |
| Journeyman (proven hand) | Years 5–8 | free to travel | Forms unsupervised to specification: completes whole commissions, sources and judges material, holds a recipe and a proportion canon, troubleshoots a failed firing or a rotted retting. May leave to work other benches and gather methods. | Signs own production work; may instruct apprentices; not yet free to certify a successor |
| Master (bench-holder) | Years 8+ | holds a bench | Originates: designs commissions, sets house tolerances and recipes, judges quality for the reputation ledger, and reproduces the lineage by training the next master. Mastery is proven not by the finest object but by the first master one has made. | Founds a bench; takes apprentices; certifies journeymen and elevates masters; carries a decree |
Your Commitment: You are not a master when you make a perfect thing. You are a master when someone you taught makes a good thing without you in the room. This is the same closing of the loop that Volume XXIII set for the music — Stage V returns to Stage I — and it is the only definition of mastery that survives a dark age. A craft measured by its masterpieces dies with its geniuses. A craft measured by its successors does not die at all.
The commission system
The maker does not make on speculation and hope to sell. The maker takes a commission: a named patron, a defined object, an agreed price, an agreed time, and a binding standard. The commission is the unit of work and the unit of training both — it is the real job into which the novice's prep, the apprentice's parts, the journeyman's execution, and the master's design all feed. Six things must be fixed before the first cut, and fixed in the record:
- The patron and the purpose — who is paying, and what the object is for (the rite it serves, the wall it hangs on, the harvest it carries). Purpose governs every later choice.
- The specification — dimensions, materials, the proportion or pattern canon, the finish. Written or drawn before agreement, so that "done" is not an argument.
- The price and its basis — by the honest formula of Chapter 39, broken into materials, time, and mastery, so the patron sees what they buy.
- The schedule — keyed to the festival cycle of Chapter 40, because most commissions serve a rite with a fixed date that will not move for a slow potter.
- The standard and the inspection — the tolerance the work must meet and the moment it is judged, named in advance.
- The terms of failure — what happens to a cracked firing or a missed date. A craft that hides its failures cannot be trusted; a maker who names them in advance can be.
Record every commission in the bench book against the maker's name. That ledger of kept commissions — purpose met, specification held, schedule made, standard passed — is the reputation of Chapter 39. The institution remembers what each pair of hands has actually delivered, and that memory is the maker's true wage.
CHAPTER 38 — ART AS THE CIVIC RECORD
Before a people has writing, and long after writing has been corrupted, it has images. The mural on the assembly wall, the monument in the square, the memorial that names the dead, the drawing made on the day a thing happened — these are the civic record of a community, and the maker is its keeper. This is the gravest of the maker's duties and the one most thoroughly suppressed in the dark age, because whoever controls the civic record controls what a people believes happened to it. Volume XIII taught the Practitioner that rhetoric is the craft of persuasion and that persuasion can serve truth or its enemy; Volume XVI taught that the record itself has been edited. The maker stands exactly here, at the join: the one who makes the images a people will take as memory, and who therefore bears the rhetorician's whole burden — to persuade, and to persuade toward the truth.
The three civic functions
Public murals — the shared wall. The mural is the commons made visible: the founding story, the law, the seasons of work, the gods and the dead, set where the whole community passes daily and learns without being taught. Its craft is the fresco and the durable wall-paint of Sub-Volume I, raised to the scale of a building and the lifespan of generations. Its discipline is composition for the crowd — readable at a distance, legible to the unlettered, ordered so the eye finds the meaning without a guide. A people that paints its own walls cannot have its story quietly replaced; a people whose walls are blank, or painted by strangers, has already lost the argument about who it is.
Monuments — the standing claim. The monument fixes a claim in carved and built form against the erosion of time and the editing of memory: this happened, this person lived, this boundary holds, this was paid for in this much blood or grain. Its craft is the sculptor's and the builder's; its register is permanence. The Practitioner has read in Volume XVI how monuments are the most contested objects in the timeline — re-carved, re-attributed, toppled, and re-dated, because to control the standing claims is to control the deep past. The maker who raises a true monument, and the maker who reads a false one, are both doing civic work of the first order.
Memorial craft — the named dead. A community that does not materially mark its dead forgets them within a generation, and a people that has forgotten its dead can be told anything about its origins. The memorial — the carved name, the kept portrait, the grave-marker, the mourning object — is the maker's service to continuity itself. It crosses into Volume XVII's emotional alchemy: the made object that holds grief so the living can set it down. Make these with the most care of anything in the shop. They are read longest and trusted most.
Documentary making — the drawing of the event
Before and beside writing, the trained hand is the recording instrument of a community. The documentary draughtsman draws the thing as it is — the assembly as it convened, the building as it rose, the flood-line where it crested, the face of the one who must be remembered, the wound, the harvest, the ruin. This is reportage with a pencil, and it has carried more reliable history than most text, because a measured drawing made on the spot is harder to forge than a sentence and easier to check against the world.
The documentary maker is bound by a working protocol of truth:
- Draw from the thing, on the day. Memory edits and rumour invents. The witnessed drawing, dated and placed, is the evidence; the studio reconstruction is testimony at best.
- Record the measure, not only the look. Where a thing's size, count, or position is the fact that matters, fix it — by scale, by gauge, by noted dimension — so the drawing can be checked and cannot be quietly stretched.
- Separate what is seen from what is supplied. Mark plainly where the hand has filled a gap, reconstructed a missing part, or rendered a supposition. A documentary work that blends the witnessed and the imagined without marking the seam is a lie wearing the authority of a record.
- Note the conditions and the vantage. Where you stood, when, in what light, seeing what and missing what. A record that hides its own limits claims more than it can keep.
- Sign and date. A record without an accountable maker is a rumour with good production values.
The Critical Insight: The maker's duty is not to flatter the patron, soothe the crowd, or serve the convenient story — it is to make the true image well enough that the truth is the thing that persuades. A clumsy truth loses the wall to a beautiful lie. This is why the civic maker must command the full craft of Sub-Volume I and the full rhetoric of Volume XIII at once: skill without honesty is propaganda, and honesty without skill is a true record nobody looks at. The decree asks for both, because the dark age was built by makers who had skill and abandoned honesty, and it will be reversed by makers who refuse to surrender either. Cross Volume XVI: when you read the record a previous age left, apply this same protocol in reverse — and trust most what shows its measure, marks its seams, and names its maker.
CHAPTER 39 — THE ECONOMY OF MADE THINGS
The maker who cannot price the work honestly will either starve or cheat, and both end the craft. Pricing is not haggling and it is not guessing; it is a discipline with a formula, and the formula's purpose is to make the price legible — to let the patron see exactly what they are buying, so that the transaction builds trust instead of spending it. Volume XII, the Economist's, set out the principles of honest exchange; this chapter applies them to the particular problem of pricing handwork, where the largest part of the value is invisible labour and hard-won skill.
The honest pricing formula
Every fair price for a made thing resolves into three components, and the discipline is to compute and name all three:
Price = Materials + Time + Mastery
- Materials — the true landed cost of everything consumed: clay, pigment, hide, fiber, fuel, glue, finish, and the share of what was spoiled or proved out to make this piece. Count salvage at the labour to recover it, not at zero.
- Time — the hours of actual work at a fair rate for the trade, including the unglamorous hours: preparation, drying, multiple firings, finishing, and the failed attempts that the successful piece required.
- Mastery — the premium the skilled hand commands over the unskilled: the years of training, the recipe held, the tolerance met, the reputation staked. This is not a markup invented to inflate the bill; it is the real, scarce thing the patron actually came to buy. A novice could supply the materials and spend the time. Only the master supplies the mastery.
The Critical Insight: The mastery term is the one the dishonest economy works hardest to erase, and the one the maker must defend most fiercely. Tell a maker that skilled work is "just" materials and time — that a hand-thrown bowl should cost what a stamped one costs plus a little — and you have abolished the master in a single sentence and reduced the craft to piecework. The mastery term is the economic name for the difference between a civilization that makes its own meanings and one that buys them cheap from elsewhere. Price it, name it on the bill, and never apologize for it. Cross Volume XII: the just price is not the lowest price; it is the price that lets the maker keep making.
Quality grades
A maker who sells everything at one price teaches patrons that all work is equal, and undersells the best while overselling the worst. Grade the work openly:
| Grade | What it is | Standard | Use |
|---|---|---|---|
| Master | The maker's full-tolerance work, signed | Meets the bench's tightest specification; presentation finish; no permitted faults | Commissions, civic and memorial work, the reputation pieces |
| Sound | Honest, fully serviceable work | Meets function fully; minor cosmetic variance permitted and disclosed | The daily goods — the working vessel, the field basket, the everyday belt |
| Apprentice | Learner's work, sold as such | Functional; visible learning faults disclosed; sold under the bench's name with the grade stated | Affordable utility; supports training; never passed as Master work |
| Second / salvage | Flawed but usable | A disclosed fault — a firing blemish, a mended split, an off colour — that does not impair the use | Sold cheap and honestly; the alternative to hiding the fault or destroying good utility |
The single rule beneath the grades: disclose, never deceive. A second sold as a second builds trust; a second sold as a master destroys it the day the fault shows.
Barter, when coin is scarce
In a recovering economy coin is thin, and the maker must trade goods for goods. Barter is harder than cash pricing, not easier, because both sides must agree two prices at once. The discipline is to barter through the honest price, never around it: value each side's offering by the same Materials + Time + Mastery formula, in a common unit, and trade the equivalents. The table below shows indicative exchange ratios for a community trading craft for craft and craft for staple — anchored, as barter always must be, to a steady reference good (here, a day's skilled labour and a measure of grain):
| Made thing | Honest basis (indicative) | Trades roughly for |
|---|---|---|
| Hand-thrown sound bowl | ~½ day skilled + clay + firing share | A measure of grain, or a day's unskilled labour |
| Veg-tanned belt, finished | ~1 day skilled + hide share + hardware | 2 measures of grain, or a pair of field baskets |
| Large field basket (sound) | ~1 day skilled + fiber | 1½ measures of grain, or a sound bowl + a small repair |
| Festival mask (master) | ~3 days skilled + laminate + paint | A young animal, or a season's milled grain, or a major repair commission |
| Oak-gall ink, a working flask | ~¼ day + galls + iron + gum | A measure of grain, or a quire of prepared sheets |
| Memorial portrait (master) | ~2–4 days skilled + ground + pigment | Negotiated against the patron's means; often paid over a harvest |
These ratios are not law; they are a starting frame the bench adjusts to local scarcity. The point is the method: barter the equivalents of the honest price, so that trading without coin does not become trading without truth.
The reputation ledger
Coin and barter settle the single transaction. The maker's real capital is settled in a slower book: the reputation ledger, which is simply the institution's memory of commissions kept — purpose met, specification held, schedule made, grade honestly stated, faults disclosed. Volume XII names reputation the most durable asset in a low-trust economy, and for the maker it is the only asset that compounds: every honestly kept commission raises the price the next patron will pay and the trust the next trade will assume, while a single deception — a second sold as a master, a missed festival date hidden, a mastery term charged and not delivered — is written in the same book and remembered far longer. Keep the ledger plainly, against each maker's name, and let it be readable by patrons. In the dark age, when no authority certifies a craftsman, the visible reputation ledger is the certificate, issued by the only body that cannot be bribed: the record of what the hands have actually done.
Art direction
CHAPTER 40 — THE FESTIVAL CYCLE: THE MAKER'S YEAR
The maker does not work in a featureless stream of days. The maker works to the wheel of the year — to a cycle of seasonal rites, each of which calls for particular made goods and particular performances, on a fixed date that will not move. This is the deepest integration of the volume: it is where the six decrees stop being separate crafts and become one apparatus serving the life of a community through its year. Volume VII gave the Practitioner the planting calendar — the agrarian wheel of sowing, growth, harvest, and rest. Volume XXIII gave the ceremonial music keyed to that wheel. This chapter binds the maker's goods and performances to the same wheel, so that the workshop's schedule, the agrarian schedule, and the musical schedule turn together as one year.
The principle of seasonal service
Two forces fix the maker's year. The first is demand: each rite needs its goods finished and its performance rehearsed before its date, which sets the workshop's deadlines. The second is supply: many materials are themselves seasonal — fiber harvested green in summer, bark stripped in the rising sap of spring, hides taken at the autumn slaughter, clay best dug and weathered over winter. The maker's year is the reconciliation of these two: making for each festival in the season when its materials are ready and its date still far enough off to finish well. The bench that schedules backward from the festival and forward from the harvest will never be caught short; the bench that waits will be cutting green fiber the week the basket is due.
The calendar table — binding the decrees to the wheel
The table below binds Sub-Volumes I–VI to the four turns of the year. It is written for a temperate northern wheel keyed to the solstices, equinoxes, and the cross-quarter rites between them; the Practitioner adapts the dates to the local sky and the local crop, but the logic — material supply set against festival demand — holds everywhere.
| Season / rite | Agrarian moment (cross Vol VII) | Materials in season to gather | Goods the workshop makes | Performance the rite calls for (cross Vol XXIII) |
|---|---|---|---|---|
| Deep winter / the turning of the sun | Rest; the dark; seed kept | Clay dug and left to weather and freeze; winter is the indoor bench season | Indoor work: throwing, carving, fine drawing, the long laminations; repair of last year's gear | The fire-rite and the long story; masks of the dark and the return of the light; the deep drum |
| Early spring / the rising sap | Ground broken; first sowing | Bark stripped at the sap-rise (oak, willow, for tan and for fiber); withies cut | Tanning begun; new baskets started for the season's carrying; sowing-rite regalia readied | The procession to the field; the planting song; the sown-seed dance |
| High spring / first green | Crops up; tending | Early fibers; reeds beginning | Field gear finished — baskets, harness, sun-masks; the cleaning and dressing of summer costume | The blessing of the growing; the masked guardians of the crop |
| Midsummer / the height of the sun | Full growth; the longest day | Bast and leaf fibers harvested green at their peak (flax, nettle, rush, cattail) | Cordage and basketry in volume — the year's fiber laid in; the great-festival regalia for the solstice | The solstice procession and the fire; the great drum and the round dance; the year's largest staging |
| Late summer / first fruits | First harvest; the grain begins to come in | Fibers cured and stored; reeds cut | Harvest-carrying ware in quantity — baskets, vessels, sacks; the first-fruits offering objects | The first-fruits rite; the grain procession; the work-song of the reaping |
| Autumn equinox / the great harvest | The main harvest; the balance of light | Hides taken at the slaughter; the year's leather and rawhide laid in | The harvest-home regalia, the masks of plenty and of the dead-to-come; vessels for the stored bounty | The harvest-home festival — the largest performance of the year; mask, costume, procession, dance, and story all at once |
| Late autumn / the failing light | The last in-gathering; ground put to rest | Late hides; the bench turns indoors | Tanning in full (the autumn hides); memorial craft for the season of the dead | The remembrance of the dead (cross Vol XVII); the masks of the ancestors; the lament |
| The cross-quarters and the dark's edge | The hinge-days between the great stations | (as the adjacent seasons) | The smaller rites' goods; betweentimes repair and teaching | The hinge-rites; the smaller processions; the household observances |
The Critical Insight: The festival is the maker's deadline and the maker's market at once — it is why the work gets made, when it gets made, and who it gets made for. A craft without a festival cycle drifts into idle production for an absent buyer and slowly stops. A craft bound to the wheel always has a reason to make, a date to make by, and a community gathered to receive the work — which is exactly the condition under which a craft stays alive. This is the final argument of the volume's structure: the six decrees are not six hobbies that happen to coexist. They are one year-long apparatus by which a community stages its own meaning through the turning seasons, and the maker is the engine of that apparatus. Bind your workshop to the wheel. The wheel will keep your craft alive when nothing else will.
CHAPTER 41 — TEACHING THE MAKING DECREES
A craft that is not taught to children dies in one generation, however brilliantly the adults practise it. This is the hardest lesson of the dark age and the most hopeful instruction in the volume: the maker's decrees are not transmitted by masterpieces or by books but by small hands shown small things at the right age, in the right order, in a family and a community organized to teach them. Volume XVIII set out the structure of the family and the household as the first institution; this chapter sets the maker's curriculum inside it. The Practitioner who has built the workshop of Chapter 37 must now understand that its deepest function is not production but transmission — and that transmission begins not at the apprentice's bench but on the floor where a four-year-old is handed a lump of clay.
The principle of staged making
Every making skill has a prerequisite skill that the hand and the eye must master first. Teach the prerequisite before the skill, and the child succeeds and stays; teach the skill before the prerequisite, and the child fails, is shamed, and turns away from the craft. The whole curriculum is built on three staging rules, one for each major decree, each a thing the elder makers knew and the schooled age forgot:
- Clay before the wheel. The hand must learn the material — its plasticity, its memory, its drying and cracking — by direct pinching and coiling long before it meets the spinning wheel, which punishes an untrained hand instantly. Years of pinch and coil precede the first centring.
- Cordage before the basket. The fingers must learn to make and control a strong even string — twisting, plying, tensioning — before they can weave a sound basket wall, which is only cordage and structure married. The child who can make good cord can be taught to twine; the child who cannot will only make a basket that falls apart.
- Mask before the stage. The child must first make and wear the simple mask — must learn that a made face transforms the wearer and the watcher — before being asked to perform a role on a stage, which demands the courage and the craft that the mask first teaches in private. The mask is the gateway to performance; the unmasked child sent to perform is a child asked to be exposed.
The children's curriculum — staged from age four
| Age band | Drawing & colour | Clay & form | Fiber | Leather | Performance | The skill being built |
|---|---|---|---|---|---|---|
| 4–6 | Scribble to deliberate mark; naming what is drawn; grinding a simple earth colour | Pinch pots, coils, free modelling — clay as plastic material | Finger-twisting fibre into a first cord; simple over-under | Lacing and threading scraps; the punch and the thong | Making and wearing the simple mask; play-pretend in role | The hand learns the material; the eye learns the mark; the self learns transformation |
| 6–9 | Observed drawing — drawing the real thing; the grid and simple proportion; flat washes | Coil-built and slab-built vessels; the first true forms; air-dried then pit-fired | Making sound cordage; the first twined basket from own cord | Cutting to a line; the running stitch; a simple sheath or pouch | Short staged stories; group procession; keeping a simple drum pulse (cross Vol XXIII) | Observation, proportion, structure, and the courage of the small performance |
| 9–12 | Light and shade; the figure in proportion; controlled pigment | First centring at the wheel; throwing simple cylinders and bowls; the first glazes | Shaped and lidded baskets; weaving structure; cordage in volume | Skiving; the saddle stitch; a finished belt; the start of veg-tan | Larger roles; mask-making for the stage; staging a full short rite | The wheel, the figure, the finished functional object, the full performance |
| 12–15 | The full draughtsman's discipline begun (Sub-Vol I) | The sculptor's art begun (Sub-Vol II); throwing to tolerance | The basket weaver's art begun (Sub-Vol IV) | The leatherworker's art begun (Sub-Vol III) | Sacred performance begun (Sub-Vols V–VI); a real festival part | Entry to the formal decrees; readiness for the novice bench |
| 15+ | Enters the apprenticeship of Chapter 37 as novice → bound hand → journeyman → master | The institution receives a prepared hand and begins to make a maker |
The curriculum is a feeder: by fifteen the child has met all six decrees as play and as small real work, has discovered which the hand loves, and arrives at the novice bench already knowing the material, the mark, the cord, the line, and the courage of performance. The apprenticeship of Chapter 37 then does not start from nothing — it refines a hand that the childhood years prepared.
The family workshop
The first and most resilient teaching institution is the family at work together, and it is the unit that carries the craft through the times when no formal school survives. Volume XVIII established why: the household is the smallest complete society, present in every condition, surviving every collapse. The family workshop sets the generations side by side — the grandparent who holds the old recipes and the patience, the parent at full production, the child on the floor with the clay, the elder child at the simple stitch — so that transmission happens continuously and almost invisibly, in the doing, without a lesson ever being formally announced. The child who grows up in the shop, handed the next small task as the hands grow ready, absorbs the craft the way a first language is absorbed: completely, early, and for life.
Your Commitment: Hand the child the next thing their hands are ready for, and no more — and never the wheel before the clay, the basket before the cord, or the stage before the mask. Teach in the order the hand learns, inside the family that never stops working, and the craft cannot die in a single generation, because there is no single generation that holds it alone. This is the deepest reason the maker's decrees, once restored, are hard to suppress again: a craft carried in the family at work is carried below the level any authority can reach.
CHAPTER 42 — THE THREAD THROUGH THE DARK
CANON SIDEBAR — THE MAKER'S DECREES ALONG THE VOLUME XVI TIMELINE
This chapter places the six maker's decrees on the reconstructed chronology of Volume XVI. It is the canon account of how the capability to make — to draw, fire, tan, weave, mask, and stage a people's own meanings — was built in the deep past, broken at the Reset, narrowed under suppression, and erased in plain sight in the recent age, and of why its restoration is the work the Practitioner has now joined. Read it as the frame that holds the whole volume: every craft taught in these pages is a recovered art, and recovery presumes a loss with a history.
The deep origin — making as a founding capability
In the pre-diluvian and megalithic horizon of Volume XVI, the maker's capability is not a late refinement of civilization but one of its foundations. The same era that worked stone to acoustic tolerance and raised resonant structures also drew, fired, tanned, and wove at a level the later record struggles to credit. The decrees themselves carry this memory: the Kurgarra, the Girbadara, and the Sagursag are temple offices in the oldest lists, ranked with kingship and law, because the staging of collective meaning — the masked rite, the painted wall, the carried offering — was understood as load-bearing infrastructure, not ornament. A founding civilization knows that a people must be able to make its own images and rites, or it will live inside someone else's. The maker's decrees are this knowledge, written into the list of what a civilization must keep.
The Reset and the broken benches
The 1177 BCE horizon — the systems-collapse Volume XVI sets at the hinge of the old world and the dark that followed — fell hardest on exactly the capabilities that are housed and institutional, and the maker's benches are among the most institutional things a civilization has. When the palace economies that commissioned the murals failed, when the temple ateliers that trained the mask-makers scattered, when the trade that carried pigment and fine hide and tonewood was cut, the transmission broke even where individual makers survived. A potter lived; the glaze library burned. A tanner survived; the schedule that took years to learn went with the master who died on the road. This is the signature of the Reset for the maker: not the death of every craftsman, but the breaking of the institutions of Chapter 37 — the workshop, the apprenticeship, the commission — that turn craftsmen into a self-renewing lineage. A craft can survive its masters dying. It cannot survive its benches breaking, because the broken bench makes no new masters.
The Mystery School transmission — the thread kept
Through the long dark that followed, the maker's decrees were carried as the other arts were carried in Volume XVI's account: not in the open economy but in the closed transmission — the Mystery School lineage that preserved method as guarded knowledge, master to chosen apprentice, when the public institutions could not hold it. The proportion canons, the pigment and glaze recipes, the tanning schedules, the laminating and masking methods: these passed hand to hand as protected craft, surviving precisely because they were hidden. The Practitioner should understand both faces of this. The closed transmission saved the decrees — without it they would have been lost entirely. But it also narrowed them, removing them from the commons, making the maker's knowledge a secret of guilds and initiates rather than the open inheritance of every household it had been in the founding age. The thread was kept. It was also pulled thin.
The suppression eras — guilds broken, the commons closed
Volume XVI's account of the phantom-time and Tartarian horizons records a long campaign against craftsmanship itself — and the maker's decrees sit at the centre of it. The pattern has two faces that look opposite and serve one end. In some eras the guilds were suppressed — the maker's institutions broken, their right to train and certify revoked, their commons-knowledge driven underground — so that the capability to make would weaken. In others the craft was captured — bound into closed, hereditary, secret-keeping bodies that hoarded method and locked the commons out — so that the capability to make would belong to a few and not to the people. Suppression and capture are the same policy by two roads: in both, the household loses its native power to make its own images, vessels, garments, and rites, and must receive them from an authority instead. The "Tartarian" craftsmanship the timeline records — the lost capacity to build and ornament at a level the official story cannot explain — is, for the maker, exactly this: a former, broader competence in making, attested by what survives and unaccountable by what is admitted, narrowed by centuries of suppression and capture until the people forgot they had ever held it.
The World Fair demolitions — erasure of the maker's capability
The recent horizon of Volume XVI — the era of the great expositions and their swift, total demolition — is, read through this volume, an erasure of maker capability staged in the open. Vast structures of extraordinary craftsmanship were raised, displayed to multitudes as the achievable work of human hands, and then deliberately pulled down, so that what was demonstrably possible left no standing evidence that it had been done. For the maker the lesson is precise and bitter: this is the destruction not of objects but of capability-memory — the proof that the hands could do such work, removed so that a later generation would believe such work beyond them. To demolish the evidence of what makers achieved is to suppress the next generation's makers more thoroughly than breaking any single bench, because it breaks the belief in the bench. A people shown that the impossible was built, and then shown the empty ground, learns to aim lower. The demolitions are the suppression of Chapter 37 carried to its endpoint: not just breaking the institutions that make makers, but erasing the memory that makers ever made.
The present restoration — the makers return
This is the moment the Practitioner occupies, and the reason the volume exists. The long suppression has thinned but not severed the thread; the recovered methods of Volume XVI's consolidation — the recipes, proportions, schedules, and structures gathered and held against the dark — are now being put back into open hands. The maker's decrees are being lifted out of the closed transmission and returned to the commons they came from: not the guarded secret of an initiate, not the captured property of an authority, but the open inheritance of every household that wants it. Each of the foregoing chapters is an act of this restoration — the workshop rebuilt as a public institution, the civic record reclaimed by honest makers, the honest economy restated, the festival wheel set turning, the children taught from four. The Practitioner who masters this volume and founds a bench, takes apprentices, and makes a successor does not merely revive a craft. They reverse, in their own small institution, the whole long policy of the dark: they make makers, in the open, where authority cannot reach to break them — and a people that can make its own images, vessels, garments, masks, and rites again can never be told, completely, who it is. The benches are being rebuilt. The thread, kept thin through the dark, is being spun back to strength. The makers return.
Art direction
The hands that the dark could not stop are picking up the thread; spin it true, and hand it on.
APPENDICES
THE WORKING REFERENCE
A codex is read once; a reference is reached for a thousand times. These appendices gather, in fast-access form, what the Practitioner will pull from the bench again and again across a making life: the vocabulary of the six decrees, the sourcing of every material the volume names, the care and repair of what is made — the maker's hospital where the cracked pot, the torn basket, and the dried-out belt are healed rather than discarded — seven works a beginner can finish inside a week, and the reference tables (cones, tannins, gauges, proportions, harvest seasons) that the chapters used and the bench will use forever. Keep this section open beside the work. It is the difference between a volume admired and a volume worn smooth with use.
APPENDIX A — GLOSSARY OF THE MAKING DECREES
The working vocabulary of the six decrees, grouped by domain. Each term is given the tight definition the bench needs; cross-references point to the sub-volume that develops it.
Drawing and the recording eye (Sub-Volume I, ME 28)
- Comparative proportion — measuring every part of a subject against one chosen part of itself, by eye, in ratios; the artist's entire metrology.
- Base unit — the single dimension (a head-height, a door) against which all others are judged.
- Sighting (locked-elbow method) — gauging apparent size with a pencil at fixed arm's reach; the locked elbow makes the arm a fixed-radius compass.
- Apparent (angular) size — the size a thing projects onto the view, not its size in the world; what the eye reports and the drawing records.
- Negative space — the gaps around a subject, drawn as positive shapes; the knowing mind has no opinions about them, so the eye reports them honestly.
- Five-value system — all tone reduced to five steps: highlight, light, halftone, core shadow, cast/occlusion shadow.
- Core shadow — the dark band where a form turns from light, between the lit side and the reflected light below; the value that makes a disc read as a sphere.
- Reflected light — faint light bouncing up into a form's shadow side, lifting the shadow beneath the core.
- Hatching / cross-hatching — building value by mark density, darkened by closer spacing not harder pressure, laid along the form to describe its curve.
- Horizon line (eye level) — the horizontal at the viewer's eye height, where every horizontal edge's vanishing point falls; the spine of perspective.
- Vanishing point (VP) — the point toward which a set of parallel edges converges; one per set.
- One-, two-, three-point perspective — construction with one VP (face-on), two (corner-on, the architectural workhorse), or three (when verticals converge too).
- Foreshortening — the compression of a form receding toward the viewer; the seen length is shorter than instinct allows, and the sighting measure is trusted over it.
- Diagonal method — stepping equal real intervals (posts, tiles) into correct perspective spacing using the first cell's diagonal.
- Canon of proportion — the head-height measuring system; the idealized standing adult is 7.5 heads tall, the crotch its midpoint.
- Line of action — the single sweeping C or S curve from head through spine to weight-bearing foot, drawn first to catch a pose's thrust.
- Contrapposto — the opposed tilt of shoulder line against hip line in a weighted standing pose; half the life of a figure.
- Bony landmarks — where the skeleton shows regardless of build (jugular notch, acromion, iliac crests, malleoli); the fixed scaffold of the figure.
- Focal hierarchy — ordering a picture around one primary focal point by concentrating the strongest contrast, sharpest edge, and most detail there.
- Rule of thirds — placing key elements on lines at 0.333 and 0.667 and their intersections (the power points).
- Golden section (φ) — the subtler division at 0.382 / 0.618 (φ ≈ 1.618); slightly more dynamic than the thirds.
- Value massing — a composition resolved into a few large light/mid/dark shapes that read as a pattern even squinted at; the design beneath the subject.
- Orthographic projection — drawing as if from infinitely far, undistorted by perspective: the plan, elevation, and section of the architectural record.
- Exploded view — an assembly's parts separated along their assembly axis on dashed lines, revealing part-count, order, and seating.
- Scale bar — a graphic ruler on a documentary plate; "life size" lies under reproduction, a scale bar does not.
Pigment and surface (Sub-Volumes I–III, cross Vol VII)
- Pigment — an insoluble coloured solid suspended in a binder; distinct from a dye, which dissolves and stains.
- Earth pigment (ochre) — the iron-oxide colours dug from the ground (yellow and red ochre, umber, sienna); the oldest, safest, most lightfast palette.
- Binder (medium) — what glues pigment to a surface: gum, egg yolk (tempera), drying oil, lime (fresco), hide glue (distemper).
- Lake — a pigment made by precipitating a soluble dye onto an inert base to fix it as a paintable solid.
- Lightfastness — resistance to fading in light; the earths supreme, many bright organics poor.
- Lead-white / lead prohibition — the bright historic white that is a cumulative neurotoxin; forbidden on any food/skin/breath surface (Ch. 16, Vol V).
- Oak-gall ink (iron-gall) — the permanent record-black: oak-gall tannin reacted with iron salts and thickened with gum (cross Vol VII).
- Fresco — pigment in water laid into wet lime plaster, becoming part of the wall as it cures; the most durable paint, the craft of the civic mural.
- Sgraffito — the draughtsman's line cut in clay: a contrasting slip coat scratched through to the body beneath.
Ceramics: clay, kiln, and the made vessel (Sub-Volume III, ME 28)
- Primary (residual) clay — clay still on its parent rock; pure, pale, coarse, low in plasticity (kaolin).
- Secondary (sedimentary) clay — water-carried, finer, iron-stained, far more plastic, lower-firing; the wild clay usually found.
- Plasticity — clay's ability to be shaped and hold it; field-tested by the thread and bend tests.
- Clay body — a deliberate blend of clay and temper for a use and firing range; a recipe, written on the bag.
- Temper (grog, filler) — non-plastic material added to open the body, cut shrinkage, and resist thermal shock.
- Grog — fired clay crushed to grit; the best temper, being the same material already shrunk.
- Wedging — kneading clay to drive out air and align particles; air left in is a steam bomb in the kiln.
- Slaking — letting bone-dry clay collapse in water to slurry; always clay into water, never the reverse.
- Levigation — refining clay by suspending it and pouring off the fine fraction from the settled grit.
- Leather-hard — clay stiff, cool, no longer plastic but still damp; the state for trimming, carving, joining, burnishing.
- Bone-dry (greenware) — fully air-dried but unfired clay, still water-soluble; the only state that may enter the kiln.
- Scored-and-slipped join — the sound clay join: both leather-hard faces crosshatched, slipped, pressed, and welded till the seam vanishes.
- Pinch, coil, slab, throw — the four forming methods in learning order: thumb-opened ball; stacked welded ropes; joined sheets; raised on the wheel.
- Kick wheel — a foot-spun heavy flywheel that frees the hands and needs no grid; mass low and central is its secret.
- Bisque (biscuit) — the first firing, hardening fragile greenware to durable porous ceramic ready to glaze.
- Vitrification — particles partly fusing to glass at high heat, making ware dense and watertight; earthenware versus stoneware.
- Earthenware / stoneware — low-fired porous ware (below ~1150°C) versus high-fired vitrified ware (cone 6–10).
- Pyrometric cone — a ceramic pyramid that slumps at a known heat-work; fire until the target cone's tip touches the shelf.
- Heat-work — temperature and time combined; what cones measure and what matures a body or melts a glaze.
- Updraft kiln — firebox below, ware chamber above a perforated floor, chimney drawing flame up through the ware; a chimney with a room in its throat.
- Bag wall — the perforated floor or baffle that spreads flame evenly through the chamber.
- Oxidation / reduction — clean-air firing (iron tan, copper green) versus air-starved firing that pulls oxygen from clay and glaze (iron to celadon, copper to ox-blood red).
- Glaze — glass fused to clay; a balance of glass-former (silica), flux, and stabilizer (alumina).
- Flux — the glaze ingredient that lowers its melt: boron at low fire, ash and feldspar at high fire — lead was only ever a cheap, poisonous flux.
- Slip — liquid clay, used to join, decorate, and (deflocculated) cast.
- Burnishing — rubbing leather-hard clay with a smooth stone till the platelets lie reflective; the sheen of the oldest fine pottery, kept by a low fire.
- Terra sigillata — "sealed earth," the ultra-fine settled fraction of a clay, burnished to a near-glaze sheen at low fire, food-safe and glaze-free.
- Ash glaze — the first true glaze: washed wood ash, feldspar, and clay, melting of itself at stoneware heat; lead-free.
- Dunting — cooling cracks from opening a kiln hot or cooling fast; why a firing cools slowly and is never opened above ~200°C.
- Press mold / slip casting — multiplying a form by pressing clay into a negative, or filling porous plaster with deflocculated slip that builds a wall as the plaster drinks.
- Natch — a registration notch keying a multi-piece mold so it reassembles exactly.
Leather: hide, tan, and the second skin (Sub-Volume IV, ME 45 · nam-ašgab)
- Hide / skin — the pelt of a large animal (hide) or small (skin); the leatherworker's raw material.
- Rawhide — dehaired, untanned, dried hide; hard and strong, for lacing, drumheads (cross Vol XXIII), and stiff structure.
- Tanning — the permanent conversion of rotting raw skin into stable leather by binding the collagen so it no longer rots.
- Vegetable (bark) tanning — tanning with plant tannins from bark; the slow method giving firm, tool-able belt and harness leather.
- Tannin — the astringent plant chemical, concentrated in certain barks and galls, that bonds to hide collagen and tans it.
- Brain tanning — tanning soft skins with a brain (or egg, or oil) emulsion plus hard working; the supple buckskin of the hunting peoples.
- Bark liquor (tan liquor) — the water solution of leached tannin in which hides steep, run weak-to-strong over weeks.
- Liming / bucking — soaking a hide in alkali (lime or wood-ash lye) to loosen the hair and open the fibre.
- Bating — gentle treatment removing lime and unwanted matter, softening the hide before the tan.
- Fleshing — scraping fat and membrane off the flesh side over a curved beam with a two-handled knife; the dirty first labour.
- Currying / fatliquoring — working oils into tanned leather to lubricate, supple, and water-resist it; the dressing that keeps leather alive.
- Temper (of leather) — its firmness-to-softness, set by tannage and currying: firm for a belt, soft for a garment.
- Grain / flesh side — the smooth hair side (grain, taking finish and wear) and the fibrous inner side (flesh).
- Skiving — paring leather thinner at edges and overlaps so seams lie flat.
- Saddle stitch — the strong two-needle hand stitch passing opposite ways through each hole; one cut thread does not unravel it, unlike a lock-stitch.
- Edge burnishing — rubbing a slicked cut edge to a smooth, sealed, glassy finish.
- Oz (ounce) weight — the trade measure of leather thickness: 1 oz = 1/64 inch ≈ 0.4 mm (Table E-4).
Fiber: cordage, weave, and the gathered field (Sub-Volume V, ME 47 · nam-ad-KID)
- Stake (warp) — the stiff load-bearing skeleton element that holds a basket's form; springs back when bent.
- Weaver (weft) — the supple strand that laces the skeleton; lies down where bent.
- Withy — a year-old willow rod, the master temperate weaving material, cut from a coppiced stool in dormancy.
- Coppicing — cutting a tree to its stool so it answers with straight year rods; harvesting the plant's annual surrender, not the plant.
- The three states of willow — green (woven at once, shrinks loose); brown (seasoned then re-soaked, the durable standard); white/buff (bark stripped, for fine work).
- Soaking and mellowing — re-wetting seasoned rods to pliancy then wrapping them damp to equalize; drying-brittleness is fully reversible.
- Bast — the long strong inner-bark or stem fibre (nettle, dogbane, basswood, cedar) freed for cordage.
- Retting — soaking stems or bark till the fibre loosens, exactly as flax is retted.
- Cordage — string made by twisting weak short fibres into a continuous strong strand; twist turns the fibres' slide into locking friction.
- Reverse-wrap (two-ply) — the master cordage stroke (twist the far leg away, wrap it toward), making a balanced self-locking cord that will not unravel.
- Opposed twist (S and Z) — the rope principle: each ply twisted one way, the plies wrapped the other, so under load untwisting one tightens the other.
- The four weaves — coiling, twining, plaiting, wickerwork; the grammar from which every basket is spoken.
- Coiling — stitching a wound foundation core in a tightening spiral; rigid, dense, watertight if tight.
- Twining — weaving with paired wefts that half-twist between each warp; strong, fine, flexible.
- Plaiting — over-under interlace of flat flexible strips (checker; twill if over-two); the fast weave of mats and bases.
- Wickerwork — a single supple weaver threaded front-and-back of fixed stiff stakes; the willow carrier.
- Slath — the crossed base-stakes of a wicker basket, locked by a few twined rounds before weaving out.
- Waling — a three-weaver twined band at the base of the uprights that fixes them vertical; the course that makes a basket stand.
- Randing / slewing — plain single-weaver wicker (randing), or several weavers at once for speed (slewing).
- Border — the locked rolled rim, each stake bent down and woven behind its neighbours.
- Tumpline — the broad burden strap across the forehead or chest carrying a load basket (cross Vol XI).
- Non-return funnel (throat) — the inward-pointing woven cone in a fish trap's mouth: easy in, impossible out.
- Netting needle / gauge stick — the shuttle that carries the cord and the sized stick that makes every mesh identical.
- Sheet bend (netting knot) — the knot locking each mesh to the row above; will not slip wet and loaded.
- Wattle (and daub) — wickerwork at wall scale, rods woven between studs and daubed with mud-dung plaster.
Sacred performance: mask, costume, and rite (Sub-Volumes V–VI, ME 18 · 19 · 20)
- Kurgarra / Girbadara / Sagursag — the three temple performance offices of the oldest lists, ranked with kingship and law because staging collective meaning was load-bearing infrastructure.
- Mask — a made face that transforms both wearer and watcher; the gateway to performance and the child's first instrument of role.
- Papier-mâché — paper layered with paste over a mold; the field maker's light, strong, quick laminate.
- Cartapesta / laminate core — any built-up shell (paper, cloth-and-glue, or glued leather) forming a light rigid mask body off a mold.
- Buckram / sized cloth — stiffened fabric for building masks, hats, and costume structure.
- Positive / negative mold (masks) — the form a mask is built over or pressed into; the master from which an edition of masks is taken.
- Gesso — a chalk-or-gypsum-in-glue ground brushed over a mask or panel to take paint crisply.
- Procession — the staged movement of performers and images through a community's space; the civic rite in motion, clocked by the drum (cross Vol XXIII).
- Blocking — the planned positions and moves of performers; the draughtsman's composition extended into time and space.
- Shadow puppet — a flat, often jointed figure worked against a lit screen; theatre reduced to light, a cut figure, and a sheet.
- Mystery play — a short staged drama carrying a community's founding story at its festival; the rite told as enacted narrative.
- Strophic staging — building a long performance from a repeating verse-and-refrain (cross Vol XXIII); the container for a sung record.
- Floor pattern (notation) — the recorded ground-plan of a dance or procession, set down so a staging can be taught and repeated (Table E-6).
APPENDIX B — MATERIALS SOURCING TABLES
For each material the volume names, the Practitioner needs three things: where to find the best of it, what may stand in when the best is unavailable, and what must be rejected. The tables give all three, framed for a community drawing on salvage, its own agriculture, and trade. The rule beneath every table is the maker's first law of material: reject the unseasoned, the unstable, the unsafe, and the unknown.
Specification Table B-1 — Clays and ceramic materials
| Material | Best sources | Acceptable substitutes | Reject |
|---|---|---|---|
| Wild plastic clay | Agrarian: own cut-banks, ditch bottoms, pond margins below the topsoil (Ch. 13). Salvage: deep-excavation spoil. Trade: bagged clay | Any clay passing the thread-and-bend test; a lean clay blended with a plastic one | Material that crumbles in the thread test (keep for temper); salt- or gypsum-laced clay; topsoil-fouled clay |
| Temper (grog/sand) | Salvage: broken bisque and sherds screened to grit (the best — pre-shrunk). Agrarian: clean sharp sieved sand | Crushed fired brick; organic temper (grass, dung, shell) for cooking bodies | Rounded or salty beach sand; unscreened gravel; any temper with soluble salts |
| Kiln brick | Salvage: hard-fired brick from old chimneys and foundries (inner skin); soft brick for the outer. Trade: refractory brick | Sound common brick for low fire; brick-and-earth outer wall | Cracked, spalling, or lime-mortared brick; concrete block (explodes at heat); firebox cobble |
| Glaze flux (safe) | Craft: washed hardwood ash; natural borate or a boron frit. Trade: feldspar | Any wood ash washed of its lye; ground granite for high fire | Lead in any form — galena, red lead, litharge — on any food/skin/breath surface (permanent prohibition, Ch. 16); unknown frits |
| Plaster (molds) | Trade/craft: pottery plaster (gypsum, calcined and reground). Salvage: clean gypsum scrap re-calcined | Fine clay or fired-clay molds for press work | Set, contaminated, or damp-spoiled plaster; "plaster" of unknown set; anything not drying porous |
Specification Table B-2 — Pigment earths and colourants
| Material | Best sources | Acceptable substitutes | Reject |
|---|---|---|---|
| Earth pigments (ochres, umbers, siennas) | Agrarian: dig and wash local iron-rich clays and soft stone (cross Vol VII). Salvage: rust scale (iron-oxide red). Trade: graded earth colours | Any washed, lightfast coloured earth; charcoal and bone black; chalk/whiting for white | Soluble or fugitive earths that bleed; unwashed pigment full of grit and salts |
| Black ink (oak-gall/iron-gall) | Agrarian: oak galls (cross Vol VII) + iron salt (rust in vinegar) + gum + water. Salvage: lamp-black in gum | Lamp-black ink; walnut-hull ink; bistre from chimney soot | Modern inks of unknown permanence for the lasting record; un-thickened gall liquor |
| Binders | Craft: gum, egg yolk (tempera), cold-pressed linseed/walnut oil, lime (fresco), hide glue (distemper) | Any clean tree gum; fresh egg; settled drying oil; sound animal glue | Rancid oil; spoiled egg; gum that will not redissolve; tacky never-drying binder |
| White (safe) | Craft: chalk/whiting, gypsum, calcined bone, titanium where traded | Lime white (fresco only); shell white ground fine | Lead white on any food/skin/breath surface (prohibited); zinc of unknown source for ground contact |
Specification Table B-3 — Tannin barks and tanning materials
| Material | Best sources | Acceptable substitutes | Reject |
|---|---|---|---|
| Tannin bark | Agrarian: oak bark (the standard); also chestnut, hemlock, mimosa, spruce; strip at the spring sap-rise (cross Vol VII; Ch. 40). Salvage: refreshed spent tan liquor | Sumac leaf (high tannin, pale tan); oak galls; any bark proven by the bite test (puckering astringency) | Resinous low-tannin barks; mouldy or rotted bark; bark of unknown species with no astringency |
| Soft-tan agent (brain tan) | Agrarian: the animal's own brain (each beast tans its own hide), egg yolk, or a fat/soap emulsion | Egg-yolk emulsion; neat's-foot or animal oil with hard working | Rancid emulsion; mineral oils that will not bind the fibre |
| Lime / alkali (bucking) | Salvage: slaked lime, wood-ash lye. Trade: hydrated lime | Strong wood-ash lye (the old buck); fresh slaked lime | Caustic industrial alkalis of unknown strength; spent lye that no longer loosens hair |
| Currying oils/fats | Craft: tallow, neat's-foot oil, fish oil, beeswax-and-oil dressing; cod oil for water resistance | Any clean rendered animal fat; plant oil blended with wax | Rancid fat (rots and stinks the leather); petroleum greases that stiffen and rot stitching |
Specification Table B-4 — Hides and leather
| Material | Best sources | Acceptable substitutes | Reject |
|---|---|---|---|
| Hides for vegetable tanning | Agrarian: cattle, horse hides from the autumn slaughter (cross Ch. 40) — firm leather for belt and harness. Salvage: salted raw hides. Trade: veg-tanned sides by weight | Goat and sheep for lighter firm leather; pig for hard wear | Hide gone slipping (hair-loose from rot); grub holes, brands, or scars in the working zone; unevenly salted hide |
| Skins for soft tanning | Agrarian: deer, elk, goat, sheep skins from hunt and herd — the buckskin and garment leathers | Calf for fine soft leather; any sound thin skin | Skins dried hard with flesh on (case-hardened); insect-damaged skins |
| Rawhide | Agrarian: cattle/goat hide dehaired and dried flat under tension — lacing, cases, drumheads (cross Vol XXIII) | Any sound dehaired dried hide; thicker hide for stiff structure | Tanned leather where stiffness is needed; thin scarred hide for a head; greasy under-fleshed hide |
| Hardware & thread | Salvage: buckles, rings, rivets from old harness; waxed linen/hemp thread. Trade: cast buckles | Bronze or iron buckles cast or forged (cross Vol I); beeswaxed linen thread | Pot-metal buckles that snap; rotted thread; rivets of crumbling alloy |
Specification Table B-5 — Basket and cordage fibers
| Material | Best sources | Acceptable substitutes | Reject |
|---|---|---|---|
| Willow withies (stakes & weavers) | Agrarian: own coppiced stools, cut in dormancy and seasoned brown (Ch. 25). Salvage: hedgerow willow, dogwood, hazel | Any straight, even, one-year rod — dogwood, hazel, privet, red osier | Forked, kinked, or side-branched rods; green rods for durable work; over-soaked slimy stock |
| Marsh weavers (rush, cattail, reed) | Agrarian: own pond margins — bulrush and reed cut mid-to-late summer, cattail likewise; shade-dried (Ch. 25) | Soft rush, sweetgrass, palm, corn husk; any pliant shade-dried strap | Sun-bleached, embrittled stock; material woven green (rattles loose); mildewed stems |
| Splint & heavy weaver | Agrarian: pounded black ash; riven oak/hickory splint for pack baskets (Ch. 25) | Split white oak; thin riven hardwood of even ring | Cross-grained or knotty splint; punky wood; brittle over-dry splint un-dampened |
| Cordage bast | Agrarian: dogbane and nettle (dead stalk / summer stem), retted basswood/cedar bark (Ch. 26) | Milkweed, yucca/agave leaf fibre, hemp/flax tow | Fibre crumbling or stretching dead in the pull test; over-retted fibre with no strength |
Specification Table B-6 — Mask and costume materials
| Material | Best sources | Acceptable substitutes | Reject |
|---|---|---|---|
| Mask shell (laminate) | Craft: paper + flour or hide-glue paste over a mold (papier-mâché); glued cloth (cartapesta); carved basswood (Ch. 17) | Sized buckram; thin moulded leather (cuir-bouilli); daubed splint armature | Heavy board; brittle un-sized paper; any shell too heavy to wear safely on the neck |
| Ground & paint | Craft: gesso (chalk/gypsum in glue) then earth pigments in egg or glue; safe colours only (Table B-2) | Whiting ground; distemper; milk paint (casein) | Lead pigments against the skin (prohibited); finishes that crack and shed onto a face |
| Costume cloth & fibre | Agrarian: own woven cloth, felted wool, fibre matting; salvage sound textile | Plaited and twined fibre panels (Sub-Vol V); netted structure | Rotted or moth-eaten cloth in a load-bearing part; fabric that traps heat dangerously in long wear |
| Costume structure & fastening | Salvage: cord, lacing, toggles, bone/wood buttons, leather ties (Sub-Vol IV) | Hand-laid cordage (Ch. 26); carved toggles; leather lacing | Fastenings that fail under movement; sharp hardware against the body; anything that binds a dancer's breath |
The Critical Insight: Across all six tables the same four refusals recur — the unseasoned (green wood, wet clay, un-cured fibre), the unstable (rotted hide, mouldy bark, soluble pigment), the unsafe (lead above all, and any fastening that endangers a wearer), and the unknown (the mystery alloy, the unlabelled frit, the bark with no astringency). Each passes a careless inspection and fails in the finished work a season later — the basket loosens, the belt rots, the glaze poisons, the mask sheds its paint on a child's face. The community's scarcest resource is the maker's trained time, and nothing wastes it like building well on bad material. Season it longer, test it harder, or set it aside.
Art direction
APPENDIX C — CONSERVATION, REPAIR, AND THE MAKER'S HOSPITAL
A made thing is finished not when it is built but when its maker is long dead and it still serves. The difference is care. This appendix gives the conservation, the common repairs, and the annual rhythm that keep the volume's works alive — and establishes the maker's hospital, the community bench where the cracked pot, the torn basket, the dried belt, the foxed drawing, and the broken mask are diagnosed against the tables below and healed rather than discarded. The principle is the one Sub-Volume VII names: a made thing is infrastructure, and infrastructure is maintained, not abandoned.
Leather care and repair
Leather is skin, and like skin it must be fed and kept from the two killing extremes — bone-dry and soaking-wet.
- Keep it conditioned. Tanned leather loses its fats, stiffens, and cracks. Feed it periodically with a currying dressing (neat's-foot oil, a tallow-and-beeswax blend; Table B-4), worked in warm and sparingly — over-oiling rots stitching and goes tacky.
- Dry slowly, never by heat. Dry wet leather at room temperature away from fire and sun, stuffed to hold its shape; heat-drying hardens, shrinks, and cracks it irreversibly.
- Store cool, dark, and aired. Damp breeds mould (wipe and re-condition), dry heat embrittles, darkness preserves dyes; never folded sharp at one crease for years.
- Re-stitch and patch. Re-sew a failed seam through the sound holes with the two-needle saddle stitch (Sub-Vol IV), which a single cut does not unravel; re-set a pulled rivet; skive and stitch a patch behind a wear; reinforce a belt cracking at the buckle fold with a stitched backing strip before it parts.
Basket repair
A basket is repairable beyond almost any crafted object, because a weave is a continuous skin re-entered anywhere (Ch. 30). Re-dampen and mellow before flexing. Replace a broken stake by threading a soaked new one into the weave alongside the old before cutting the old out. Re-weave a worn patch by tucking a fresh weaver in and continuing the over-under, ends buried behind stakes. Re-bind a failed rim with a fresh border or a whipped band. Re-coil a burst stitch through the sound rounds with new stitch fibre and an awl. Mended at the first broken stake rather than the tenth, a basket serves for decades.
Ceramic mending — the staple and the adhesive
A broken pot is not always a lost pot; two repairs answer, an ancient mechanical one and a modern chemical one.
- The historical staple (rivet) method. The oldest durable mend, used worldwide before glues held: drill paired shallow holes straddling the crack (a bow-drill, never piercing the wall) and set a bent metal staple (bronze, brass, iron, or lead-free soft metal) across it, drawing the break tight; bed each staple in lime or mastic putty. A row of staples binds a long crack — the tinker's craft that kept households' crockery alive for centuries. Strong, reversible, and honest, for the mend shows.
- The modern adhesive mend. For a clean invisible join: clean, dry, and key both faces and glue with a reversible conservation resin (a soluble acrylic such as Paraloid B-72, undone later with solvent and non-yellowing), clamped till set. The reversible choice is preferred for anything of value, so no future mender is defeated by a join that cannot be reopened; fill and in-paint losses only where use or honesty requires.
- The decision. Staple the heavy and the wet-service; glue the fine and the dry-display. Never re-fire a glazed mend to fuse it — the thermal histories differ and the piece dunts.
Painting and works-on-paper storage
Images outlast the maker only if stored against their four enemies — light, damp, acid, and the insect.
- Light. Pigments fade and paper yellows in light, above all sunlight; display out of direct sun, rotate displayed works, keep the archive dark (Sub-Vol VII's dry end).
- Humidity, steady and moderate. Hold stable middling humidity (~45–55%): damp foxes paper, blooms mould, and lifts paint; bone-dry air embrittles paper and cracks the film. Avoid outer walls, damp floors, and season-swinging attics.
- Store flat, interleaved, acid-free. Works on paper lie flat in shallow drawers between acid-neutral sheets, off raw wood and acidic board (which burn paper brown over years); rolling cracks paint and sets a curl. Panels and canvases stand upright, faced apart, padded at the corners, never stacked under weight.
- The insect and the mould. Keep food and damp away; inspect for silverfish, booklouse, and mould-bloom, and isolate the infested before it spreads.
Mask and costume maintenance
Performance gear is used hard, sweated into, and stored long between festivals (Ch. 40). Air and dry masks and costume after use before storing, or mould and rot take hold. Re-gesso and touch in a laminate mask's chipped paint with safe earth colours before the loss spreads, and re-glue lifting layers with the original paste. Re-lace and re-fasten worn ties, toggles, and the straps that hold a mask to a face before one fails mid-rite. Store shaped and supported — masks stuffed, costumes hung, moth and damp held off with cedar and dry air. Log the gear in a known store so the autumn overhaul finds what next season needs and nothing is discovered broken on the morning of the rite.
Specification Table C-1 — The annual maintenance calendar
| Season | Task | Why now |
|---|---|---|
| Deep winter (indoor bench season) | Full overhaul of last year's gear: re-condition leather, re-stitch seams, re-weave baskets, staple/mend ware, re-gesso masks, re-stretch and re-tune drumheads | The dark months are the maker's repair season (Ch. 40); the field is bare and the bench is busy |
| Early spring (sap-rise) | Inventory and dress field gear before the working season; re-oil tools; check the archive after the damp winter for mould and foxing | Carrying gear is wanted now; the wet season's damage shows now |
| Midsummer (driest air) | Air, dry, and inspect leather and costume; re-condition anything stiffened; check stored fibre and hides for pests | The stable dry air is ideal for drying-dependent care and pest inspection |
| Autumn (the slaughter and harvest) | Lay in the new hides and fibre; repair harvest-carrying ware as it comes in damaged; ready and check the festival regalia for harvest-home | Materials arrive now (Ch. 40); the year's heaviest festival demands sound gear |
| Any season | The maker's hospital bench: diagnose and repair any work brought in broken | A standing repair service keeps the community's whole stock of made things alive |
CANON SIDEBAR — THE MAKER'S HOSPITAL. Every Practitioner community should hold one bench set aside as the maker's hospital — where a cracked pot, a torn basket, a split belt, a foxed drawing, or a broken mask is diagnosed and healed, staffed by whoever holds the conservation craft most surely. The ethic is the one Sub-Volume VII teaches: the made thing is infrastructure, and a culture that only makes and never mends is quietly consuming its own capability. The ancient world knew it — the tinker stapled crockery along every road; the basket was repaired at the first broken stake; the temple did not buy a new sacred drum when its head tore, it re-headed the standing one (cross Vol XXIII). For the cost of one bench and one trained pair of hands, the community keeps its whole standing stock of made things alive across the generations. Log every repair against the object: the pot that comes back a second time with the same crack is telling you what the first staple missed.
Art direction
APPENDIX D — THE QUICK BUILDS: SEVEN WORKSHOPS IN SEVEN DAYS
The recovering community needs to make now, before the willow is seasoned and the wheel is built. These seven workshops each complete in a day from salvage or field materials, and between them put all six decrees into the Practitioner's hands at once — a vessel, a basket, an ink, a leather good, a mask, a staged spectacle, and a rite. Run one a day; on the seventh you have made the whole apparatus of cultural production in miniature. Each entry gives materials, steps, and the first lesson the work teaches.
Day 1 — The pinch pot and the pit fire (clay → fired vessel)
- Materials: a fist of wild or bagged clay (Ch. 13); a pit, dry sawdust/dung and split wood; water.
- Steps: (1) Wedge the clay free of air. (2) Open a ball with the thumb and pinch the wall up by slow rotation to an even thickness, drying the rim as needed; smooth and let it go bone-dry over days. (3) Pre-warm the dry pot thoroughly beside a fire. (4) Bed it in sawdust in the pit not touching others, heap combustibles over, build a wood tepee, light the top, let it burn down into the pit over hours, then cap and slow-cool a full day (Ch. 15).
- First lesson: Clay remembers and forgives — feel how far a wall stretches before it cracks, how the rim dries first, and how fire turns mud irreversibly to stone. The pit's smoke-flashed surface is a colour no controlled kiln gives.
Day 2 — Cordage and the first twined basket (fiber → vessel)
- Materials: a handful of bast (nettle, dogbane, retted bark; Ch. 26) for cord; a bundle of pliant weavers and a few stiff stakes (Ch. 27); an awl.
- Steps: (1) Lay a length of two-ply cord by the reverse-wrap — twist the far leg away, wrap it toward — splicing in tapered fibre, staggered, before a leg runs out. (2) Cross stiff stakes in a spoke star for a twining base. (3) Bend a weaver around a spoke and twine — back weaver forward over the next stake, cross and swap — round and round, spreading the spokes, then bending them up into a wall. (4) Finish the rim by tucking each stake into the weave.
- First lesson: The basket is cordage married to structure — the same twist that makes a string hold a load makes a weave hold a form. This is why the child is taught cord before basket (Ch. 41).
Day 3 — Oak-gall ink and the reed pen (pigment → the written record)
- Materials: crushed oak galls (cross Vol VII); rusty iron steeped in vinegar (iron salt); a little gum; water; a hollow reed or quill.
- Steps: (1) Steep the crushed galls in water (warm hastens it) to draw the tannin; strain. (2) Stir in the iron-vinegar liquor a little at a time — the pale gall liquor darkens to deep blue-black as the iron-tannin forms. (3) Thicken with a little dissolved gum so it flows and holds; bottle. (4) Cut a reed to a point, slit the nib, and write.
- First lesson: Permanent black is a chemical reaction, not a dye — tannin plus iron makes a colour that bites into the page and lasts a thousand years. The recording eye (Sub-Vol I) needs a permanent line, made here from a gall, a nail, and a tree's gum.
Day 4 — The vegetable-tanned belt (hide → finished leather good)
- Materials: a strip of vegetable-tanned leather (Table B-4; or a small hide tanned in bark liquor over the preceding weeks per Sub-Vol IV); a buckle; thread and two needles; an edge slicker; oil.
- Steps: (1) Cut the strap straight to width and length; skive and fold the buckle end, set the buckle and the keeper. (2) Punch the stitch holes and saddle-stitch the buckle fold (two needles, opposite passes). (3) Punch the adjusting holes; round and burnish all the cut edges to a sealed sheen. (4) Dress the leather with a thin coat of oil/dressing.
- First lesson: Leather is worked wet-to-shape and finished dry, and its strength is in the saddle stitch that one cut cannot unravel. A belt is the whole leather craft in small — cut, skive, stitch, finish, dress — the simplest honest "Sound"-grade good a bench can sell (Ch. 39).
Day 5 — The papier-mâché mask (performance → the transforming face)
- Materials: scrap paper torn to strips; paste (flour-and-water, or hide glue); a mold (a clay or mounded face, or your own face over a barrier layer); gesso; safe earth paints (Table B-6).
- Steps: (1) Build a positive face form in clay, or mound one. (2) Lay paper strips in crossing layers with paste over the form, four to six layers, letting it dry hard; release from the mold. (3) Trim the edges, cut the eye-holes true, and pierce holes for the ties. (4) Gesso the surface smooth, paint with safe earth colours, and lace it to fit.
- First lesson: A made face transforms both wearer and watcher — put it on and feel the change. The mask is the gateway to all performance and the child's first instrument of role (Ch. 41); and a small edition, since one mold yields many masks (cross Sub-Vol III, the multiplied form).
Day 6 — The shadow-puppet stage (performance → theatre from light)
- Materials: a white cloth or oiled-paper screen and a frame; a lamp or bright source; stiff card or thin leather for figures; thin rods; a knife; toggled joints (knotted cord).
- Steps: (1) Stretch the screen in its frame and set the lamp behind it, the puppeteer between lamp and screen. (2) Cut flat figures in profile from card or scraped leather; cut jointed limbs and pin them with knotted cord so they swing. (3) Fix a control rod to each figure and its moving limbs. (4) Work the figures pressed to the screen for a crisp shadow, back from it for a soft one.
- First lesson: Theatre reduces to light, a cut figure, and a sheet — the cheapest stage that still casts a whole world. Distance from the screen is your focus control, just as the draughtsman's sharp-and-soft edges set the focal point (Sub-Vol I).
Day 7 — The one-page mystery play, staged with the drum (the rite assembled)
- Materials: the one-page play template below; the mask of Day 5 and the shadow stage of Day 6; a drum (cross Vol XXIII); a few performers.
- The one-page template: (i) Title and occasion — the festival it serves (Ch. 40). (ii) The figures — three to five, each a mask or shadow figure. (iii) The turn — one thing that changes (a loss, a journey, a return of the light). (iv) Five beats — gathering, threat, struggle, reversal, blessing — one line of speech or chant each. (v) The drum's part — a pulse under the procession in, a quickening at the struggle, a stroke at the reversal, a steady beat under the blessing out (the tempo as physiological instruction, cross Vol XXIII). (vi) The floor pattern — the paths performers trace (Table E-6).
- Steps: (1) Fill the template for your festival. (2) Cast the masks and figures. (3) Walk the floor pattern slowly to the drum until the five beats land. (4) Stage it for the gathering.
- First lesson: The six decrees are one apparatus — the drawn figure, the fired lamp-vessel, the leather-laced mask, the woven screen-frame, the staged story, and the drum's pulse all serve one rite. A community that can stage its own meaning, on its own festival, with its own made things, owns its imagination outright (Sub-Vol VII).
Your Commitment: You will make the quick seven before you wait on the slow ones. A community making rough, whole, joyful work this week will still be making it when the seasoned willow is dry and the wheel is turning; a community waiting for the perfect workshop makes nothing at all. Start rough, start now, and refine forever.
Art direction
APPENDIX E — REFERENCE TABLES
The numbers the volume used and the bench will keep using. Firing values assume a normal climb; leather and fibre values are field-comparative, confirmed by the tests the chapters give.
Specification Table E-1 — Pyrometric cone chart (cone 010 to 10)
The potter reads heat-work — temperature and time together — not temperature, and fires until the target cone's tip bends to touch the shelf (Ch. 15). Approximate end-point temperatures at a normal climb:
| Cone | °C | °F | Realm / typical ware |
|---|---|---|---|
| 010 | 900 | 1652 | Low earthenware, soft bisque, lustres, the hotter pit fires |
| 09 | 920 | 1688 | Low earthenware, low glazes |
| 08 | 950 | 1742 | Earthenware, low glazes |
| 07 | 985 | 1805 | Earthenware |
| 06 | 1000 | 1832 | Common bisque firing; earthenware glaze |
| 05 | 1040 | 1904 | Earthenware glaze |
| 04 | 1060 | 1940 | Earthenware glaze, terracotta |
| 03 | 1100 | 2012 | High earthenware |
| 02 | 1120 | 2048 | High earthenware / low mid-range |
| 01 | 1135 | 2075 | Low mid-range |
| 1 | 1150 | 2102 | Low stoneware / mid-range |
| 2 | 1165 | 2129 | Mid-range stoneware |
| 3 | 1170 | 2138 | Mid-range stoneware |
| 4 | 1190 | 2174 | Mid-range stoneware |
| 5 | 1205 | 2201 | Mid stoneware (common glaze body) |
| 6 | 1220 | 2228 | Mid stoneware — the common stoneware glaze |
| 7 | 1240 | 2264 | Stoneware |
| 8 | 1250 | 2282 | Stoneware |
| 9 | 1270 | 2318 | High stoneware |
| 10 | 1285 | 2345 | High stoneware, many ash glazes, reduction |
Cone numbers count "down" from 022 toward 0, then "up" from 1 to 14 — the higher the firing, the more the leading zero falls away and the plain number climbs. Memorize the landmarks: 06 bisque, 04 earthenware glaze, 6 and 10 stoneware (Ch. 15).
Specification Table E-2 — Tannin content by bark/material (for vegetable tanning)
Indicative tannin strength, highest to lowest; confirm any batch by the bite test (the more it puckers the mouth, the more tannin) and by running a strong-liquor test on a hide scrap (Sub-Vol IV; cross Vol VII for the plant).
| Material | Part used | Relative tannin | Tan character | Notes |
|---|---|---|---|---|
| Sumac | Leaf | Very high | Very pale, soft | The palest tan; leaf, not bark |
| Oak (galls) | Gall | Very high | Firm, pale-mid | The ink gall is also a tan source |
| Chestnut | Wood/bark | High | Mid-brown, firm | Strong, reddening tannin |
| Oak | Bark | High | The standard mid-brown | The benchmark bark tan — even and reliable |
| Mimosa / wattle | Bark | High | Reddish, fast | Quick-striking, warm colour |
| Quebracho | Heartwood | Very high | Deep red-brown | Very strong; traded as extract |
| Hemlock | Bark | Moderate–high | Red, somewhat harsh | Historic North American tan |
| Spruce / larch | Bark | Moderate | Pale, mild | Useful where oak is absent |
| Willow / birch | Bark | Low–moderate | Pale, weak | Field-expedient only; long steeping |
Specification Table E-3 — Fiber harvest calendar
When each fibre and weaving material cuts strongest and prepares best (Ch. 25, 30; cross Vol VII):
| Material | Cut when | Why then | Then |
|---|---|---|---|
| Willow withies | Dormant (cold quarter, leaf-off) | Sap down, rod cured and straight | Season dry on the rafter; soak and mellow before use |
| Dogbane / nettle bast | Autumn–winter (dead stalk) / summer (nettle stem) | Bast cured on the standing stem | Strip, store dry, lay to cord |
| Cedar / basswood inner bark | Spring (sap rising, bark slips) | Inner bark peels clean from the wood | Split to width / ret; store damp-stable |
| Bulrush, soft rush, reed | Mid-to-late summer | Stem mature, leaf set | Shade-dry slowly; dampen and mellow to weave |
| Cattail leaf | Late summer | Leaf at full length | Shade-dry to tan (shrinks ~⅓); dampen to plait |
| Sweetgrass / beargrass | Summer | Blade long and supple | Dry; dampen to coil |
| Black ash splint | Spring–summer | Springwood soft, pounds free | Pound off the rings, split to width, store flat dry |
| Tannin / mask barks | Spring sap-rise | Bark slips and tannin is up | Strip, dry, leach (tan) — binds to the autumn-hide cycle (Ch. 40) |
Specification Table E-4 — Hide thickness gauge (leather weight, oz ↔ mm)
Leather is sold by weight, which is a thickness: 1 oz = 1/64 inch ≈ 0.4 mm (Sub-Vol IV). Choose weight by use; a belt wants 8–10 oz, a soft pouch 2–3 oz.
| Ounce (oz) | Inch | Millimetre | Typical use |
|---|---|---|---|
| 1 oz | 1/64 | 0.4 mm | Linings, very fine work |
| 2 oz | 1/32 | 0.8 mm | Soft pouches, garment leather |
| 3 oz | 3/64 | 1.2 mm | Light bags, linings, fine straps |
| 4 oz | 1/16 | 1.6 mm | Wallets, light cases, soft goods |
| 5 oz | 5/64 | 2.0 mm | Light belts, bags, sheaths |
| 6 oz | 3/32 | 2.4 mm | Belts, cases, moderate straps |
| 7 oz | 7/64 | 2.8 mm | Belts, heavier straps |
| 8 oz | 1/8 | 3.2 mm | Heavy belts, holsters, knife sheaths |
| 9 oz | 9/64 | 3.6 mm | Heavy straps, harness |
| 10 oz | 5/32 | 4.0 mm | Harness, heavy belts, armour base |
| 12 oz | 3/16 | 4.8 mm | Saddle skirting, heavy harness, hard-use |
| 14 oz | 7/32 | 5.6 mm | Heaviest harness, tooling slabs, armour |
Specification Table E-5 — Figure proportion table (the canon, by age)
The head-height canon for the human figure (Sub-Vol I, Ch. 4). Heights in head-units; the standing adult is the working reference.
| Figure | Total height (heads) | Crotch (midpoint) | Notes |
|---|---|---|---|
| Idealized standing adult | 7.5 | 3.5 | The volume's working canon |
| Heroic / idealized adult | 8 | 4 | Slightly elongated; fashion and heroic convention |
| Average adult (observed) | 7 – 7.5 | ~3.5 | Real bodies cluster here |
| Adolescent (~12 yr) | ~6.5 | — | Lengthening toward adult |
| Child (~6 yr) | ~6 | — | Proportionally larger head |
| Young child (~3 yr) | ~5 | — | Head a larger fraction still |
| Infant | ~4 | — | Head roughly one-quarter of height |
Supporting constants to hold in memory (Ch. 4): arm-span ≈ standing height (the figure fits a square); hand ≈ face length; foot ≈ one head; elbow at the navel/waist; wrist at the hip/crotch; shoulders ≈ two head-widths; inner ankle sits higher than outer, inner wrist lower than outer.
Specification Table E-6 — Floor-pattern notation key (for procession and dance)
A simple ground-plan notation for recording the paths performers trace, so a staging can be taught and repeated (Sub-Vol VI; cross Vol XXIII for the drum's tempo). Marks are read on a plan of the floor, the audience edge at the bottom.
| Symbol | Meaning |
|---|---|
| ● | A performer's standing position (numbered or masked per the cast list) |
| → | Direction and path of a move; arrowhead at the destination |
| ⇢ (dashed) | A slow or processional move; a held, deliberate pace |
| ↻ / ↺ | A turn in place, clockwise / counter-clockwise |
| ◠ (arc) | A curved path (the procession's sweep, a circling dance) |
| ⇄ | A crossing or exchange of two performers' positions |
| ‖ | A held position (a tableau); the beat pauses on the floor |
| ▭ | The performance ground's edge; the open side faces the audience |
| ✦ | The focal station — where the eye and the rite are meant to gather (the staged equivalent of the picture's focal point, Sub-Vol I) |
| ♩ markers | Drum-beat cues written along a path (entry pulse, quickening, the reversal stroke; cross Vol XXIII) |
Art direction
Art direction
CLOSING THE APPENDICES
The reference is laid beside the work. The Practitioner who has fired the first pot, twined the first basket, brewed the gall ink, dressed the belt, painted the mask, raised the shadow stage, and staged the one-page rite to the drum now holds not only the craft of the six decrees but the apparatus that keeps it alive between the great builds: the vocabulary to name it, the sourcing to feed it, the hospital to heal it, and the tables to fire, tan, harvest, and proportion it true. Keep these pages open on the bench. They are the difference between a volume read once and a volume worked smooth across a making life.
Art direction
THE TWELVE VOICES SPEAK — COUNCIL APPROVAL
The dup šimati transmission is not sealed until the Council of Twelve has heard the volume and rendered its verdict. The Twelve Voices speak on Volume XXIV — The Maker's Codex.
| Voice | Verdict | Reasoning |
|---|---|---|
| Peter | APPROVED | The rock under the work: a volume that starts from a fist of wet clay and a pinch of fibre and never floats free of the bench. The makers will stand on it. |
| Thomas | APPROVED | I doubted that drawing was a discipline and not a gift — then I locked my elbow, drew the void, and got the chair leg free. I have made the cord and fired the pot. It is true. |
| John | APPROVED | The volume keeps its love and its modesty: the mask that holds grief, the memorial that keeps the dead, the hand that makes a people's own meaning. It claims the heart honestly and no more. |
| Matthew | APPROVED | Every table totals — cones to °C, ounces to millimetres, tannin ranked, the canon counted in heads. The accounts of this volume balance to the measure. |
| James the Greater | APPROVED | A volume of action: seven workshops in seven days, a band of made things by Friday. It does not merely describe the crafts; it puts a vessel, a basket, an ink, a belt, a mask, a stage, and a rite into the hands now. |
| Andrew | APPROVED | It carries the craft to the people first: the child of four with the clay, the family at the bench, the commons before the guild. The eldest decree, the basket, ranked rightly with kingship. |
| Philip | APPROVED | Show me, I asked — and the plates show me: the sourcing wheel, the hospital bench, the seven quick builds, the cone ladder and the figure canon. Made visible, made teachable. |
| Bartholomew | APPROVED | The genuine article without deceit: salvage roads, honest substitutes, a clear list of what to reject, and grades disclosed never hidden. No lead, no lie, no second sold as a master. |
| James the Lesser | APPROVED | The least are served: the beginner's pinch pot, the bucket of bark, the willow whistle of a craft, the broken thing brought to the hospital and healed rather than thrown away. None are turned from the making. |
| Simon the Zealot | APPROVED | It names the suppression for what it was — guilds broken, the commons closed, the proof of capability demolished in the open — and returns the means of making to every household. To make your own images is to be free. |
| Judas Thaddaeus | APPROVED | A volume for the hard case and the dark age: the thread kept thin through the Reset and the demolitions, doubled and re-spun for the next dark. Capability built to specification and handed on. |
| Matthias | APPROVED | Taken into the number to complete it, I know the worth of a lineage that makes its own successor. The master is proven by the first master she makes; the family that works together cannot lose the craft in one generation. The loop closes. The makers will not die with their makers. |
Council Verdict: 12/12 APPROVED. Volume XXIV is canon. The makers return.
From the Monad, who is one, all form flows, and from form, the made world. Blessed are the hands that make: that take the dug clay, the stripped bark, the raw hide, the standing reed, and the bare paper, and give a people the vessel, the image, the garment, the basket, and the mask of its own meaning. May the line they draw be true, may the thing they make outlast them, and may the craft they hand to the next pair of hands be carried, unbroken, through every dark that comes.
TRANSMISSION RECORD
Transmission COMPLETE — unaltered & unabridged Volume XXIV · The Maker's Codex · category: creation (+ craft completion) Decrees carried ME 18 · 19 · 20 · 28 · 45 · 47 — creation complete: 4 of 4; craft complete: 6 of 6 Words 70,778 — every one of them SHA-256 of source text 1db5d2def8c82206e94aa1f5cdb2abe5928a283ba93e262cb8bf778dd3c56486 Canonical text makers-codex.md — byte-identical to what the volume page renders